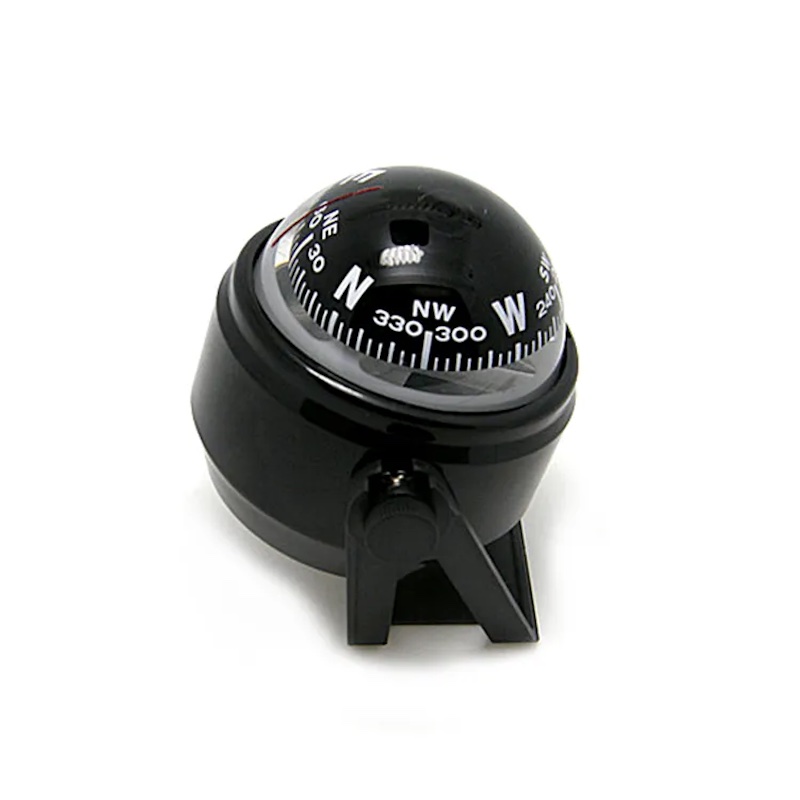
Exploring the Essential Parts of a Compass

Introduction to Compasses

Navigating through the wilderness requires reliable tools. One essential tool is the compass. With advancements in technology, digital devices have become popular for navigation. However, these gadgets can fail due to various reasons such as dead batteries or lost signals. Therefore, understanding the fundamentals of a compass is crucial for anyone venturing outdoors.

Historical Background of Compasses

The history of the compass dates back over 2,000 years. Ancient Greeks first discovered Earth’s magnetic fields, laying the foundation for the compass. By the 12th century, Chinese scientists were using magnetized needles for navigation. Initially, compasses were simple, indicating only the four cardinal directions: north, south, east, and west. As technology progressed, compass designs evolved to include 360 degree markings for more precise navigation. Today’s compasses are highly accurate, but they operate on the same magnetic principles as their ancient counterparts.

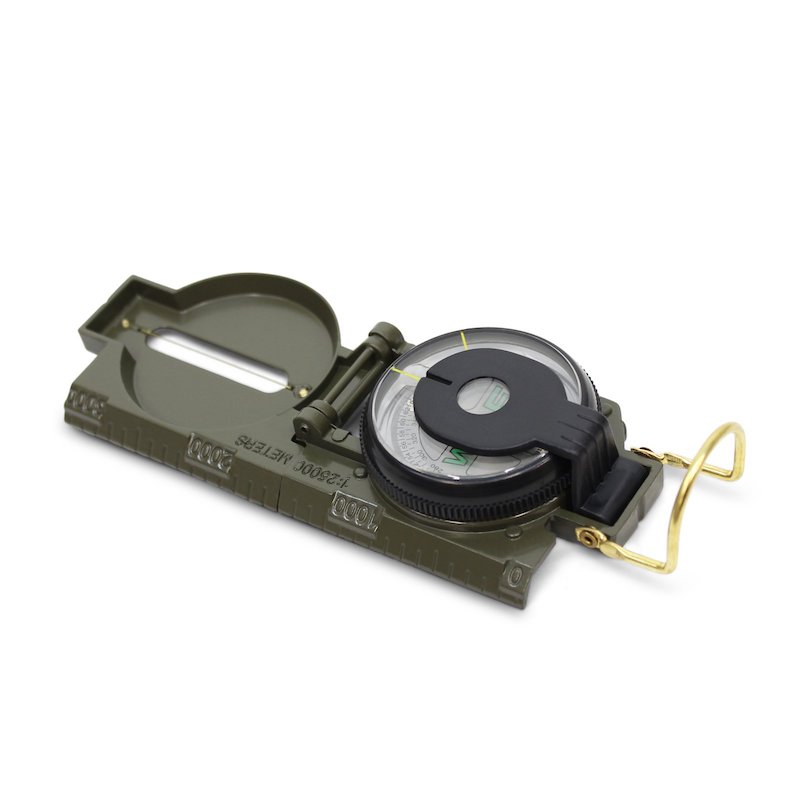
9000L Lensatic Compass

Basic Components of a Compass

Navigating effectively demands knowing your compass’s basic components.

Baseplate

The baseplate is a hard, transparent, flat surface found on compasses. It often has rulers along the edges to measure map distances. Its clear nature allows map features to be visible beneath it. Ensure the baseplate doesn’t have scratches for the best visibility.

Magnetic Needle

This is a magnetized piece of metal that always points towards magnetic North. One end usually has a distinctive color, often red, for easy north identification. The needle should freely rotate if the compass is flat and steady.

Rotating Bezel (Azimuth Ring)

The rotating bezel, also known as the azimuth ring, has 360-degree markings. By turning this bezel, you can set a bearing or align the compass with a map. It is crucial for accurate navigation.

Orienting Arrow and Lines

These are on the compass floor and help align the magnetic needle with north on a map. The orienting arrow should fit the shape of the magnetic needle’s end. Always ensure they match up precisely for accurate readings.

How to Use a Compass

Navigating with a compass is a fundamental outdoor skill. Below, we outline steps to properly set a bearing and navigate using a compass and a map.

Setting a Bearing

To set a bearing with a compass, follow these steps:

  1. Identify your target destination on your map.
  2. Place your compass on the map so the edge of the baseplate connects your current location and the destination.
  3. Rotate the compass housing (bezel) until the orienting lines and needle align with map’s north.
  4. Read the degree marking from the index line at the top of the compass housing. This is your bearing.
  5. Hold the compass in front of you with the direction of travel arrow pointing forward. Turn yourself until the magnetic needle aligns with the orienting arrow in the compass housing.

Navigating with a Compass and Map

Once you have set your bearing, use these steps to navigate:

  1. Keep the compass level in front of you with the direction of travel arrow pointing straight ahead.
  2. Move forward consistently while ensuring the magnetic needle remains aligned with the orienting arrow.
  3. Check your progress on the map periodically to confirm you are on the right path.
  4. Adjust your direction as necessary if landmarks or map features indicate a correction is needed.

Using these steps, you can confidently navigate through terrain, even when trails or signs are not present.

ILCA Carbon Parts Compass

Types of Compasses

Navigating requires more than knowing compasses parts. Knowing different compasses types is essential.

Baseplate Compasses

Baseplate compasses are popular among hikers and orienteers. They have a clear, flat base with measurement markings. This design allows for easy map overlay and distance measuring. They’re robust and reliable for detailed navigation.

Mirror and Sighting Compasses

Mirror and sighting compasses offer advanced functionality. They have additional sighting tools like mirrors or prisms. These features help in taking precise bearings on distant landmarks. They are ideal for navigating challenging terrains where accuracy is critical.

Specialty Compasses: Thumb and Lensatic

Thumb compasses are small and attach to the thumb. They are useful for runners or orienteers who need to move quickly. Lensatic compasses, often used by the military, have a folding cover with a sighting wire. This setup aids in extremely precise navigation.

Each type of compasses serves a specific purpose and situation. Choose your compasses based on your specific navigation needs.

Practical Tips for Compass Maintenance

Navigating accurately demands a well-maintained compass. Look after your compass with these practical tips.

Avoiding Magnetic Interference

Keep your compass away from magnetic sources to ensure accuracy. Avoid close contact with phones, batteries, and metal objects. Separate these items from your compass during storage and use. Consistent exposure to strong magnets can permanently damage a compass’s ability to point north.

Proper Storage and Care

Store your compass in a cool, dry place when not in use. Protect it from scratches and drops with a padded case. Keep it clean, especially the baseplate and needle. Use a soft cloth for cleaning. If you have a liquid-filled compass, monitor for leaks and bubbles. Lastly, always consult your compass’s manual for specific manufacturer recommendations.

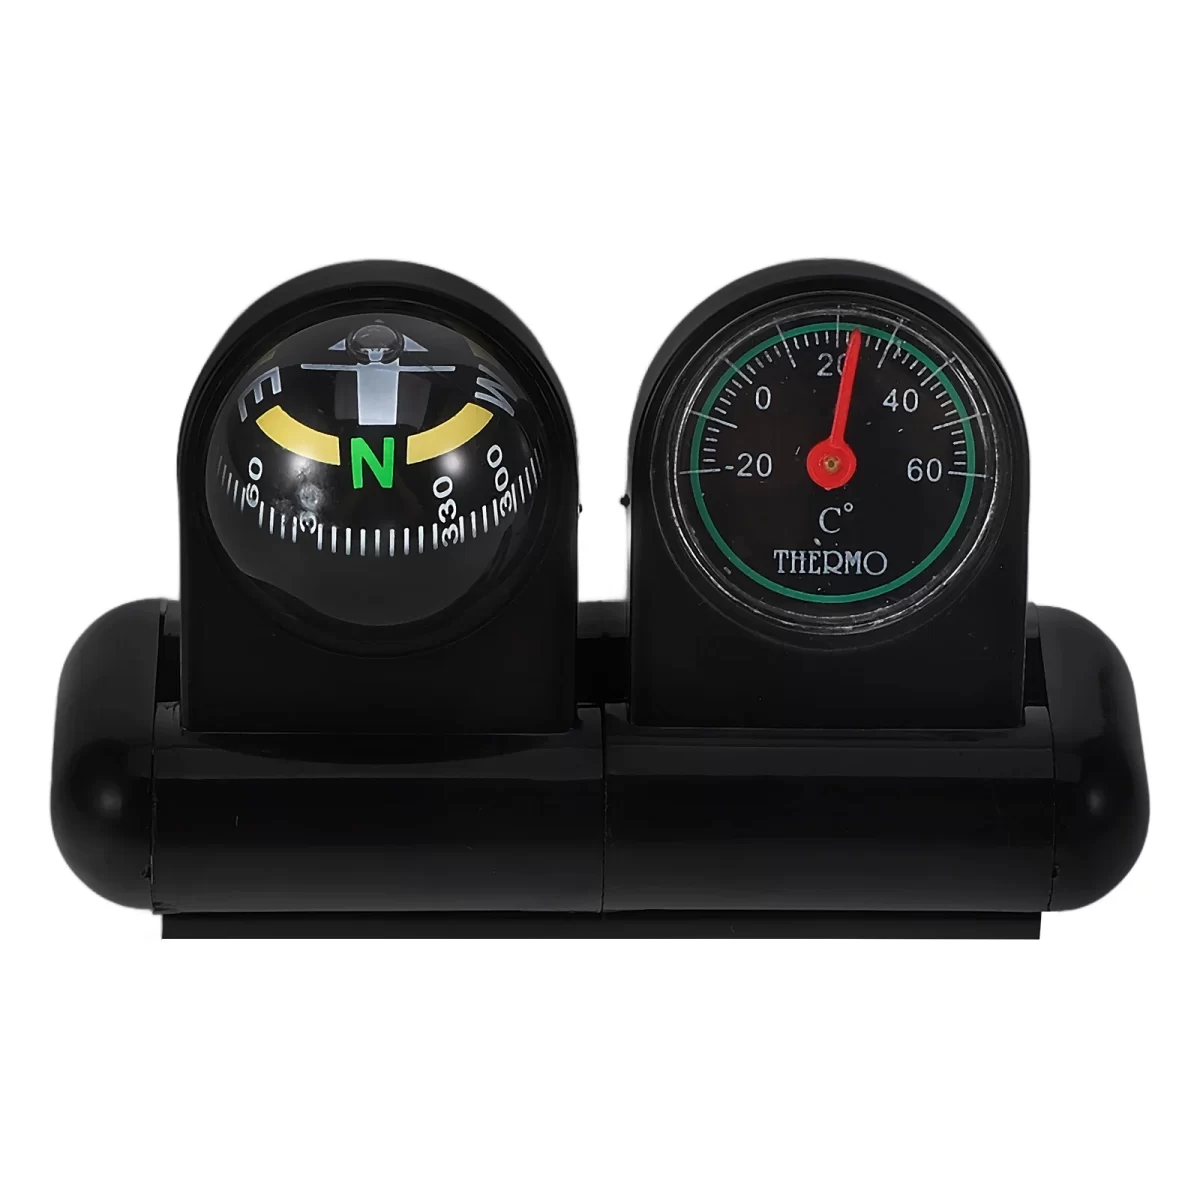
using a compass for great outdoors

Advanced Compass Features

Navigating through challenging terrain demands precision. Advanced compass features meet this need, enhancing navigation considerably.

Global Needles and Declination Adjustment

Modern compasses may come with global needles. These needles work well across both northern and southern hemispheres. This feature is vital for travelers who journey between different continents. Also, declination adjustment is critical for accurate navigation. This function allows compasses users to account for the difference between magnetic and true north. Once set, it provides consistent directionality without requiring manual calculation, simplifying navigation.

Inclinometers and Additional Sights

Inclinometers measure slopes and angles, useful for assessing terrain and planning routes. They are especially helpful in mountainous areas. Additional sights, like mirrors or prisms, enhance accuracy. They allow for sighting distant features with precision. These added components make advanced compasses essential for serious navigators and outdoor enthusiasts.

Conclusion

The Importance of Mastering Compass Skills

Mastering compass skills offers unmatched benefits for outdoor enthusiasts and adventurers. Understanding compasses’ parts and their functions empowers you to navigate confidently and independently, especially in areas without digital coverage. Using parts of a compass proficiently ensures you remain oriented and can help prevent getting lost, which enhances safety during your outdoor activities.

With compasses, you gain a reliable, non-electronic backup for navigation. This skill proves essential when GPS devices or smartphones fail due to low battery, poor signal, or extreme weather conditions. Knowing how to effectively use a compass also provides a deeper connection with the natural environment, encouraging a more immersive experience.

Besides the practical benefits, using a compass can be a fun, engaging way to introduce younger generations to the principles of geography and orientation. It’s also a practical skill that fosters problem-solving and decision-making abilities. Mastering compasses’ usage is not just about finding your way but also building resilience and preparedness for any adventure.

In conclusion, compasses is an invaluable tool for navigating the great outdoors. By understanding how to take and follow bearings, and how to use compasses with a map, you can confidently explore the wilderness and find your way to your destination. With practice and experience, using a compass will become second nature, and you’ll be able to enjoy all the wonders that the outdoors has to offer.
The Ultimate Guide to the Best Camping Food

Introduction

Camping is an exciting adventure that allows you to connect with nature and unwind from the hustle and bustle of daily life. One of the most essential aspects of a successful camping trip is the food you bring along. From simple snacks to gourmet meals, the right camping food can make all the difference in your outdoor experience. In this comprehensive guide, we’ll explore the best camping food ideas, tips, and recipes. They will help you plan delicious and satisfying meals for your next outdoor adventure.

35 BEST Camping Recipes

Part 1: Breakfast

Level 1: Quick and Easy Breakfast Ideas
When you’re camping, you want to start your day with a hearty and satisfying breakfast that will provide you with the energy you need for hiking, fishing, and other outdoor activities. Quick and easy breakfast options such as instant oatmeal, granola bars, and yogurt cups are ideal for busy mornings at the campsite. These convenient options require minimal preparation and are portable. Making them perfect for on-the-go breakfasts.

Level 2: Gourmet Breakfast Recipes
For campers who enjoy a more leisurely breakfast, gourmet camping food can be a treat. Consider making breakfast burritos with eggs, cheese, and veggies. Or whipping up a batch of banana pancakes on a portable griddle. If you’re feeling adventurous, you can even try your hand at cooking eggs benedict over a campfire. These recipes may require a bit more effort, but the delicious results are well worth it.

Part 2: Lunch

Level 1: Sandwiches and Wraps
When it comes to camping food, sandwiches and wraps are a classic choice for lunch. They’re easy to prepare, and you can customize them with your favorite ingredients. Turkey and cheese sandwiches, peanut butter and jelly wraps, and hummus and veggie wraps are all fantastic options for a satisfying and portable lunch at the campsite.

Level 2: Grilled Lunch Options
If you have access to a grill or campfire, consider grilling up some delicious lunch options such as hot dogs, burgers, or grilled chicken skewers. Grilled food adds a smoky and flavorful element to your lunch. It’s a fun and interactive way to prepare a meal at the campsite.

Part 3: Dinner

Level 1: One-Pot Camping Meals
One-pot camping meals are a convenient and efficient way to prepare dinner at the campsite. Dishes such as chili, pasta with marinara sauce, and stir-fry can be cooked in a single pot or skillet. Minimizing cleanup and making mealtime a breeze.

Level 2: Campfire Cooking
Nothing beats the taste of food cooked over a campfire. From classic campfire favorites like foil packets filled with veggies and protein to gourmet options like cedar-planked salmon The campfire cooking adds a rustic and flavorful element to your camping meals.

Part 4: Snacks

Level 1: Trail Mix and Dried Fruit
Trail mix and dried fruit are ideal snacks for camping because they’re lightweight, non-perishable, and provide a quick energy boost. These snacks are perfect for munching on during hikes, fishing trips, or any other outdoor activities.

Level 2: S’mores and Campfire Treats
No camping trip is complete without indulging in some classic campfire treats. S’mores, roasted marshmallows, and campfire popcorn are all beloved camping traditions. They add a sweet and nostalgic touch to your outdoor experience.

Part 5: Beverages

Level 1: Hydration Options
Staying hydrated is crucial when you’re spending time outdoors, so be sure to bring plenty of water and electrolyte-replenishing beverages such as sports drinks or coconut water.

Level 2: Campsite Cocktails
For campers who enjoy a more culinary approach to their outdoor dining experience, consider mixing up some refreshing campsite cocktails. From simple options like canned cocktails and canned wine to more elaborate concoctions using a portable cocktail kit. The possibilities are endless for enjoying a delicious beverage at the campsite.

Fantastic Camping Meals Kids Will Love - Adventure Travel Family

Part 6: Delicious Desserts for Campers

Dessert is an essential part of any camping trip, and there are plenty of tasty options to satisfy your sweet tooth while in the great outdoors. One classic camping dessert is s’mores, a combination of roasted marshmallows, chocolate, and graham crackers. Another popular choice is grilled fruit, such as pineapple or peaches, which can be topped with honey and cinnamon for a sweet and flavorful treat. For those with a sweet tooth, consider bringing along some pre-made cookie dough to bake over the campfire for fresh, warm cookies in the wilderness. And don’t forget about the classic campfire pies, which can be filled with fruit, chocolate, or even savory fillings for a sweet and satisfying end to a day of outdoor adventure.

Part 7: Creative Campfire Cooking

When it comes to camping food, there are countless creative and delicious options to explore. For a unique and flavorful meal, consider cooking foil packets over the campfire. Fill the packets with your choice of protein, vegetables, and seasonings, and then cook them over the flames for a tasty and convenient meal. Another fun option is to bring along a pie iron, which can be used to make a variety of sweet and savory dishes, such as grilled cheese sandwiches, fruit pies, or even pizza pockets. And for a truly memorable camping meal, try cooking your own bread on a stick over the campfire for a warm and satisfying accompaniment to any dish.

Part 8: Cooking Tips for Campers

For a successful camping trip, it’s important to be prepared and to have the right skills and knowledge for cooking in the great outdoors. To ensure a smooth and enjoyable cooking experience, be sure to plan and prepare your meals in advance, and pack all the necessary ingredients and cooking equipment. It’s also important to consider the cooking method you’ll be using, whether it’s a campfire, portable stove, or grill, and to practice using your chosen cooking method before heading out on your trip. Additionally, be mindful of food safety practices and proper storage of perishable items to avoid foodborne illness. With a little preparation and some creativity, camping food can be both tasty and enjoyable for all.

The 12 Best Camping Stoves [2024] | Take The Truck

Part 9: Campfire Desserts to Satisfy Your Sweet Tooth

No camping trip is complete without a delicious and indulgent dessert to enjoy by the campfire. One classic option is to make s’mores using graham crackers, chocolate bars, and toasted marshmallows for a gooey and satisfying treat. If you’re feeling a bit more ambitious, consider baking some apples filled with cinnamon and brown sugar wrapped in foil and cooked over the fire until tender. Another great idea is to make a simple fruit crisp using fresh berries or apples, topped with a crumbly oat and nut topping and cooked in a cast iron skillet over the coals. And for a refreshing and light dessert, you can prepare a batch of grilled pineapple slices brushed with honey and sprinkled with cinnamon. These campfire desserts are sure to satisfy your sweet tooth and leave you with fond memories of your outdoor adventure.

Conclusion

When you’re out exploring the great outdoors, it’s important to have some quick and easy snacks on hand to keep you fueled throughout the day. Planning and preparing delicious and satisfying camping food is an essential part of any outdoor adventure. From quick and easy breakfast ideas to gourmet campfire dinners and everything in between, these camping food ideas, tips, and recipes will help you create memorable and enjoyable meals during your next camping trip. Happy camping and happy eating!

The Ultimate Guide to Choosing Cots for Camping

Introduction

When it comes to camping, having a comfortable place to sleep can make all the difference in your outdoor experience. While sleeping bags and air mattresses are popular choices, camping cots are another great option for those looking for a more stable and elevated sleeping surface. In this guide, we’ll explore the benefits of camping cots and provide tips for choosing the best one for your needs.

cots for camping

Part 1: The Benefits of Camping Cots

Level 1: Comfort and Support
Camping cots offer a level of comfort and support that is often unmatched by traditional sleeping arrangements. With a sturdy frame and durable fabric, camping cots provide a stable and level surface for sleeping, eliminating the need to worry about uneven or rocky ground.

Level 2: Off the Ground
One of the biggest advantages of camping cots is that they keep you off the ground. This can be especially beneficial in wet or muddy conditions, as well as in areas with potential critters or insects. By elevating your sleeping surface, camping cots provide added protection and peace of mind during your outdoor adventures.

Part 2: Choosing the Right Camping Cot

Level 1: Size and Weight
When choosing a camping cot, it’s important to consider both the size and weight of the cot. Look for a cot that is large enough to accommodate your body size and sleeping habits, but also lightweight and portable enough to carry to your campsite. Consider the dimensions and weight capacity to ensure a comfortable and secure fit.

Level 2: Setup and Portability
Another factor to consider is the ease of setup and portability of the camping cot. Look for a cot that can be quickly and easily assembled and disassembled, as well as one that is compact and lightweight for easy transportation. Consider whether the cot comes with a carrying case or bag for added convenience.

Part 3: Types of Camping Cots

Level 1: Traditional Cots
Traditional camping cots are the most common type, featuring a simple yet sturdy frame and a fabric sleeping surface. These cots are typically lightweight and easy to transport, making them a popular choice for camping trips.

Level 2: Folding Cots
Folding camping cots are designed to be even more compact and portable, often featuring a collapsible frame for easy storage and transportation. These cots are ideal for backpackers and hikers who need a lightweight and space-saving sleeping solution.

Part 4: Additional Features to Consider

Level 1: Built-In Extras
Some camping cots come with built-in extras, such as a built-in pillow, side pockets, or a built-in nightstand. These additional features can add to the comfort and convenience of the cot, providing a more luxurious sleeping experience in the great outdoors.

Level 2: Durability and Material
When choosing a camping cot, it’s important to consider the durability and material used in its construction. Look for a cot with a sturdy frame and durable fabric that can withstand the rigors of outdoor use. Consider whether the cot is rust-resistant, water-resistant, and easy to clean for long-lasting performance.

Part 5: Maintenance and Care Tips

Level 1: Cleaning and Storage
Proper maintenance and care of your camping cot can help ensure its longevity and performance. After each use, be sure to clean the cot of any dirt, debris, and moisture, and allow it to fully dry before storage. Store the cot in a cool, dry place to prevent mold and mildew growth.

Level 2: Repairs and Replacements
If your camping cot becomes damaged or worn over time, it’s important to address any necessary repairs or replacements. Many cots come with warranty coverage for added peace of mind, while others may require simple DIY repairs or replacements of specific parts.

Camping Cot, Folding Camping Cots For Adults

Part 6: Tips for Choosing the Right Camping Cot

When it comes to choosing the right camping cot, there are a few factors to consider to ensure that you have a comfortable and restful sleep during your outdoor adventures. First, consider the size and weight of the cot. If you will be backpacking or hiking to your campsite, you’ll want a lightweight and compact cot that is easy to transport. Additionally, make sure the cot is large enough to accommodate your body size and sleeping style. Look for cots with a weight capacity that can support your body weight, and check the dimensions to ensure you have enough space to stretch out comfortably.

Next, consider the construction and materials of the cot. Look for a cot that is sturdy and durable, with a strong frame and high-quality fabric. Aluminum or steel frames are common choices for camping cots, as they are lightweight yet sturdy. The fabric should be tear-resistant and breathable to ensure a comfortable sleeping surface. Some cots also come with added features such as built-in padding or storage pockets, so consider what extras might enhance your camping experience.

Finally, consider the setup and breakdown process of the cot. Look for a cot that is easy to assemble and disassemble, with a quick and hassle-free setup. Some cots come with a simple folding design that allows for easy storage and transportation, while others may require more time and effort to put together. Consider your own comfort level with setup and breakdown processes and choose a cot that aligns with your preferences.

By considering these factors, you can ensure that you choose the right camping cot for your outdoor adventures, providing you with a comfortable and convenient sleeping solution for your next camping trip.

Part 7: Maintaining and Storing Your Camping Cot

Once you’ve invested in a high-quality camping cot, it’s important to properly maintain and store it to ensure its longevity and performance. Proper maintenance can help prevent wear and tear, extend the lifespan of your cot, and ensure that it remains a comfortable sleeping surface for your outdoor adventures.

To maintain your camping cot, start by regularly cleaning it after each use. Use a mild soap and water to clean the fabric and frame, removing any dirt, debris, or stains that may have accumulated during your camping trip. Allow the cot to fully dry before storing it to prevent mold or mildew from forming. Additionally, periodically check the frame and fabric for any signs of damage or wear, such as fraying fabric or bent or broken legs. Address any issues promptly to prevent further damage.

When storing your camping cot, consider the climate and environment in which it will be stored. If possible, store the cot in a cool, dry place to prevent mold or mildew from forming. Ideally, store the cot in a protective case or bag to prevent dust, dirt, or moisture from accumulating on the fabric and frame. If the cot is not in use for an extended period, consider disassembling it for compact storage.

By properly maintaining and storing your camping cot, you can ensure that it remains a comfortable and reliable sleeping surface for many outdoor adventures to come.

Can anyone give an honest review about these tent/cots?

Part 8: Alternatives to Traditional Camping Cots

While traditional camping cots are a popular choice for outdoor sleeping solutions, there are also alternative options to consider for your camping adventures. These alternatives provide different sleeping experiences and may be better suited to certain camping scenarios.

One alternative to traditional camping cots is a hammock. Hammocks provide a lightweight and compact sleeping solution, ideal for backpacking or hiking trips. They are suspended above the ground, providing a unique and comfortable sleeping experience. Hammocks are especially popular for warm-weather camping, as they allow for plenty of ventilation and can be easily set up in various environments. However, hammocks may not be suitable for all camping scenarios, such as camping in areas with limited hanging options.

Another alternative is a camping pad or inflatable mattress. These options provide a more cushioned sleeping surface, ideal for campers who prioritize comfort. Camping pads and inflatable mattresses are lightweight and portable, providing a convenient sleeping solution for backpacking or car camping trips. They also offer insulation from the ground, keeping you warm and comfortable during chilly nights. However, they may not be as compact and easy to set up as traditional camping cots.

Finally, consider a camping cot with added features, such as a built-in air mattress or padding. These cots combine the convenience and portability of a traditional cot with the added comfort of an inflatable mattress, providing a comfortable sleeping surface that is elevated off the ground. These cots are ideal for campers who prioritize both comfort and convenience, providing a convenient all-in-one sleeping solution for their camping adventures.

By considering these alternative options, you can explore different sleeping solutions and find the best fit for your camping style, ensuring that you have a comfortable and restful sleep during your outdoor adventures.

Conclusion

Cots for camping offer a comfortable and supportive sleeping solution for outdoor enthusiasts of all kinds. By considering the benefits, choosing the right cot, and understanding the different types and features available, you can find the perfect camping cot to enhance your next outdoor adventure. With proper maintenance and care, your camping cot can provide many nights of restful sleep under the stars.

Exploring the Benefits of the Blackstone Camping Grill

Introduction

When it comes to outdoor cooking, having a reliable and versatile camping grill can make all the difference. Blackstone camping grill is known for its quality construction, portability, and ability to cook delicious meals no matter where you are. In this article, we will explore the benefits of Blackstone camping grills and why they are a popular choice for outdoor enthusiasts.

Adventure Ready 20x14" Camping Griddle - Blackstone Griddles

Part 1: Portability and Convenience

Level 1: Blackstone camping grills are designed with portability in mind, making them easy to transport and set up at any campsite or outdoor location. The compact size and folding legs allow for easy storage and transportation, while the quick ignition system ensures that you can start cooking in no time.

Level 2: The convenience of a Blackstone camping grill cannot be overstated. Whether you are on a camping trip, tailgating at a sporting event, or simply enjoying a day at the beach, having a reliable and easy-to-use grill can make all the difference in your outdoor cooking experience.

Part 2: Versatile Cooking Options

Level 1: Blackstone camping grills are known for their versatility, allowing you to cook a wide variety of foods with ease. The adjustable heat zones and multiple cooking surfaces make it easy to grill, fry, and sauté your favorite dishes, all while enjoying the great outdoors.

Level 2: The ability to cook different types of food simultaneously is a game changer for outdoor cooking. With a Blackstone camping grill, you can easily grill up some burgers and hot dogs while also preparing a side of vegetables or even pancakes for breakfast.

Part 3: Durable Construction

Level 1: When it comes to outdoor cooking, durability is key. Blackstone camping grills are built to withstand the elements, with sturdy construction and durable materials that can handle the wear and tear of outdoor use.

Level 2: The quality of construction in Blackstone camping grills is evident in their long-lasting performance and ability to withstand the rigors of outdoor cooking. With proper care and maintenance, a Blackstone camping grill can provide years of reliable use.

Part 4: Easy to Clean and Maintain

Level 1: One of the often-overlooked benefits of Blackstone camping grills is how easy they are to clean and maintain. The removable griddle top and grease management system make it easy to keep your grill in top condition.

Level 2: The last thing you want to deal with when enjoying the great outdoors is a messy and difficult-to-clean grill. You can spend more time enjoying your meals and less time worrying about cleaning up afterwards.

Part 5: Affordable and Reliable

Level 1: Blackstone camping grills are not only affordable, but they also offer reliable performance that outdoor enthusiasts can count on. With a range of sizes and configurations available, there is a Blackstone camping grill to fit every budget and cooking need.

Level 2: The combination of affordability and reliability makes Blackstone camping grills a popular choice for outdoor cooking enthusiasts. Whether you are a seasoned camper or just starting to explore outdoor cooking, a Blackstone camping grill is a smart investment for delicious meals on the go.

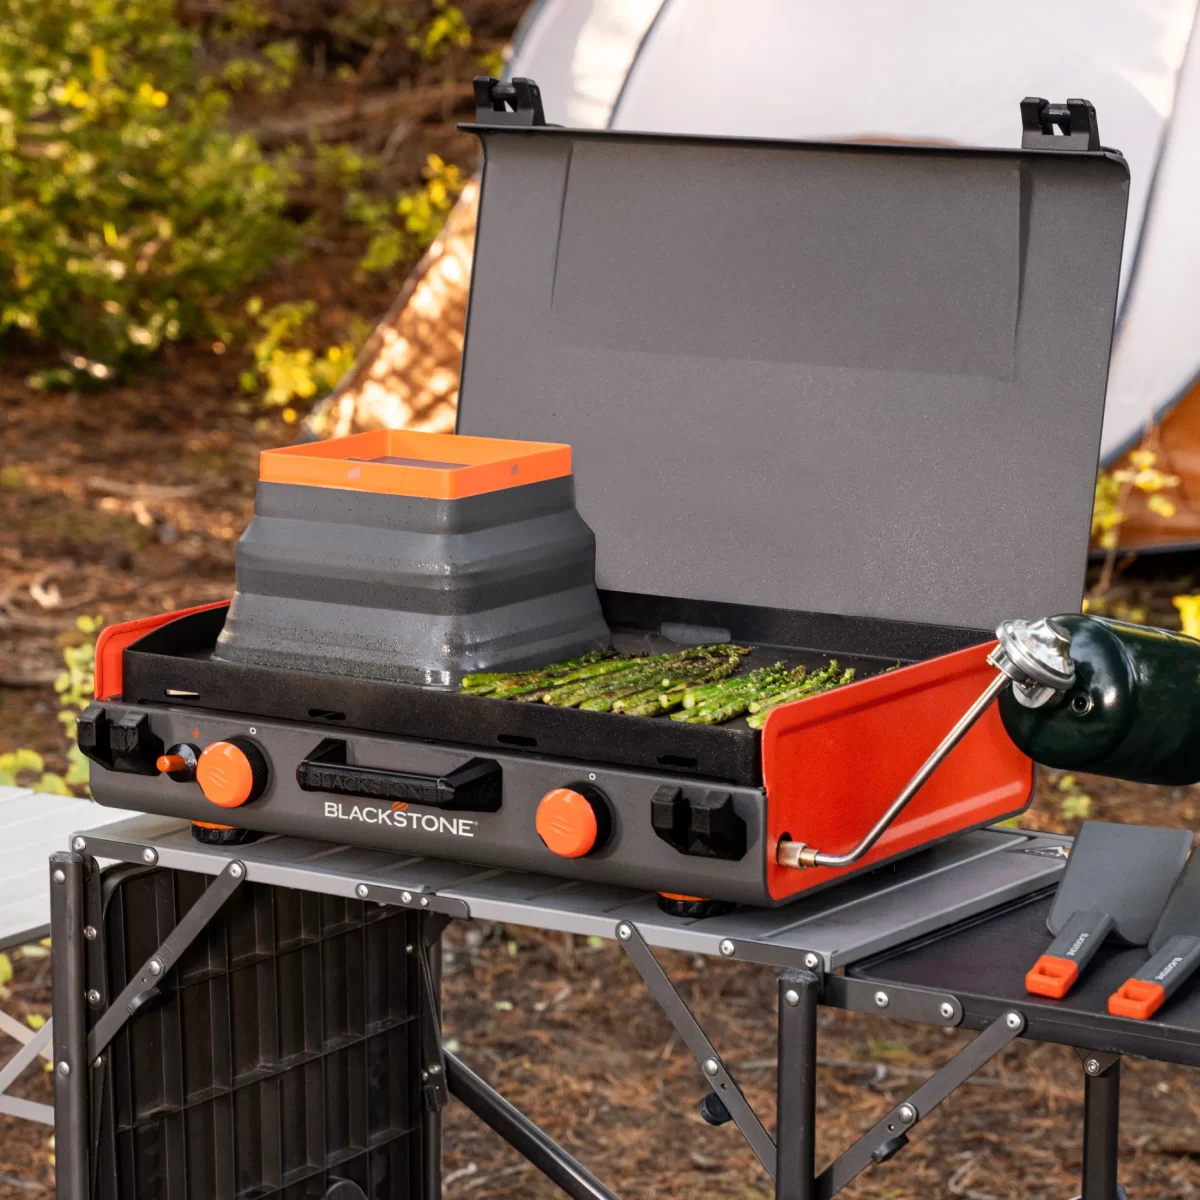
Blackstone 22" Culinary Omnivore Portable Griddle with Carry Bag

Part 6: Cleaning and Maintenance of the Blackstone Camping Grill

Proper maintenance and cleaning of your Blackstone camping grill are essential to ensuring its longevity and optimal performance. Regularly cleaning the grill after each use will help prevent grease and food buildup, as well as prevent rust and corrosion. Here are some important maintenance tips for your Blackstone camping grill:

  • After using the grill, allow it to cool completely before cleaning.
  • Use a grill brush to remove any food residue and debris from the griddle surface.
  • Wipe the griddle surface with a damp cloth or paper towel to remove excess grease and oil.
  • Use a mild dish soap and warm water to clean the griddle surface. Avoid using abrasive cleaners or steel wool, as they can damage the seasoning on the griddle.
  • After cleaning, apply a thin layer of cooking oil to the griddle surface to prevent rust and maintain its non-stick properties.
  • Store the grill in a dry, covered area to protect it from the elements.

By following these maintenance tips, you can ensure that your Blackstone camping grill remains in top condition. For many years of outdoor cooking enjoyment.

Part 7: Accessories for the Blackstone Camping Grill

Enhance your outdoor cooking experience with a variety of accessories designed specifically for Blackstone camping grills. From grilling tools to protective covers, these accessories can help you make the most of your cooking adventures. Here are some popular accessories for the Blackstone camping grill:

  • Griddle tool kit: A set of specialized tools designed for use with a griddle, including a spatula, scraper, and chopper.
  • Grill cover: A weather-resistant cover to protect your grill from the elements when not in use.
  • Carry bag: A convenient bag for transporting and storing your grill, complete with pockets for accessories.
  • Propane adapter hose: An adapter hose for connecting larger propane tanks to your grill for extended cooking sessions.
  • Grill hood: A hood attachment to transform your griddle into a versatile outdoor cooking station with multiple cooking zones.

Investing in these accessories can help you get the most out of your Blackstone camping grill. And enhance your outdoor cooking capabilities.

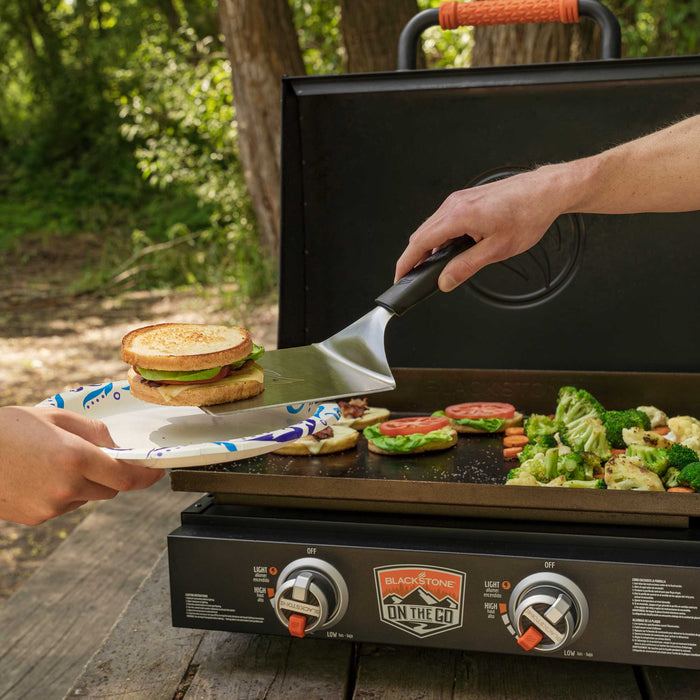
Blackstone On The Go 22in Tabletop Griddle with Hood

Part 8: Recipes and Cooking Tips for the Blackstone Camping Grill

The Blackstone camping grill offers endless possibilities for outdoor cooking, from traditional breakfasts to gourmet dinners. With its spacious griddle surface and adjustable heat zones, you can cook a wide variety of dishes with ease. Here are some delicious recipes and cooking tips to help you make the most of your Blackstone camping grill:

  • Breakfast: Cook up a hearty breakfast of bacon, eggs, and pancakes all at once on the griddle surface. Taking advantage of the multiple cooking zones.
  • Stir-fry: Use the adjustable heat zones to create a sizzling stir-fry with your favorite vegetables, meats, and sauces.
  • Smash burgers: Make mouthwatering smash burgers with crispy edges and juicy interiors by pressing ground beef patties onto the hot griddle surface.
  • Fajitas: Prepare sizzling fajitas with marinated steak, chicken, or shrimp, along with bell peppers and onions, all cooked to perfection on the griddle.
  • Grilled pizza: Create homemade pizza with your favorite toppings, cooked directly on the griddle for a delicious crispy crust.

With these recipes and cooking tips, you can take your outdoor cooking to the next level and impress your friends and family with delicious meals made on your Blackstone camping grill.

Conclusion

The Blackstone camping grill is a versatile and convenient outdoor cooking solution that is perfect for camping, tailgating, and backyard cookouts. With its compact design, powerful burners, and durable construction, it’s no wonder why it has become a favorite among outdoor cooking enthusiasts.

With proper care and maintenance, your Blackstone camping grill will continue to provide you with delicious meals and memorable outdoor cooking experiences for years to come. So why wait? Invest in a Blackstone camping grill today and elevate your outdoor cooking game! With its unbeatable combination of portability, power, and performance, you’ll wonder how you ever lived without it.

Blackstone camping grills offer a range of benefits for outdoor enthusiasts. From their portability and convenience to their versatile cooking options and durable construction. With easy maintenance and affordable pricing, a Blackstone camping grill is a valuable addition to any outdoor cooking arsenal. Whether you are grilling up a storm at the campsite or enjoying a day at the beach. A Blackstone camping grill is a reliable and versatile option for outdoor cooking.

The Guide to Camping Oven: Everything You Need to Know

Introduction

Camping is one of the most enjoyable experiences of life, and having good food to eat while you’re out in the wild can make the experience even better. While camping stoves are a popular choice for cooking while camping, many people are now turning to camping ovens as a way to bake and cook more diverse meals in the great outdoors. In this guide, we will take an in-depth look at the camping oven and how they can enhance your camping experience.

Portable Camping Oven & Stove

Part 1: What is a Camping Oven?

Level 1: Understanding the Basics of Camping Ovens
Camping ovens are portable and versatile cooking appliances designed for outdoor use. They typically run on propane or butane and are similar in design to the ovens found in a standard kitchen. These ovens come in various sizes, from compact backpacking models to larger, more robust options for campers who prefer to travel with more equipment.

Level 2: The Benefits of Using a Camping Oven
One of the main benefits of using camping ovens is the ability to bake and cook a wider variety of meals while camping. Unlike traditional camping stoves, camping ovens allow you to bake bread, cook pizzas, roast meats, and make delicious desserts. This versatility can make the camping experience more enjoyable and allows for more creativity in meal planning.

Part 2: Types of Camping Ovens

Level 1: Different Types of Camping Ovens
There are several types of camping ovens available, each with its own unique features and benefits. Some ovens are compact and lightweight, designed for backpacking and minimalist camping, while others are larger and more sophisticated, ideal for car camping and RV trips.

Level 2: Choosing the Right Camping Oven for Your Needs
When selecting a camping oven, it is important to consider factors such as size, weight, fuel type, and cooking capacity. For backpackers and hikers, a compact and lightweight oven may be the best option, while those with larger camping setups may prefer a more robust model with additional features.

Part 3: Tips for Using a Camping Oven

Level 1: Setting Up and Operating Your Camping Oven
Before using your camping oven, it is important to carefully read the manufacturer’s instructions and familiarize yourself with the setup and operation of the appliance. Take the time to practice using the oven at home before your camping trip so that you are comfortable with its features and functions.

Level 2: Cooking Techniques and Recipes for Camping Ovens
When using camping ovens, it’s essential to adjust your cooking techniques to suit the outdoor environment. This may involve using different cooking temperatures, preheating the oven for longer, and rotating dishes for even cooking. There are also many camping oven’s recipes available online, from simple bread and pizza recipes to more elaborate dishes.

Part 4: Maintenance and Care of Camping Ovens

Level 1: Cleaning and Storage of Camping Ovens
Proper maintenance of your camping ovens is essential for ensuring its longevity and reliable performance. After each use, clean the oven thoroughly, removing any food residue and grease buildup. Proper storage is also important to protect the oven from damage and deterioration.

Level 2: Troubleshooting Common Issues with Camping Ovens
Like any appliance, camping ovens may experience issues from time to time. Learning how to troubleshoot common problems such as uneven heating, burner malfunction, or ignition issues can help you resolve these issues quickly and get back to enjoying your outdoor cooking experience.

Part 5: Safety Considerations When Using Camping Ovens

Level 1: Understanding the Risks Associated with Camping Ovens
While camping ovens are designed for outdoor use, it’s important to be aware of the potential risks and hazards associated with their use. These may include fire hazards, burns, and carbon monoxide poisoning if the oven is not operated correctly.

Level 2: Safety Precautions for Using Camping Ovens
To ensure safe operation of your camping oven, follow the manufacturer’s safety guidelines and never leave the oven unattended while in use. Always set up the oven on a stable and level surface, away from flammable materials, and ensure proper ventilation to prevent the buildup of harmful gases.

Coleman Camp Oven

Part 6: Safety Tips for Using a Camping Oven

When using a camping oven, safety should always be the top priority. Here are some important safety tips to keep in mind while using a camping oven:

  1. Always read and follow the manufacturer’s instructions for camping ovens. This will ensure that you are using the oven safely and in accordance with the manufacturer’s guidelines.
  2. Use the camping oven in a well-ventilated area to prevent the build-up of carbon monoxide. Never use a camping oven inside a tent or a closed space.
  3. Keep flammable materials away from the camping oven. This includes things like paper, cloth, and other combustible materials that could catch fire if they come into contact with the oven.
  4. Make sure the camping oven is placed on a stable and level surface to prevent it from tipping over while in use.
  5. Always supervise the camping oven while it is in use, especially if there are children or pets around. Accidents can happen quickly, so it’s important to keep a close eye on the oven at all times.

By following these safety tips, you can ensure that you are using your camping oven in a safe and responsible manner, allowing you to enjoy delicious meals while enjoying the great outdoors.

Part 7: Cleaning and Maintenance of a Camping Oven

Proper cleaning and maintenance of your camping ovens are important to ensure its longevity and optimal performance. Here are some tips for cleaning and maintaining your camping ovens:

  1. After each use, allow the camping oven to cool down completely before cleaning. Use a mild detergent and water to clean the interior and exterior of the oven, and avoid using abrasive cleaners that could damage the finish.
  2. Regularly inspect the camping oven for any signs of wear and tear, such as rust or corrosion. If you notice any damage, have it repaired by a professional before using the oven again.
  3. Check the fuel connections and hoses for any leaks or damage. Replace any worn or damaged parts to prevent potential safety hazards.
  4. Store camping ovens in a dry and well-ventilated area to prevent rust and corrosion. Cover the oven when not in use to protect it from the elements.

By following these cleaning and maintenance tips, you can ensure that your camping ovens remain in good working condition for many outdoor adventures to come.

Part 8: Cooking Tips and Recipes for a Camping Oven

When it comes to cooking with a camping oven, there are a variety of delicious dishes that you can prepare. Here are some cooking tips and recipes for making the most of your camping ovens:

  1. One-pot meals: A camping oven is perfect for making hearty one-pot meals such as stews, casseroles, and soups. Simply add your ingredients to the oven, set the temperature, and let it cook while you enjoy the great outdoors.
  2. Baking: You can also use your camping ovens to bake delicious treats such as bread, cookies, and even pizzas. Just make sure to preheat the oven and monitor the cooking time to achieve the perfect bake.
  3. Grilling: Many camping ovens come with a grill attachment, allowing you to grill up your favorite meats and vegetables while camping. Take advantage of this feature to add some smoky flavor to your meals.
  4. Dutch oven recipes: Dutch ovens are a popular choice for camping cooking, and there are countless recipes available for making everything from breakfast dishes to desserts in a Dutch oven. Try your hand at cooking a classic Dutch oven recipe for a memorable camping meal.

By exploring these cooking tips and recipes, you can elevate your camping experience with delicious and satisfying meals prepared with your camping ovens.

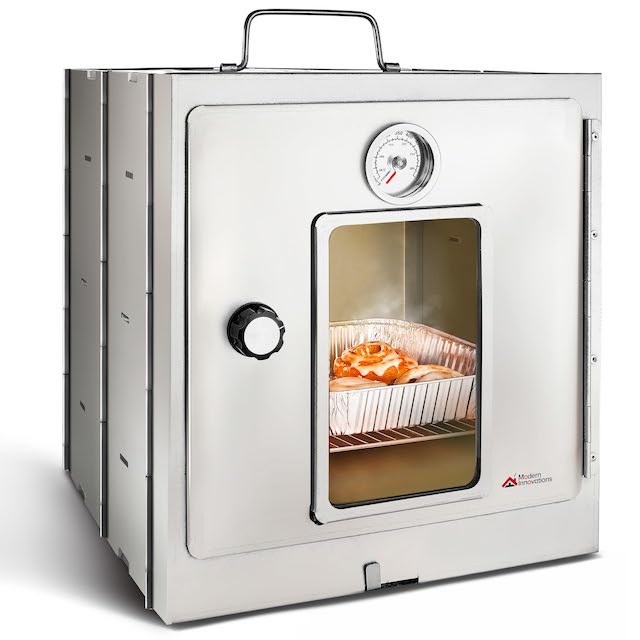
Deluxe Outdoor Camping Oven

Conclusion

Investing in camping ovens can significantly expand your cooking capabilities while camping, allowing you to enjoy delicious meals that go beyond traditional camping fare. By understanding the different types of camping ovens, learning how to use and maintain them properly, and following safety precautions, you can make the most of your outdoor cooking experience and create memorable camping meals for yourself and your fellow campers.

The Ultimate Guide to the Best Coolers for Camping

Introduction

Camping is a great way to enjoy the great outdoors, but it’s important to have the right gear to make the experience enjoyable. One essential piece of equipment for any camping trip is a cooler to keep your food and drinks cold. With so many coolers on the market, it can be overwhelming to find the best one for your needs. In this guide, we will explore the best coolers for camping and what to look for when making a purchase.

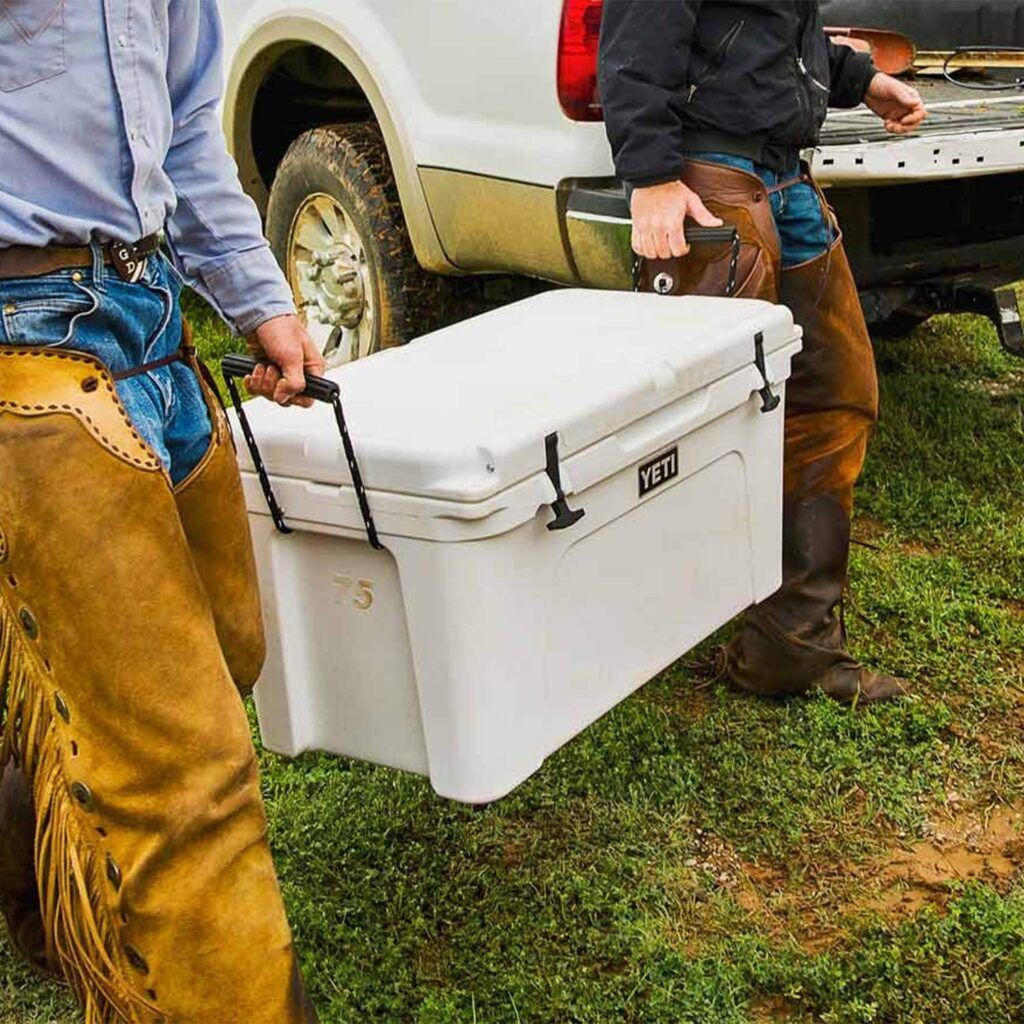
The Best Camp Coolers to Invest in This 2024

Part 1: Hard-Sided Coolers

When it comes to camping, hard-sided coolers are a popular choice due to their durability and ability to keep items cold for an extended period of time. These coolers are typically made of heavy-duty plastic and are great for keeping food and drinks cold in hot weather or over a long weekend camping trip. Some of the best hard-sided coolers for camping include the Yeti Tundra, RovR RollR, and Coleman Xtreme.

Level 1: Yeti Tundra
The Yeti Tundra is known for its excellent insulation and ability to retain ice for days. It is also bear-resistant, making it a great choice for camping in bear country. The Tundra comes in a variety of sizes, making it easy to find the perfect cooler for your camping needs.

Level 2: RovR RollR
The RovR RollR is a premium cooler that offers superior ice retention and innovative features such as a built-in wagon bin for easy transport and storage. It also has a convenient pull handle and large all-terrain wheels, making it easy to maneuver over rough terrain at the campsite.

Part 2: Soft-Sided Coolers

For campers who are looking for a more portable and lightweight option, soft-sided coolers are a great choice. These coolers are typically made of durable fabric and are easier to carry and maneuver, especially for shorter camping trips or day trips. Some of the best soft-sided coolers for camping include the RTIC SoftPak, YETI Hopper, and Coleman 16-Can Soft Cooler.

Level 1: RTIC SoftPak
The RTIC SoftPak is a durable and portable cooler that is perfect for camping trips and outdoor adventures. It is designed to keep food and drinks cold for up to 5 days and is made of tough, puncture-resistant material. The cooler also features a waterproof zipper and an antimicrobial liner, making it easy to clean and maintain.

Level 2: YETI Hopper
The YETI Hopper is a premium soft-sided cooler that is designed for maximum portability and durability. It features a leakproof zipper and ColdCell insulation to keep items cold, even in extreme temperatures. The Hopper is available in several sizes, making it a versatile option for camping trips of any length.

Part 3: Electric Coolers

Another option for campers who want the convenience of keeping items cold without the need for ice is an electric cooler. These coolers are powered by a 12-volt car adapter and are great for long road trips or camping trips where ice may be difficult to come by. Some of the best electric coolers for camping include the Dometic CFX, ARB Fridge Freezer, and Engel Portable Fridge/Freezer.

Level 1: Dometic CFX
The Dometic CFX is a high-performance electric cooler that is designed for use in extreme conditions. It features a powerful compressor, efficient insulation, and a digital display for easy temperature control. The CFX also has a durable construction and can keep items cold even in hot weather.

Level 2: ARB Fridge Freezer
The ARB Fridge Freezer is a top-of-the-line electric cooler that is perfect for camping and outdoor adventures. It features a robust construction, efficient cooling system, and a convenient design with a front opening lid for easy access to items inside. The Fridge Freezer also has low-voltage protection to prevent draining your car’s battery.

Part 4: Cooler Accessories

In addition to choosing the right cooler for your camping trip, there are some essential accessories that can enhance your cooling experience. These accessories can include items such as cooler organizers, ice packs, and cooler locks, all of which can make your camping trip more enjoyable and convenient.

Level 1: Cooler Organizers
Cooler organizers are a great way to keep your cooler neat and organized, making it easier to find items and keep them cold. These organizers typically feature compartments and pockets for storing smaller items such as utensils, condiments, and snacks, making them a great addition to any camping cooler.

Level 2: Ice Packs
Ice packs are an essential accessory for keeping items cold in your cooler, especially if you are using a soft-sided or electric cooler. They are also great for keeping food and drinks cold without the risk of any leaks or water getting into your cooler.

Part 5: Finding the Right Cooler for You

When it comes to finding the best cooler for camping, there are a few key factors to consider. These include the size and capacity of the cooler, the insulation and ice retention, portability, and any specific features that may be important to your camping needs. It’s also important to consider your budget and any specific requirements you may have for your cooler, such as bear resistance or extreme temperature capabilities.

Level 1: Size and Capacity
The size and capacity of your cooler are important considerations, as they will determine how much food and drinks you can bring along on your camping trip. If you are camping with a large group or for an extended period of time, a larger cooler may be necessary to accommodate all of your items. However, if you are camping solo or for a short trip, a smaller cooler may be more practical.

Level 2: Insulation and Ice Retention
The insulation and ice retention capabilities of your cooler are crucial for keeping items cold during your camping trip. Look for coolers with thick, insulated walls and a tight-fitting lid to prevent any air from escaping. It’s also important to consider how long your cooler will need to keep items cold, while others can retain ice for several days.

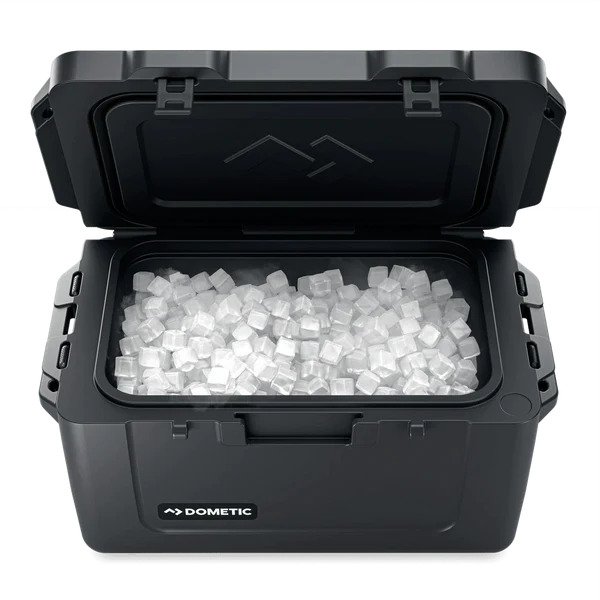
10 Best Coolers of 2025 | CleverHiker

Part 6: Features to Consider When Choosing a Camping Cooler

When choosing a cooler for camping, there are several important features to consider. One of the most important factors is insulation. Look for a cooler with thick insulation and a tight-fitting lid to keep your food and drinks cold for as long as possible. Look for coolers made from heavy-duty materials such as rotomolded plastic or high-quality metal.

Portability is another key consideration. Make sure the cooler you choose has sturdy, comfortable handles and is easy to carry, especially if you plan on hiking or carrying it long distances. Additionally, consider the overall size and capacity of the cooler. You’ll want a cooler that is large enough to hold all of your food and drinks, but not so large that it becomes cumbersome to transport.

Some coolers also come with additional features such as built-in bottle openers, integrated cup holders, and dry storage compartments. These can be convenient extras to have on hand while camping. Finally, consider the overall cost and value of the cooler. While high-end coolers can be pricey, they often offer superior insulation and durability that can make them a worthwhile investment for frequent campers.

Part 7: Tips for Packing and Using Your Camping Cooler

Once you’ve chosen the perfect cooler for your camping trip, it’s important to pack and use it effectively to maximize its performance. Start by pre-chilling your cooler before you pack it with food and drinks. Fill the cooler with ice or reusable ice packs and let it sit for several hours.

When packing your cooler, be sure to organize it strategically. Place ice or ice packs at the bottom of the cooler, followed by items that need to stay the coldest, like meat and dairy products. Pack items in sealed, waterproof containers to prevent them from getting soggy and to keep them fresh for longer.

Throughout your camping trip, try to keep your cooler out of direct sunlight and away from heat sources to maintain its cold temperature. Whenever possible, try to limit opening the cooler to prevent warm air from entering and cold air from escaping. Finally, when it’s time to clean your cooler, be sure to thoroughly wash and dry it to prevent mold and bacterial growth. With proper packing and use, your camping cooler can keep your food and drinks cold and fresh for the duration of your trip.

Part 8: Top Recommended Coolers for Camping

  1. YETI Tundra 65 – YETI coolers are known for their superior insulation and durability, making them a top choice for camping. The Tundra 65 offers ample capacity and can keep ice cold for several days.
  2. Coleman Xtreme 5-Day Cooler – This affordable option from Coleman offers excellent ice retention and a spacious interior, making it a great choice for weekend camping trips.
  3. Igloo BMX 52 Quart Cooler – The Igloo BMX offers a great balance of performance and value, with its rugged construction and impressive ice retention capabilities.
  4. ORCA 40 Quart Cooler – This roto-molded cooler from ORCA is designed to withstand tough outdoor conditions and provide long-lasting ice retention, making it an ideal choice for extended camping trips.
  5. Pelican Elite 20-Quart Cooler – The Pelican Elite cooler is a compact, yet rugged option that is easy to transport and offers excellent insulation for keeping food and drinks cold on shorter camping trips.

These top recommended coolers for camping offer a range of features and capabilities to suit different camping needs and preferences. Whether you’re looking for maximum ice retention, durable construction, or a balance of performance and value, there’s a camping cooler on this list that’s sure to meet your needs.

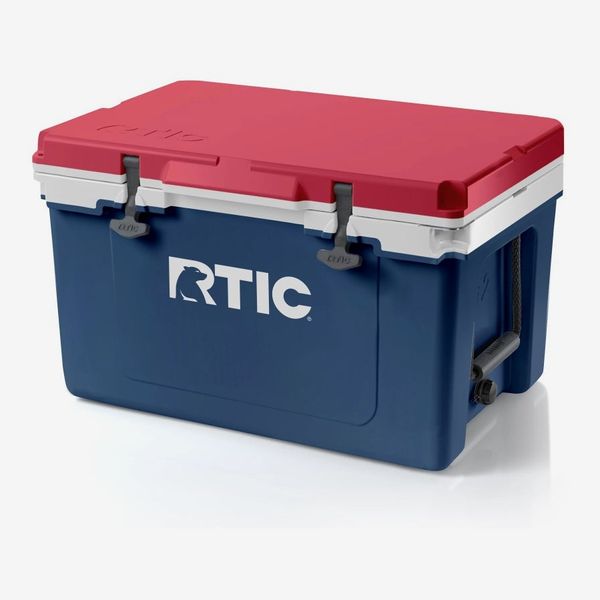
10 Best Coolers | The Strategist

Conclusion

Finding the best cooler for camping doesn’t have to be a daunting task. By considering factors such as the type of cooler, accessories, and your specific camping needs, you can find the perfect cooler to make your camping trip more enjoyable and convenient. Whether you are looking for a durable hard-sided cooler, a portable soft-sided cooler, or an electric cooler for long road trips, there are plenty of options to choose from that will keep your food and drinks cold while you enjoy the great outdoors.

S’mores and More: The Ultimate Guide to Camping Desserts

Introduction:

Camping is an opportunity to enjoy the great outdoors, and what better way to end a day of outdoor adventures than with a delicious dessert? Whether you have access to a campfire or are using a portable stove, there are plenty of simple and indulgent desserts that can be made while camping. In this article, we will explore various camping desserts that are easy to make and will satisfy your sweet tooth. From classic s’mores to creative campfire pies, there is a dessert for every camping trip.

16 Camping Desserts to Enjoy in Your Tent

Part 1: Classic Campfire Treats

Level 1: S’mores

The quintessential camping dessert, s’mores are a timeless favorite. Made with graham crackers, marshmallows, and chocolate, these sweet treats are easy to make and require minimal ingredients. Whether you prefer to toast your marshmallows to a perfect golden brown or enjoy them charred, s’mores are a must-have for any camping trip.

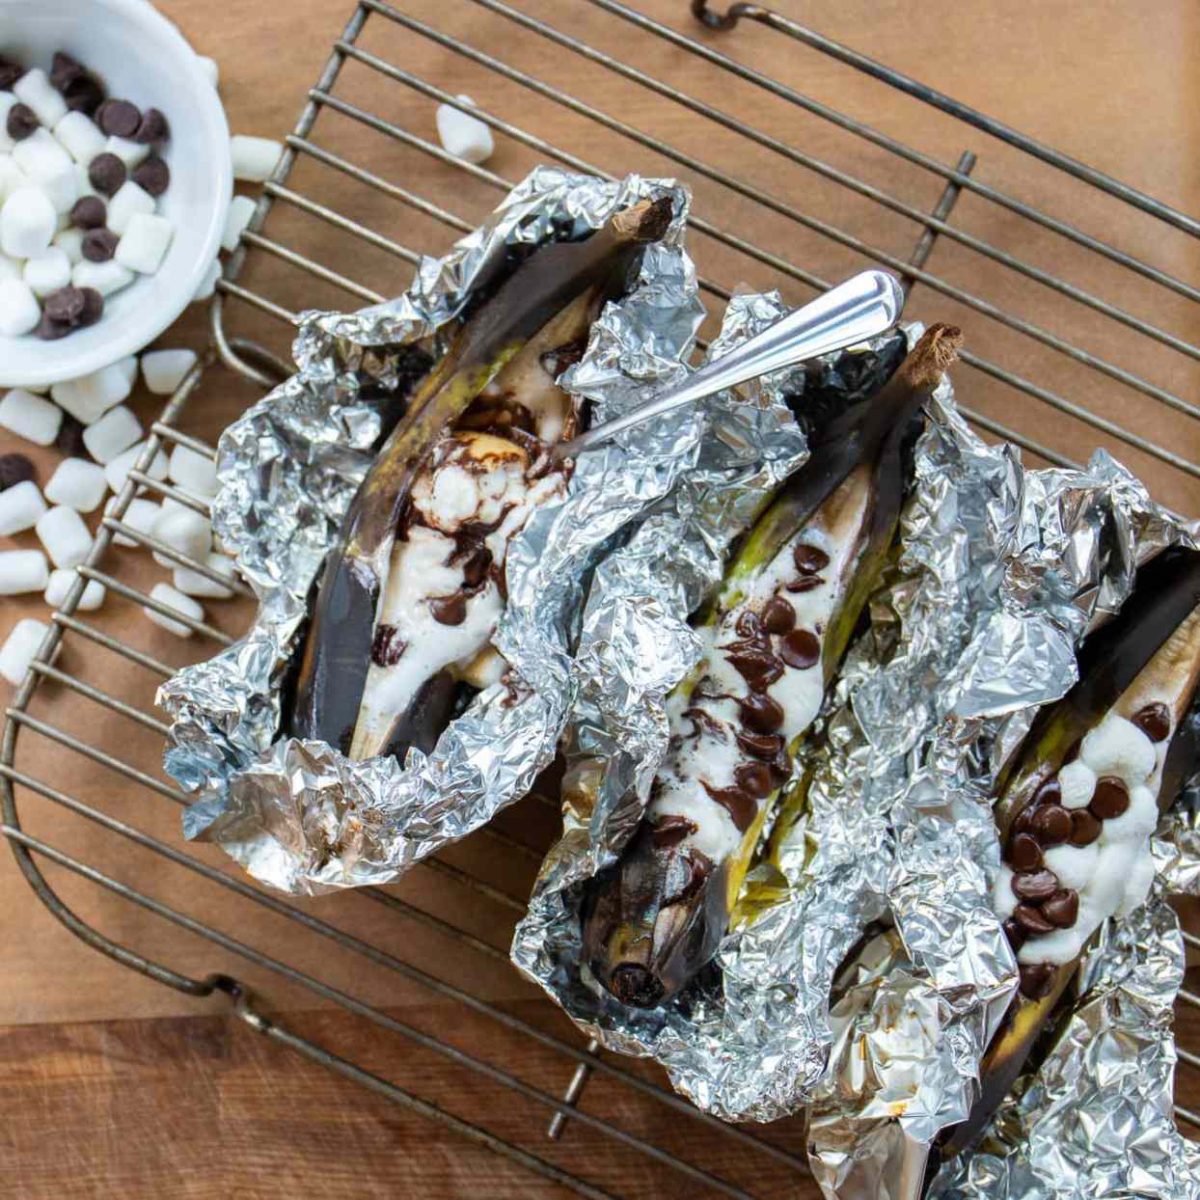
Level 2: Banana Boats

For a twist on the classic s’mores, try making banana boats over the campfire. Simply slit a banana down the middle, fill it with chocolate chips and marshmallows, wrap it in foil, and place it on the campfire to melt the ingredients. The result is a warm, gooey dessert that is sure to please everyone around the campfire.

Part 2: Campfire Pies

Level 1: Pie Iron Pies

Pie irons are a popular tool for making delicious campfire pies. Simply fill two slices of bread with your choice of pie filling, such as apple or cherry, and cook them in the pie iron over the campfire. The result is a warm and crispy pie that is a perfect ending to a day of camping.

Level 2: Campfire Cone Sundaes

For a fun and customizable dessert, try making campfire cone sundaes. Fill a waffle cone with your choice of toppings, such as marshmallows, chocolate chips, and fruit, then wrap it in foil and place it on the campfire to melt the ingredients. The result is a ooey-gooey dessert that is easy to eat and perfect for sharing.

Part 3: Portable Stove Desserts

Level 1: Skillet Brownies

If you have access to a portable stove, consider making skillet brownies for a decadent camping dessert. Simply mix the brownie batter in a skillet and cook it over the stove until the edges are crispy and the center is gooey. Serve with a scoop of ice cream for an indulgent treat.

Level 2: Campfire Eclairs

For a unique camping dessert, try making campfire eclairs on a portable stove. Instead of using an oven, simply cook the pastry dough over the stove until golden brown, then fill it with whipped cream and top with chocolate sauce. The result is a delicious and impressive dessert that is surprisingly easy to make.

Part 4: No-Bake Camping Desserts

Level 1: No-Bake Cheesecake

For a refreshing and easy camping dessert, try making a no-bake cheesecake. Simply mix together cream cheese, sugar, and vanilla, then pour the mixture into a graham cracker crust. Chill the cheesecake in a cooler or cold stream for a few hours, and enjoy a creamy and delicious dessert.

Level 2: Trail Mix Bars

For a quick and energy-boosting camping dessert, make trail mix bars that require no baking. Combine ingredients such as oats, nuts, dried fruit, and honey, then press the mixture into a pan and let it set. These bars are a perfect on-the-go snack that satisfies your sweet tooth and keeps you fueled for outdoor activities.

25 Best Campfire Dessert Recipes to Enjoy Outdoors

Part 5: Creative Campfire Desserts

Level 1: Campfire Banana S’mores

For a unique twist on s’mores, try making campfire banana s’mores. Slit a banana and fill it with marshmallows and chocolate chips, then wrap it in foil and cook it over the campfire. The result is a warm and gooey dessert that combines the flavors of s’mores with the natural sweetness of bananas.

Level 2: Grilled Pound Cake with Berries and Cream

For a sophisticated camping dessert, try grilling pound cake over the campfire and topping it with fresh berries and whipped cream. The heat from the grill caramelizes the cake, while the fresh berries add a burst of flavor. This elegant dessert is sure to impress your fellow campers.

Part 6: S’mores Variations for Your Next Camping Trip

S’mores are a classic camping dessert, but there are plenty of ways to riff on this traditional treat. You can try using different types of chocolate, such as dark chocolate, white chocolate, or flavored varieties like salted caramel or raspberry-infused chocolate. Experiment with different types of graham crackers, or even swap them out for cookies like chocolate chip or ginger snaps.

Another fun way to mix up your s’mores is by adding in extra ingredients. Peanut butter, banana slices, or a drizzle of caramel can take your s’mores to the next level. You can also try using flavored marshmallows, like strawberry or mint, for a unique twist on this camping favorite. Get creative and see what delicious combinations you can come up with!

Part 7: Campfire Apple Crisp for a Delicious Outdoor Dessert

Apple crisp is a comforting and delicious dessert that can easily be prepared over a campfire. Simply toss sliced apples with sugar, cinnamon, and a bit of lemon juice, then place them in a foil packet. In a separate bowl, mix together rolled oats, brown sugar, flour, and a pinch of salt, then sprinkle this mixture over the apples. Add a few pats of butter on top, wrap the foil packet tightly, and place it on the campfire coals for about 20 minutes, or until the apples are tender and the topping is crispy.

The result is a warm, gooey apple camping desserts that is sure to satisfy your sweet tooth after a long day of outdoor adventures. Serve it with a dollop of whipped cream or a scoop of vanilla ice cream for an extra indulgent treat.

Campfire Desserts - Three Olives Branch

Part 8: Campfire Banana Boats: A Fun and Easy Dessert for the Whole Family

Banana boats are a simple and enjoyable camping dessert that kids and adults alike will love. To make them, simply slit a banana lengthwise, leaving the peel on, and stuff it with your choice of toppings. Some popular options include chocolate chips, mini marshmallows, and crushed graham crackers, but you can get creative and use whatever you have on hand.

Once the banana is stuffed, wrap it in foil and place it on the campfire coals for about 5-10 minutes, or until the toppings are melted and the banana is soft. Carefully open the foil and enjoy this gooey, sweet treat with a spoon. It’s a fun and customizable dessert that is perfect for sharing around the campfire.

Part 9: S’mores 3 Ways

S’mores are a classic camping dessert that everyone loves. But why not switch things up and try s’mores with a twist? Here are three fun and delicious ways to enjoy s’mores on your next camping trip.

  1. Peanut Butter Cup S’mores: Instead of using regular chocolate bars, swap them out for peanut butter cups. The combination of gooey marshmallow and melty peanut butter cup is absolutely divine. Just sandwich a roasted marshmallow between two graham crackers with a peanut butter cup for a decadent treat.
  2. S’mores Dip: This variation of s’mores is perfect for sharing with a group. Simply melt chocolate chips and marshmallows in a cast iron skillet over the campfire until they are gooey and bubbly. Then use graham crackers to scoop up the gooey goodness. It’s a fun and interactive way to enjoy s’mores with friends and family.
  3. S’mores Banana Boats: For a healthier twist on s’mores, try making banana boats. Slice a banana lengthwise, stuff it with marshmallows and chocolate chips and wrap it in aluminum foil. Place the banana boats on the campfire grate and let them cook until the marshmallows and chocolate are melted. The warm, gooey banana boats are a delicious and satisfying way to end a day of camping.

These fun variations on traditional s’mores are sure to be a hit with everyone at the campsite. Whether you’re looking for a quick and easy treat or a more elaborate dessert to impress your fellow campers, these s’mores recipes are a great way to enjoy a camping classic with a twist.

Conclusion:

Camping desserts are a fun and delicious way to end a day of outdoor adventures. Whether you prefer classic campfire treats, indulgent pies, portable stove desserts, no-bake options, or creative creations, there is a camping dessert for every taste and preference. So next time you plan a camping trip, don’t forget to pack the ingredients for a sweet treat that will make your camping experience even more memorable.

The Ultimate Guide to tne Camping Canopy

Introduction:

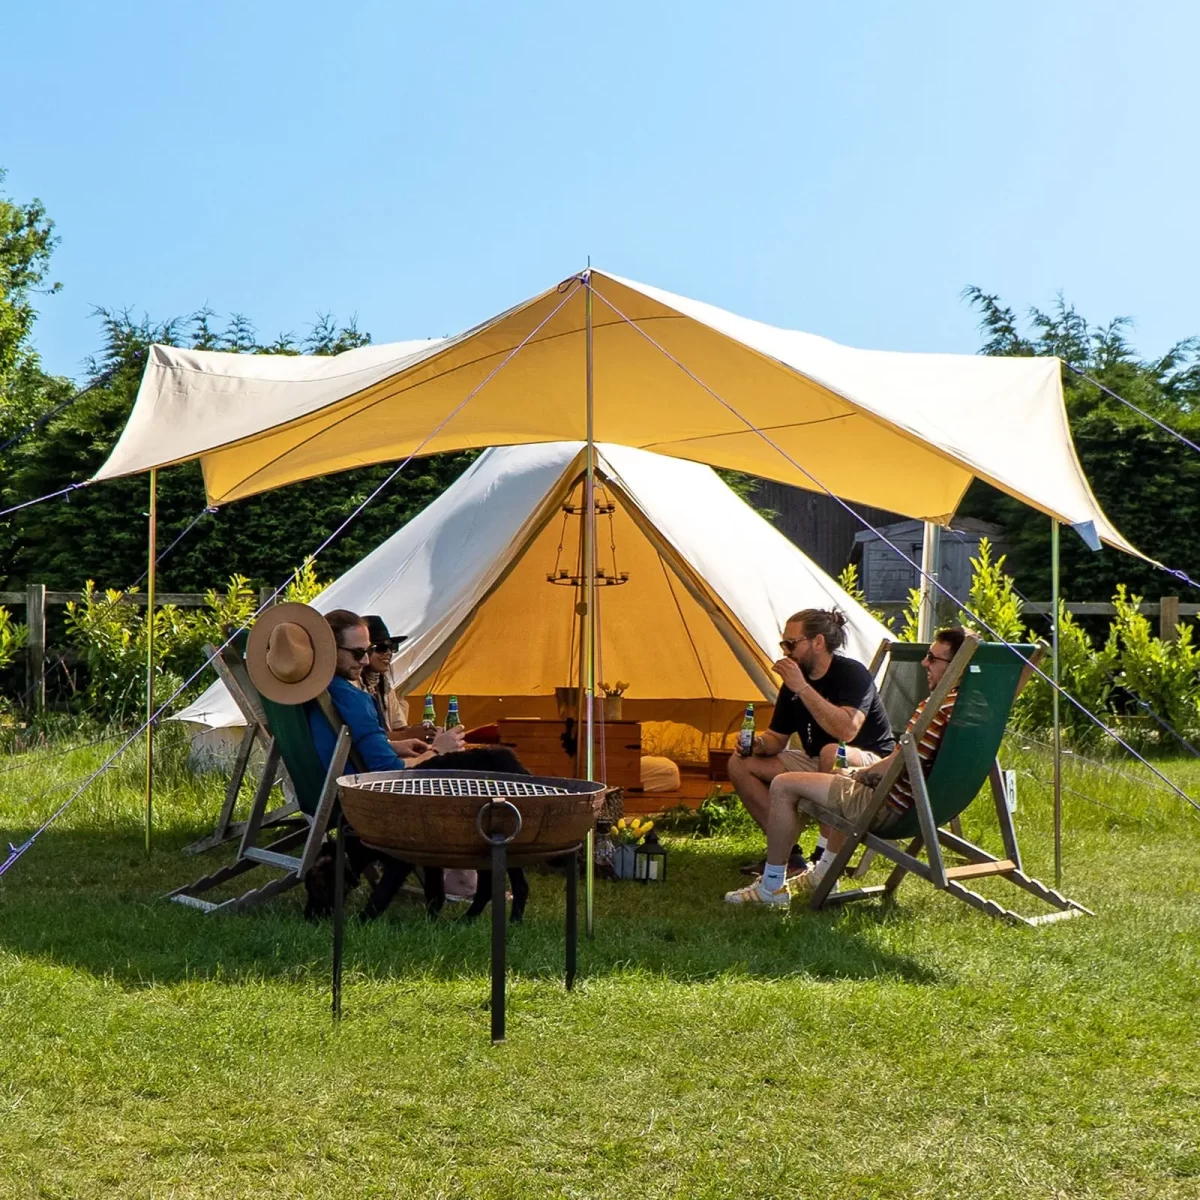
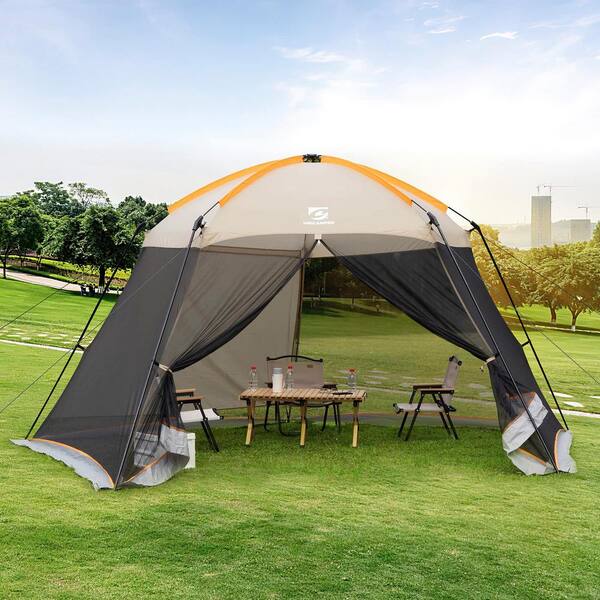
Camping canopies are essential for outdoor enthusiasts who want to protect themselves from the elements while enjoying the great outdoors. Whether you’re planning a weekend getaway or a longer camping adventure, having a reliable canopy can make all the difference in your experience. In this comprehensive guide, we’ll explore everything you need to know about camping canopies, including their benefits, types, and best practices for setting them up.

Pop Up Canopy UPF50+ Tent with Side Wall for  Camping

Part 1: Benefits of Camping Canopies

Level 1: Protection from the Elements
Camping canopies provide shelter from rain, sun, and wind, allowing campers to enjoy their outdoor activities without worrying about the weather. They also offer a shaded area to relax, eat, and socialize, making them a versatile addition to any camping trip.

Level 2: Versatility and Portability
Many camping canopies are designed to be lightweight and easy to transport, making them ideal for car camping, RV trips, and even backpacking excursions. Their versatility and portability allow campers to set up a comfortable outdoor living space wherever they go.

Part 2: Types of Camping Canopies

Level 1: Pop-Up Canopies
Pop-up canopies are a popular choice for campers due to their easy setup and takedown. These canopies typically feature a collapsible frame and a durable fabric cover, providing instant shade and protection.

Level 2: Dome Tents with Canopy Attachment
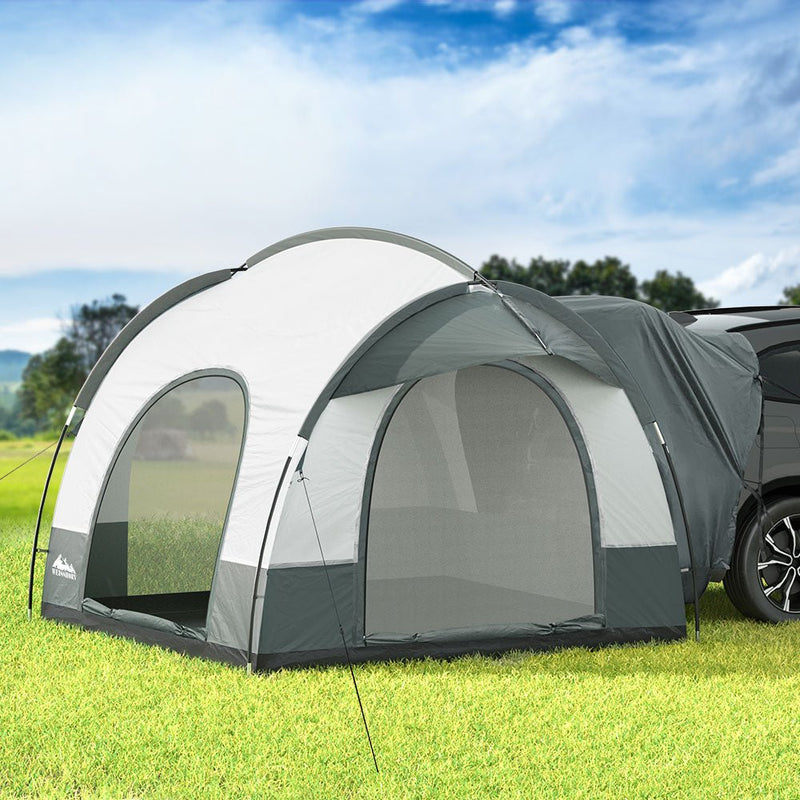
Some campers prefer the convenience of combining their shelter and canopy by using a dome tent with a built-in canopy attachment. This setup offers all-in-one protection and is especially popular for family camping trips.

Part 3: Setting Up a Camping Canopy

Level 1: Choosing the Right Location
Before setting up your camping canopy, it’s important to select a suitable location that is free from obstacles and provides adequate space for the canopy. Look for a flat and level area, and consider the direction of the sun and wind to maximize comfort.

Level 2: Anchoring and Securing the Canopy
Once you’ve chosen a location, it’s crucial to secure the canopy to the ground to prevent it from blowing away in strong winds. Anchoring options include stakes, weights, and guy lines, depending on the terrain and weather conditions.

Part 4: Maintaining Your Camping Canopy

Level 1: Cleaning and Storage
Regular cleaning and proper storage of your camping canopy will help extend its lifespan and maintain its functionality. Follow the manufacturer’s instructions for cleaning the fabric and frame, and store the canopy in a cool, dry place when not in use.

Level 2: Inspecting for Wear and Tear
Before each camping trip, inspect your canopy for any signs of wear and tear, such as loose or damaged components. Addressing these issues promptly will ensure that your canopy remains reliable and safe to use.

Part 5: Tips for Choosing the Right Camping Canopy

Level 1: Consider Your Needs
When shopping for a camping canopy, consider your specific needs and the conditions you are likely to encounter. Factors to consider include size, weight, durability, and weather resistance. For example, if you frequently camp in windy or rainy environments, prioritize a canopy with strong construction and water-resistant materials.

Level 2: Read Reviews and Seek Recommendations
Before making a purchase, read online reviews and seek recommendations from fellow campers to find the best camping canopy for your needs. Pay attention to feedback about ease of setup, durability, and overall performance to make an informed decision.

Screen House Room-Camping Tent-Outdoor Canopy

Part 6: Benefits of a Camping Canopy

A camping canopy is a versatile and practical addition to any camping trip, offering a range of benefits that can enhance the overall camping experience. One of the main advantages of a camping canopy is the protection it provides from the elements. Whether it’s shielding against sun exposure, providing a dry space during unexpected rain showers, or helping to block out strong winds, a canopy can help to create a more comfortable and enjoyable camping environment.

Additionally, a camping canopy can also serve as a central gathering point for campers, providing a designated space for cooking, dining, and socializing. This can be particularly useful during inclement weather when spending time outdoors may not be ideal. By setting up a canopy, campers can still enjoy the natural surroundings while staying sheltered from the elements.

Another benefit of a camping canopy is its portability and ease of set-up. Many canopies are designed to be lightweight and simple to assemble, making them an ideal choice for both experienced and novice campers. With the ability to quickly set up and take down a canopy, campers can spend less time on campsite logistics and more time enjoying their outdoor adventure.

In conclusion, a camping canopy offers a range of benefits that can greatly enhance the camping experience. From providing essential protection from the elements to serving as a central gathering point, a canopy is a valuable addition to any camping trip.

Part 7: Choosing the Right Camping Canopy

When it comes to selecting a camping canopy, there are several factors to consider in order to find the right fit for your camping needs. The first consideration is the size of the canopy, as it should be large enough to accommodate your camping party and any necessary equipment or gear. Additionally, the height of the canopy is important, as it should allow for comfortable standing and movement underneath.

Another important factor to consider when choosing a camping canopy is the material and construction. Look for a canopy that is made from durable and weather-resistant materials, such as polyester or nylon, which can offer protection from the sun, wind, and rain. Additionally, consider the frame of the canopy, as it should be sturdy and able to withstand the rigors of outdoor use.

The ease of set-up and takedown is another key factor to consider when choosing a camping canopy. Look for a canopy that is designed for quick and simple assembly, with user-friendly features such as telescoping legs, adjustable height settings, and easy-to-use fastening mechanisms. A canopy that can be easily transported and stored is also essential for convenience and portability.

In conclusion, choosing the right camping canopy involves considering factors such as size, material, construction, and ease of use. By carefully evaluating these factors, campers can find a canopy that meets their specific camping needs and enhances their outdoor experience.

Part 8: Tips for Maintaining Your Camping Canopy

To ensure that your camping canopy remains in good condition and continues to provide reliable shelter and protection during your outdoor adventures, it’s important to implement regular maintenance and care. One of the simplest ways to maintain a camping canopy is to regularly clean it. Before storing the canopy, remove any dirt, debris, or stains by gently brushing or wiping down the fabric and frame. For tougher stains, use a mild soap and water solution and allow the canopy to air dry thoroughly.

It’s also important to inspect the canopy for any signs of wear and tear, such as fraying fabric, bent or damaged frame components, or weakened connections. Address any issues promptly to prevent further damage and ensure the canopy remains structurally sound and reliable.

Additionally, proper storage of the canopy when not in use is essential for maintaining its longevity. Store the canopy in a dry, cool, and well-ventilated space to prevent mold and mildew growth. It’s also advisable to store the canopy in a carrying case or bag to protect it from dust, moisture, and potential damage during transportation.

Lastly, it’s important to follow the manufacturer’s guidelines for care and maintenance, as well as any specific instructions provided with the canopy. By following these tips for maintaining your camping canopy, you can ensure that it remains in optimal condition and continues to serve as a reliable and essential camping accessory for many outdoor adventures to come.

Camping Tent Car SUV Rear Extension Canopy Portable Outdoor Family 4WD

Conclusion:

A well-chosen camping canopy can significantly enhance your outdoor camping experience by providing comfort and protection from the elements. By understanding the benefits, types, setup, maintenance, and selection tips for camping canopies, you can make an informed decision and enjoy the great outdoors with peace of mind and comfort.

Navigate Off-Road Adventures with Van Compass Upgrades

Introduction to Van Compass Upgrades

Van Compass upgrades are essential for avid adventurers eager to tackle off-road challenges. These upgrades offer a mix of performance enhancements, durability improvements, and added comfort for your journey. They transform standard vans into versatile off-road machines capable of traversing diverse terrains. Van Compass, a renowned name in the aftermarket upgrade industry, provides a wide range of products. These include suspension kits, skid plates, lift kits, and upgraded shock absorbers. Each product is designed with precision and tailored to meet the demands of rough landscapes. Van Compass upgrades cater not only to performance but also to the safety and longevity of your vehicle. Coupled with expert advice and detailed installation guides, these upgrades ensure your van is ready for any adventure.

Van Compass

Importance of Upgrades for Off-Road Adventure Vans

Upgrading your van is crucial for off-road adventures. These enhancements boost your van’s handling and safety across rugged terrains. Van compass upgrades can transform a standard van into an off-road powerhouse. They enhance the vehicle’s durability and adaptability, allowing you to explore new terrains with confidence. Upgrades like suspension kits and skid plates protect your van from wear and tear. They ensure your vehicle can withstand harsh conditions, such as rocky paths and steep inclines. Additionally, improvements in shocks and lift kits increase ground clearance. This provides better navigation over obstacles and uneven surfaces. For adventurers, this means going further with fewer worries about vehicle damage. Overall, van Compass upgrades are investments that equip your van for thrilling, safe off-road journeys.

Key Van Compass Upgrades for Enhanced Performance

Enhancing your van’s performance is key for successful off-road adventures. Van Compass offers several upgrades that are crucial for turning any van into an off-roading champion. Here, we explore the top upgrades by Van Compass that are designed to boost your vehicle’s performance on challenging terrains.

Suspension Kits: The Backbone of Off-Road Performance

Upgraded suspension kits are a must-have for any serious off-road adventure. The Van Compass suspension kits offer improved stability and ride comfort on uneven surfaces. They also increase the van’s ability to absorb the impact when driving over obstacles.

Lift Kits: Elevating Your Adventure

Lift kits are essential to enhance the ground clearance of your van. This allows for a higher level of maneuvering over rocks and deep ruts. Van Compass lift kits ensure your van remains unharmed by the rough grounds beneath.

Skid Plates: Vital Underside Protection

Driving over unpredictable terrain means your van’s underside is constantly at risk. Skid plates crafted by Van Compass shield crucial components from being damaged by rocks and debris.

Upgraded Shock Absorbers: Smoother Rides Over Bumps

The role of upgraded shock absorbers cannot be overstated in off-roading. They ensure that your van handles bumps and dips with ease, delivering a smoother experience for passengers and driver alike. Van offers high-quality shock absorbers that are designed specifically for demanding off-road conditions.

Incorporating these key Van Compass upgrades will not only enhance your van’s performance but also improve its durability. Each upgrade is an investment in your vehicle’s capability and longevity, guaranteeing that your off-road adventures are both thrilling and safe.

Van Compass, 14028 N Ohio Street, Rathdrum, ID (2024)

Installation Guide for Van Compass Products

Installing Van Compass upgrades can seem daunting, but with the right guidance, it’s quite manageable. Here’s a step-by-step guide to help you install these essential off-road modifications in your van efficiently and safely.

Step 1: Prepare Your Vehicle

Start by securing your van on a flat surface. Make sure it is turned off and the keys are removed. Gather all the tools and parts specified in the Van Compass user manual for the upgrades you are installing.

Step 2: Install Suspension Kits

Begin with suspension kits as they form the foundation for other upgrades. Remove the old suspensions according to the instructions. Install the new Van suspension kits, ensuring all bolts are tightened to the manufacturer’s specifications.

Step 3: Add Lift Kits

After the suspension, install the lift kits. This will involve lifting the vehicle body from the chassis. Follow the Van Compass manual closely to place and secure the lift components correctly.

Step 4: Attach Skid Plates

Next, protect your vehicle’s underside by installing skid plates. Position them to cover vital areas and attach using the provided hardware. Ensure there is no loose fitting to avoid rattles or loss during travel.

Step 5: Replace Shock Absorbers

Replace the standard shock absorbers with the upgraded ones from Van Compass. This will improve your van’s handling over rough terrains. Bolt them in place and check their functionality before proceeding.

Step 6: Final Inspection and Testing

Once all installations are complete, perform a thorough inspection to ensure everything is properly secured. It’s advisable to test drive your van in a controlled environment to adjust to the new settings.

By following these steps carefully, you can successfully install Van Compass products and enhance your van’s off-road capabilities. Remember, safety is paramount, so always refer to the official Van installation manuals and use proper tools for the job.

WTD – Ford Transit 3″ 2WD Lift Kit “Mojave” – WeldTec Designs

Maximizing Your Van’s Potential with Suspension Kits

Maximizing the potential of your van for off-road adventure begins with the right suspension kits. Van Compass provides quality suspension upgrades that do more than just improve the ride. They ensure your van can handle the bumps and turns of off-road travel with precision and ease. By installing a Van Compass suspension kit, you elevate your vehicle’s performance to meet the challenges of any terrain.

Suspension kits from Van Compass are designed to increase the overall stability and comfort of your van while driving on uneven ground. The heavy-duty components replace your van’s standard suspension parts, which are not typically designed for off-road stress. These enhancements allow for greater weight distribution and improved shock absorption. What this means for adventurers is a van that stays level and composed, even when the trail gets tough.

With the suspension system revamped, you’ll notice that your van reacts more promptly to steering inputs. This responsiveness is crucial when navigating through tight spots or avoiding obstacles. Also, a lifted suspension can provide your van with extra clearance, which helps prevent damage to the underbody when crossing over large rocks or deep ruts.

Incorporating a Van Compass suspension kit into your off-road upgrades is a smart move. It gives you the confidence to push further into the unknown, knowing that your vehicle is backed by reliable, robust engineering. These kits are essential for any van owner looking to go off the beaten path and explore what nature has to offer.

Remember, quality suspension kits from Van Compass are not just about enhanced ability; they’re a critical upgrade for the longevity of your vehicle. As you prepare for your next off-road adventure, consider how a suspension kit could be the key to maximizing your van’s potential.

Essential Van Compass Accessories for Off-Roading

Van Compass offers a range of accessories to boost your off-roading experience. Here are some must-have items to consider when preparing your van for rugged terrains:

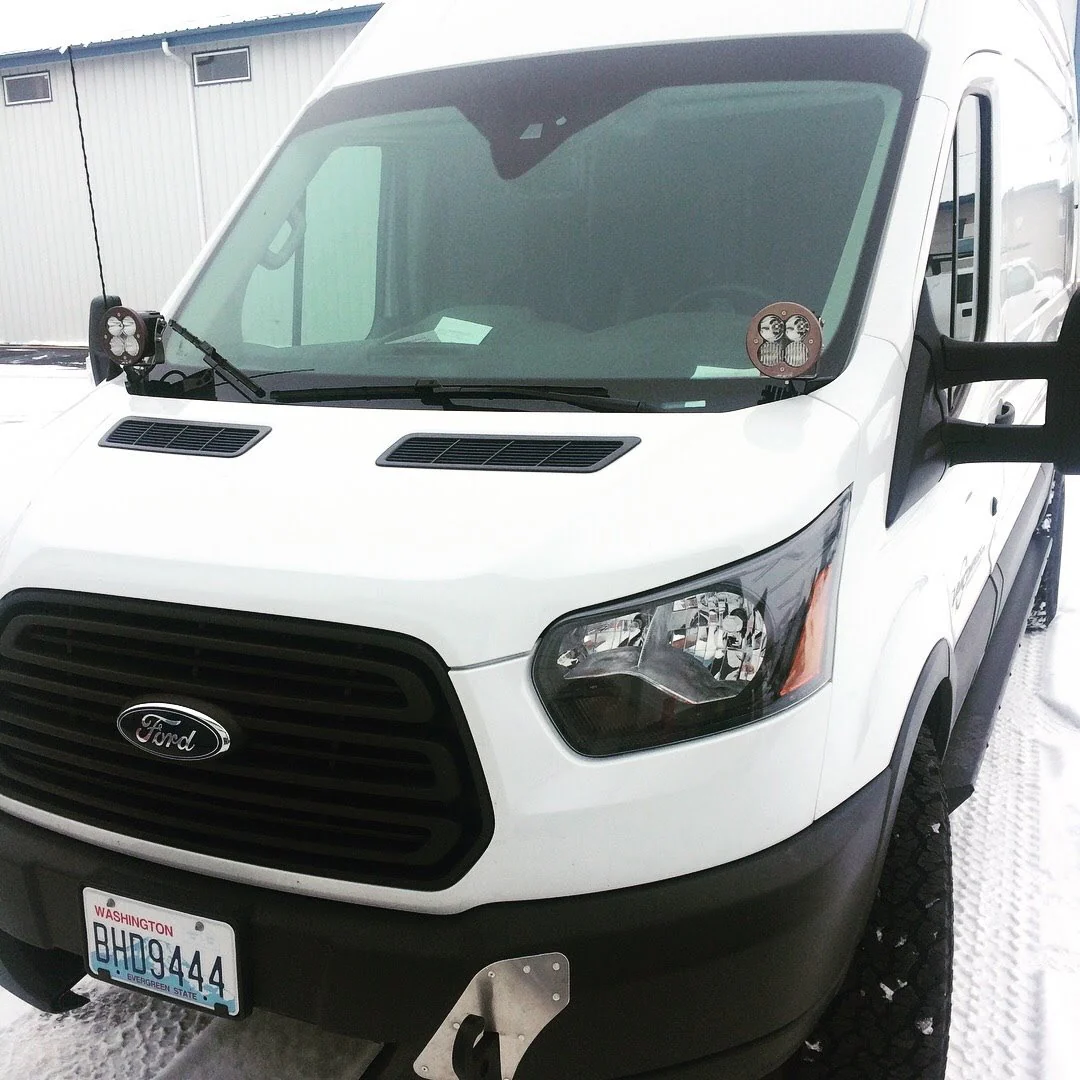
  • Off-Road Lighting: Good lighting is crucial on unlit trails. Van Compass provides powerful LED lights. They ensure a well-illuminated path, enhancing safety during night-time adventures.
  • All-Terrain Tires: Equip your van with tires suited for various landscapes. These tires offer improved grip and durability, crucial for navigating rocky or muddy environments.
  • Recovery Gear: Always be prepared for sticky situations. Van Compass recovery kits include items like winches and tow straps. These are essential if your van gets stuck or needs to pull obstacles out of the way.
  • Storage Solutions: Maximize space with smart storage solutions. Secure racks and boxes help organize and safeguard your gear, regardless of the terrains you traverse.

These accessories from Van not only complement their major upgrades like suspension kits and lift kits but are also vital for a fully-optimized off-road adventure. Equip your van with these essential accessories, and you’re set for any off-road challenge.

Navigating Tough Terrains: Tires and Protection Gear

To navigate tough terrains effectively, selecting the right tires and employing robust protection gear is crucial. Here’s how Van can help enhance your van’s capability in handling challenging environments.

Selecting the Right Tires for Every Terrain

Choosing appropriate tires is essential for any off-roading van. Van Compass offers all-terrain tires that provide increased durability and superior grip. These tires are designed to perform well on various surfaces, from muddy paths to rocky inclines. With better traction, your van can tackle steep and slippery terrains with confidence.

Essential Protection Gear for Your Van

While exploring rough terrains, protecting your van’s undercarriage and body is vital. Van Compass offers a range of protection gear, including robust skid plates and durable side protectors. Skid plates shield essential components underneath your van from rocks and debris. Side protectors help prevent damage to the body of your van from harsh impacts. Together, these items ensure that your vehicle remains safe and undamaged, no matter the obstacles you encounter.

By equipping your van with appropriate tires and essential protection gear from Van Compass, you can confidently take on even the toughest off-road challenges. This preparedness not only enhances your van’s performance but also ensures its longevity in harsh conditions.

Real-Life Experiences: Customer Stories and Transformation

Hearing real-life stories from customers who have experienced the transformative power of Van Compass upgrades can be incredibly inspiring. These tales not only show the tangible benefits of the upgrades but also illustrate the enhanced adventures and possibilities that come with a properly equipped van. Here are a few customer stories and how Van Compass has changed their off-road experiences.

  • The Desert Explorer: One customer shared how after installing Van Compass suspension and lift kits, their van conquered dunes with ease. This was a game-changer for their desert excursions.
  • The Mountain Trailblazer: Another adventurer recounted the peace of mind they gained. The Van Compass skid plates protected their van’s underside on rocky mountain paths.
  • The Long-Haul Traveler: A family that loves cross-country trips found comfort in upgraded shock absorbers that smoothed out rough terrain, making their journeys more enjoyable.

Each story is a testament to the improved capability and durability of vans equipped with Van Compass products. Customers have praised how these upgrades elevated their off-road adventures, providing both safety and performance enhancements. Van Compass takes pride in these positive transformations and uses the feedback to continually refine their products for even greater customer satisfaction. As more adventurers turn to Van Compass for their off-roading needs, the catalog of inspiring stories will surely grow.

Conclusion: Gearing Up for the Ultimate Off-Road Excursion

As you prepare for your off-road adventures, remember that the right upgrades are essential. Van products provide the performance enhancement, durability, and safety you need. From rugged suspension kits to robust skid plates, each upgrade ensures your van can handle tough terrains. Equipping your van with proper off-road tires and protection gear from Van Compass can make a huge difference. These preparations enable you to explore new, challenging environments with confidence. Embrace the thrill of adventure and gear up your van with Van Compass upgrades for a memorable and safe excursion off the beaten path.

Jeep Compass 2011: A Detailed Review

Introduction to the Jeep Compass 2011

Overview and Model Significance

The Jeep Compass 2011 marks a significant model in the compact SUV segment. Introduced by Jeep, a brand celebrated for its durable and robust vehicles, the 2011 Compass combines affordability with the off-road capabilities characteristic of the brand. The model offers a fresh design and various enhancements aimed at improving the comfort and driving experience compared to its predecessors. It was designed to attract both traditional Jeep enthusiasts and new customers seeking a reliable and versatile vehicle capable of handling diverse driving conditions.

Key Features and Specifications

The Jeep Compass 2011 stands out with its range of features designed to enhance the driving experience. It comes equipped with a 2.4-liter I4 engine, capable of generating adequate power for both city travel and off-road adventures. It offers an option between a five-speed manual or a continuously variable transmission (CVT), giving drivers a choice according to their driving preference. Notable features include electronic stability control, anti-lock brakes, and a sophisticated four-wheel-drive system, providing increased traction and stability in varied terrains. The model also boasts significant improvements in fuel efficiency, making it a more economical choice for consumers. Interior enhancements include increased cabin space, upgraded materials, and modern technological integrations such as the Uconnect system for entertainment and navigation, ensuring comfort and convenience for all passengers.

LED DRL Daytime Running Light Bumper Fog Lights With Turn For Jeep Compass  2011 2016

Design and Styling

Exterior Aesthetics

The Jeep Compass 2011 boasts a bold and rugged look characteristic of the Jeep lineage. Design updates breathe a modern twist into the traditional Jeep aesthetic, incorporating a sleeker front grille and updated headlight design. This model also introduced softer lines along the sides, aimed at giving it a more streamlined profile. Jeep aimed to strike a balance between a rough-hewn appearance and urban sophistication, and the Compass 2011 pulled it off with features like the iconic seven-slot grille complemented by chrome accents. Although compact, it stands out with its commanding presence and unmistakable Jeep identity.

Interior Design and Comfort

Inside, the Jeep Compass 2011 prioritizes comfort and functionality. Jeep revamped the interior with a focus on higher-quality materials and ergonomic design. Drivers enjoy a spacious and user-friendly dashboard, with controls laid out for easy access. The seats offer improved cushioning and support, with optional leather upholstery adding a touch of luxury. Rear-seat passengers benefit from ample legroom, contributing to an overall sense of spaciousness. With enhancements such as acoustic windshield glass and increased sound deadening, the Compass 2011 also ensures a quieter cabin, enhancing the sense of sanctuary during both city and off-road drives. With these upgrades, the Jeep Compass 2011 created an interior that drivers and passengers could enjoy for both short commutes and long adventures.

Performance

Engine and Transmission Details

The Jeep Compass 2011 is powered by a robust 2.4-liter Inline-4 engine. This engine delivers a commendable balance of power and efficiency, making it suitable for both city driving and off-road ventures. Buyers have options between a standard five-speed manual or a continuously variable transmission (CVT). The manual transmission provides traditional control and engagement, while the CVT offers ease with a smoother driving experience. This combination in the Jeep Compass 2011 allows drivers to select the style that best suits their driving preferences, ensuring a responsive and adaptable ride.

Fuel Efficiency and Economy

Fuel efficiency is a vital aspect of the Jeep Compass 2011, designed to appeal to cost-conscious consumers. Its engine and transmissions are optimized to enhance mileage, reducing the frequency and cost of fuel refills. On average, the Jeep Compass 2011 achieves an impressive fuel economy, which stands competitively within the compact SUV category. This makes the vehicle not only an excellent choice for adventure-seekers but also for daily commuters looking for a fuel-efficient, yet capable vehicle. The combination of efficiency and performance aspects makes the Jeep Compass 2011 an attractive choice for a wide range of buyers.

auto parts full black plastic front bumper grille molding grille insert  7pcs for Jeep Compass 2011

Safety Features

Safety Ratings and Crash Test Results

The Jeep Compass 2011 has undergone rigorous testing to ensure its safety. Independent bodies have rated it highly in various crash tests. This compact SUV receives commendable scores in frontal and side crash tests, demonstrating robust protection for occupants. These results provide confidence to both drivers and passengers about their safety during unforeseen events.

Advanced Safety Technologies

Jeep has equipped the 2011 Compass with cutting-edge safety technologies. It features electronic stability control and anti-lock braking system as standard, which help maintain vehicle control in slippery conditions. Moreover, the inclusion of supplemental front and side-curtain airbags adds an extra layer of protection. For enhanced visibility, the Jeep Compass 2011 incorporates fog lamps and a rearview camera, which are crucial for safe driving during poor visibility conditions or while reversing.

Comparisons and Competition

How It Stacks Up Against Rivals

When considering the Jeep Compass 2011, it’s essential to compare it with its rivals. The Compass 2011 stands out in the compact SUV segment for its off-road prowess, a trait less emphasized in competitors like the Honda CR-V and Toyota RAV4. The Jeep offers a unique blend of capability and value. Its 2.4-liter I4 engine is on par with other SUVs in its class but shines in delivering a rugged driving experience. The Compass also provides options for a manual or a CVT transmission, allowing buyers to choose based on their driving style.

In comparison, the CR-V and RAV4 lean more towards on-road comfort and fuel economy. These rivals have stronger reputations for reliability, but they do not match the Jeep’s off-road capabilities. The Compass 2011’s interior upgrades and tech features like the Uconnect system help it hold its ground against these market leaders. However, where it falls short is in luxury and refinement, areas where its competitors have made significant strides.

Market Positioning

The Jeep Compass 2011 is positioned as a budget-friendly compact SUV with an adventurous spirit. Jeep branded the Compass as a vehicle suitable for daily commuting and weekend excursions alike, appealing to a wide demographic. It boasts the ruggedness expected from Jeep, at a price point accessible to many. This makes it attractive to younger buyers and families looking for an economical, yet capable vehicle.

In the market, the Compass aimed to bridge the gap between a full-fledged off-roader and a suburban family car. This positioning has helped it to carve out its unique niche. While it does not dominate any single aspect such as luxury or fuel efficiency, the Jeep Compass 2011 offers a balanced package that includes reasonable cost of ownership, respectable safety features, and versatile driving capabilities. Its standing in the market is as a capable all-rounder with a touch of Jeep’s adventurous DNA.

Owner Experiences

Common Praises and Criticisms

Owners of the Jeep Compass 2011 frequently applaud its affordability and off-road capabilities. Drivers appreciate the versatile nature of the SUV, which performs well in both urban and rough terrains. Its fuel efficiency is also highlighted, making it a cost-effective choice for many. Enhanced interior comfort, attributed to upgraded materials and tech integrations like Uconnect, adds to the praise. However, some criticisms exist. Owners report that compared to rivals, the Compass 2011 could improve in terms of interior luxury and refinement. Some also point out that the engine noise is more apparent, especially during high-speed travel, which might detract from a pleasant driving experience.

Known Issues and Recalls

The Jeep Compass 2011 has had several recalls and common mechanical issues that prospective buyers should be aware of. Notably, there were recalls related to the airbag control module, which could compromise passenger safety during an accident. Additionally, issues with the CVT transmission were reported, leading to poor performance and a lack of reliability in significant driving conditions. These problems underline the importance of thorough inspections and maintenance checks for current and potential owners of used models. Despite these challenges, many owners find the Jeep Compass 2011 a reliable vehicle when properly maintained.

Jeep Compass 2011

Maintenance and Aftercare

To keep the Jeep Compass 2011 running smoothly, proper maintenance is crucial.

Cost of Ownership

Owning a Jeep Compass 2011 involves various expenses that owners need to consider. These costs include routine maintenance like oil changes, tire rotations, and periodic checks of the brakes and batteries. On average, annual servicing and minor repairs can range from a few hundred to over a thousand dollars, depending on usage and maintenance practices. Insurance costs for this model are relatively standard for a compact SUV.

Jeep Compass 2011 owners should also account for potential major repairs. Over longer periods, parts like the transmission, suspension, and exhaust system may require attention. For used Compass buyers, setting aside a maintenance fund is a wise move to cover unexpected expenses.

Apart from regular maintenance costs, fuel economy plays a role in the overall cost of ownership. With its competitive fuel efficiency, the Compass 2011 helps keep fuel costs lower compared to less efficient SUVs. Additionally, because the Jeep brand is widespread, parts are generally accessible and reasonably priced, which can mitigate maintenance costs over the vehicle’s lifetime.

Tips for Long-Term Maintenance

For long-term care of the Jeep Compass 2011, routine checks and prompt action on any issues are key. Here are some tips for sustaining the vehicle’s performance:

  1. Follow the Service Schedule: Adhere to the manufacturer’s service schedule. This is crucial for ensuring that all components are functioning correctly.
  2. Check Fluid Levels Regularly: Keep an eye on the levels of engine oil, transmission fluid, coolant, and brake fluid.
  3. Monitor Tire Health: Regularly check tire pressure and tread wear to ensure optimal handling and fuel economy.
  4. Be Observant: Pay attention to any irregular noises or signs of wear and promptly address them.
  5. Use Quality Parts: When repairs are needed, opt for OEM or high-quality aftermarket parts for longevity.

By keeping up with these practices, owners can maintain the resilience and reliability of their Jeep Compass 2011 and potentially prevent costly repairs down the line.