Camping Stove Propane: Everything You Need to Know

Introduction

Camping stove propane is an essential tool for any outdoor enthusiast. Whether you’re a seasoned camper or new to the outdoor lifestyle, having a reliable and efficient camping stove can make all the difference in your outdoor cooking experience. In this comprehensive guide, we’ll cover everything you need to know about camping stove propane, including the different types of camping stoves, how propane works, safety tips, and the advantages of using propane for outdoor cooking.

Part 1: Types of Camping Stoves Powered by Propane

Level 1: Understanding the Different Types of Camping Stoves

  • There are various types of camping stoves on the market, with some specifically designed to be powered by propane. These include portable, backpacking, and freestanding stoves.
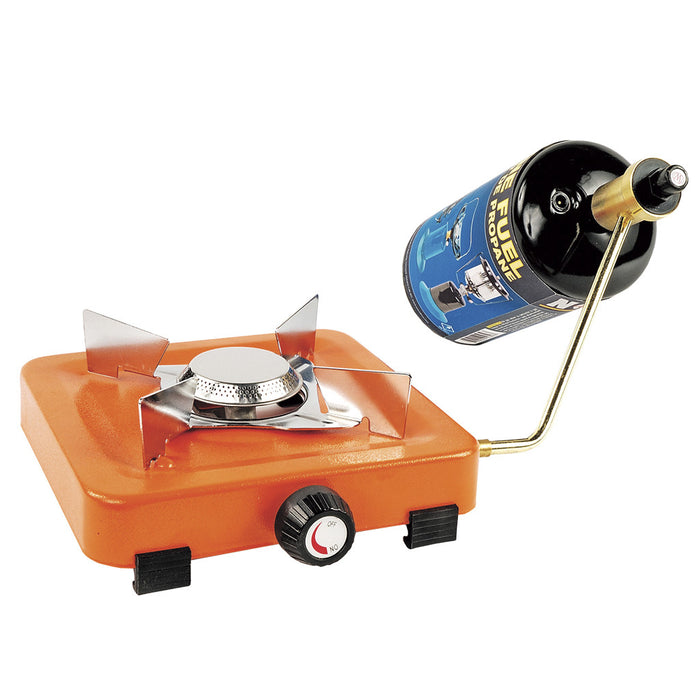
  • Portable camping stoves are lightweight, compact, and easy to transport, making them ideal for car camping and other outdoor adventures. They typically run on small propane canisters and are perfect for cooking meals on the go.

Level 2: Choosing the Right Camping Stove for Your Needs

  • When selecting a camping stove powered by propane, it’s essential to consider factors such as fuel efficiency, ease of use, and cooking capabilities.
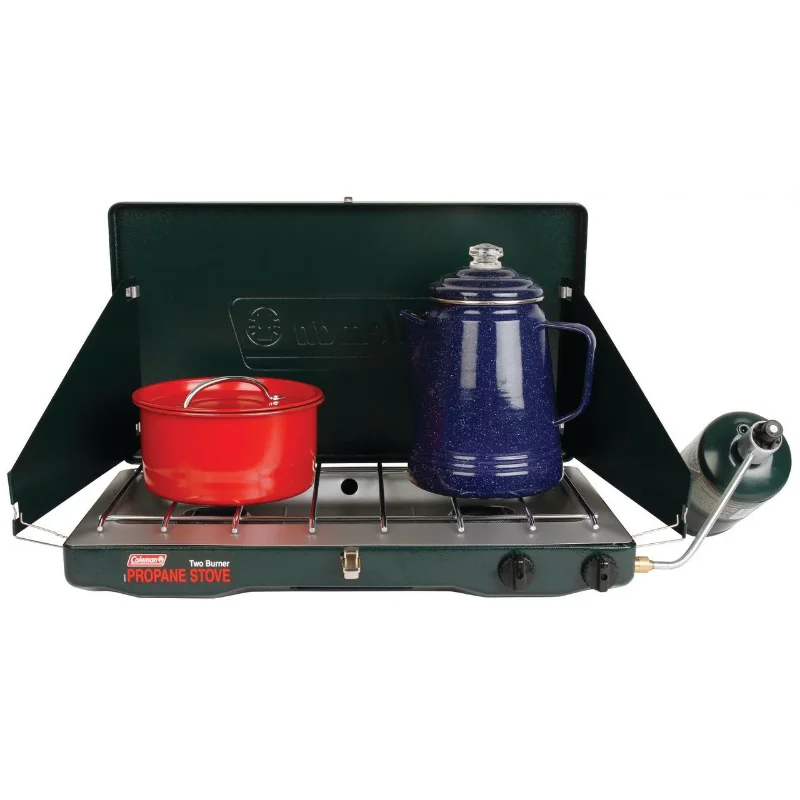
  • If you’re an avid backpacker or adventurer, a lightweight and compact backpacking stove that runs on small propane canisters may be the best option. For larger groups or extended camping trips, a freestanding camping stove with multiple burners and a more substantial propane tank may be more suitable.

Classic 2 Burner Propane Gas Camping Stove

Part 2: How Propane Works as a Fuel Source for Camping Stoves

Level 1: Understanding the Basics of Propane

  • Propane is a type of liquefied petroleum gas (LPG) that is commonly used as a fuel source for camping stoves, grills, and other outdoor equipment.
  • It is a clean-burning and efficient fuel that produces a high heat output, making it ideal for cooking in outdoor environments.

Level 2: Propane Canister Compatibility and Refilling Options

  • Propane canisters come in various sizes and are equipped with a valve and pressure regulator that allows for easy connection to camping stoves.
  • In addition to disposable propane canisters, many camping stoves are compatible with refillable propane tanks, which can be filled at various outdoor retailers or propane refilling stations.

Part 3: Safety Tips for Using Camping Stove Propane

Level 1: Understanding Propane Safety

  • Propane is a safe and reliable fuel source when used correctly, but it’s essential to follow specific safety guidelines to prevent accidents and injuries.
  • Never use a camping stove in an enclosed or poorly ventilated area, as this can lead to carbon monoxide poisoning. Always use your camping stove outdoors in a well-ventilated area.

Level 2: Best Practices for Propane Stove Use

  • Always check the condition of your propane canisters before use, and never use damaged or expired canisters.
  • When connecting propane canisters to your camping stove, be sure to follow the manufacturer’s instructions carefully to ensure a proper and secure connection.

Part 4: Advantages of Using Propane for Outdoor Cooking

Level 1: Efficiency and Convenience

  • Propane is a highly efficient fuel source that delivers consistent heat output, making it easy to cook a wide range of meals in outdoor settings.
  • Unlike traditional campfires, propane stoves allow for precise temperature control and can be quickly and easily ignited and extinguished, providing a convenient cooking experience.

Level 2: Environmental Considerations and Clean Burning

  • Propane is a clean-burning fuel that produces minimal emissions, making it an environmentally friendly choice for outdoor cooking.
  • When compared to other fuel sources such as charcoal or wood, propane is less harmful to the environment and reduces air pollution, making it a responsible choice for outdoor enthusiasts.

Part 5: Maintenance and Care for Camping Stove Propane

Level 1: Cleaning and Storage

  • Regular maintenance and cleaning of your camping stove and propane equipment are essential for ensuring safe and efficient operation.
  • After each use, be sure to clean your camping stove and inspect the propane canisters for any signs of damage or wear. Properly store your propane canisters in a cool, dry place away from direct sunlight and extreme temperatures to prolong their shelf life.

Level 2: Troubleshooting and Repairs

  • If you encounter any issues with your camping stove or propane equipment, it’s essential to troubleshoot and address the problem promptly.
  • Be sure to follow the manufacturer’s guidelines for troubleshooting and repairs and seek professional assistance if necessary to ensure the safe and continued operation of your camping stove propane equipment.

World Famous Single Burner Propane Stove

Part 6: How to Choose the Right Camping Stove Propane

When it comes to choosing the right camping stove propane, there are a few key factors to consider. First and foremost, you’ll want to ensure that the stove is compatible with the type of propane canisters you’ll be using. Some camping stoves are designed to work with specific types of canisters, so it’s important to check the compatibility before making a purchase.

Next, consider the size and weight of the stove. If you’ll be carrying the stove on backpacking trips, you’ll want to opt for a lightweight and compact option. On the other hand, if you’ll be car camping, you may have more flexibility in terms of size and weight.

Another important factor to consider is the cooking power of the stove. Higher BTU stoves will generally boil water and cook food more quickly, but may also consume more fuel. Finally, consider any additional features that may be important to you, such as built-in wind screens, piezo ignition systems, or the ability to connect multiple stoves together for larger cooking surfaces. By taking these factors into consideration, you can ensure that you choose the right camping stove propane for your needs.

Part 7: Tips for Using a Camping Stove Propane Safely

Using a camping stove propane safely is essential to enjoying your outdoor cooking experiences without any incidents. Here are some tips to help you use your camping stove propane safely:

  1. Always read the manufacturer’s instructions and follow them carefully.
  2. Only use your camping stove in a well-ventilated area to avoid carbon monoxide buildup.
  3. Keep the stove on a stable surface and away from flammable materials.
  4. Check for any leaks before each use by applying a soapy solution to the connections and looking for bubbles.
  5. Ensure that the stove is fully turned off before disconnecting the propane canister.
  6. Store your propane canisters in a cool, dry place away from direct sunlight and extreme heat.
  7. If you smell gas, turn off the stove and move away from the area immediately.

By following these tips, you can ensure that you use your camping stove propane safely and enjoy your outdoor cooking experiences without any safety concerns.

Single Burner Propane Stove Camping Hiking Outdoors Backpacking - Sports & Outdoors

Part 8: Maintaining Your Camping Stove Propane

Proper maintenance of your camping stove propane is essential to ensuring its longevity and reliable performance. Here are some tips for maintaining your camping stove propane:

  1. Clean the stove regularly to remove any built-up residue that can affect its performance.
  2. Inspect the stove for any signs of wear or damage, and replace any worn or damaged parts as needed.
  3. Check the propane canister connections for any leaks and tighten them if necessary.
  4. Store your stove in a clean, dry place when not in use to prevent rust and corrosion.
  5. Inspect the fuel lines for any signs of damage and replace them if necessary.
  6. Consider having your stove serviced by a professional if you notice any issues with its performance.

By following these maintenance tips, you can ensure that your camping stove propane stays in top condition and provides you with reliable performance for many outdoor adventures to come.

Conclusion

Camping stove propane is a versatile and reliable fuel source that offers a range of benefits for outdoor cooking. By understanding the different types of camping stoves powered by propane. Understanding how propane works as a fuel source, safety tips, advantages, and maintenance and care best practices, you can make the most of your outdoor cooking experience. You can enjoy delicious meals in the great outdoors while minimizing your environmental impact and prioritizing safety.

The Ultimate Guide to Portable Camping Toilets

Introduction

When it comes to camping, one of the most essential items to consider is a portable camping toilet. While camping in the great outdoors can be refreshing and rejuvenating, nature calls and when it does, you want to be prepared. Portable camping toilets offer a convenient and hygienic solution for any outdoor adventure, allowing you to answer nature’s call with ease. In this comprehensive guide, we will explore the different types of portable camping toilets, their benefits, and how to choose the best one for your needs.

Portable Travel Toilet For Camping and Hiking, Non-electric Waterless Toilet

Part 1: Types of Portable Camping Toilets

Level 1: Basic Types
There are several basic types of portable camping toilets, including bucket-style toilets, foldable toilets, and composting toilets. Bucket-style toilets are the most basic and usually consist of a simple bucket with a toilet seat attached. Foldable toilets are lightweight and compact, making them easy to transport and set up. Composting toilets are environmentally friendly and use natural processes to break down waste.

Level 2: Features and Variations
Within each basic type of portable camping toilet, there are numerous features and variations to consider. Some may have a built-in waste tank, while others may require the use of disposable bags. Some may have a flush system, while others may use chemical additives to control odors. Understanding the different features and variations will help you choose a portable camping toilet that meets your specific needs.

Part 2: Benefits of Portable Camping Toilets

Level 1: Convenience and Comfort
One of the most obvious benefits of a portable camping toilet is the convenience it provides. When nature calls in the middle of the night or during a long hike, having a portable toilet on hand can make the experience much more comfortable. No more digging a hole or searching for a suitable spot in the woods. Portable camping toilets also offer a hygienic and private solution for bathroom needs.

Level 2: Environmental Impact
Portable camping toilets also have a positive impact on the environment. Using a portable toilet reduces the need to dig multiple holes for waste disposal, which can lead to soil erosion and contamination. Additionally, some types of portable camping toilets, such as composting toilets, are eco-friendly and help with waste management while minimizing pollution and odor.

Part 3: Choosing the Right Portable Camping Toilet

Level 1: Consider Your Needs
When choosing a portable camping toilet, it’s important to consider your specific needs and preferences. Think about the size of your camping group, the frequency of use, and how much space you have for transportation and storage. You’ll also want to consider the type of camping you’ll be doing and whether you’ll have access to facilities like bathrooms or running water.

Level 2: Budget and Quality
Portable camping toilets come in a wide range of prices, from budget-friendly options to high-end models with advanced features. While it’s important to stick to your budget, it’s also crucial to consider the quality and durability of the product. Look for a portable camping toilet that is made of sturdy materials, easy to clean, and has good reviews from other campers.

Part 4: Maintenance and Cleaning

Level 1: Proper Disposal of Waste
Proper disposal of waste is crucial for maintaining cleanliness and hygiene while camping. Follow the specific guidelines provided by the manufacturer for disposing of waste, whether it’s through a designated dump station or by using biodegradable waste bags. Always follow Leave No Trace principles when disposing of waste in the wilderness.

Level 2: Cleaning and Sanitizing
Regular cleaning and sanitizing of your portable camping toilet is essential for preventing odors and maintaining hygiene. Many portable camping toilets are designed for easy cleaning, with removable waste tanks and non-stick surfaces. Use biodegradable and environmentally friendly cleaning products to minimize the impact on the environment.

Dextrus 5.8 Gallon Portable Toilet Camping Porta Potty with Carry Bag and  Hand Sprayer

Part 5: Tips for Using a Portable Camping Toilet

Level 1: Location and Set-Up
When using a portable camping toilet, choose a location that is at least 200 feet away from water sources to minimize the risk of contamination. Set up the toilet on level ground and ensure it is stable and secure. Consider using a privacy shelter or pop-up tent for added comfort and privacy.

Level 2: Odor Control
To control odors, consider using chemical additives or deodorizing tablets that are specifically designed for portable camping toilets. Additionally, some campers prefer to sprinkle natural odor-control substances, such as sawdust or baking soda, into the waste tank after each use.

Part 6: Tips for Choosing the Right Portable Camping Toilet

When it comes to choosing the right portable camping toilet, there are a few key factors to consider. First and foremost, you’ll want to think about the size and weight of the toilet. If you’re planning on backpacking or hiking to your campsite, a lightweight and compact option will be essential. Look for toilets that are easy to carry and set up, as well as ones that are designed to be stable and comfortable to use.

Next, consider the capacity of the toilet. If you’re going to be camping with a large group or for an extended period of time, you’ll want a toilet that can hold plenty of waste without needing to be emptied frequently. Look for options with a large capacity waste tank and a sturdy, secure lid to prevent any leaks or spills.

Another important consideration is the ease of cleaning and maintenance. Look for toilets that are designed to be easy to empty and clean, with removable waste tanks and smooth, non-porous surfaces that are simple to wipe down. Some models even come with convenient carrying bags or storage options to make transporting and storing the toilet a breeze.

Finally, make sure to consider any additional features that are important to you. This could include things like toilet paper holders, integrated hand sanitizer dispensers, or privacy tents to create a more comfortable and discreet bathroom experience. By considering all of these factors, you’ll be able to find the perfect portable camping toilet for your next outdoor adventure.

Part 7: Proper Care and Maintenance of a Portable Camping Toilet

Proper care and maintenance of your portable camping toilet are essential for keeping it clean, functional, and odor-free. Here are some tips for keeping your toilet in top condition:

  1. Empty and clean the waste tank regularly: Depending on the capacity of your toilet and how often it’s being used, you’ll need to empty the waste tank regularly. Make sure to dispose of waste in designated areas and follow all local regulations.
  2. Use the right cleaning products: When cleaning your toilet, be sure to use the appropriate cleaning products. Avoid using harsh chemicals that could damage the surfaces of the toilet. Instead, opt for gentle, biodegradable cleaners that are safe for both the environment and your toilet.
  3. Keep it dry and ventilated: After cleaning the toilet, make sure to dry it thoroughly to prevent mold and mildew from forming. Proper ventilation is also important to help eliminate any odors and keep the toilet smelling fresh.
  4. Store it properly: When not in use, store your portable camping toilet in a cool, dry place. Many models come with convenient carrying bags or cases for easy transportation and storage.

By following these simple tips, you can ensure that your portable camping toilet stays clean, hygienic, and ready for your next outdoor adventure.

Portable Camping Toilet New 5L Commode w/Detachable Inner Bucket

Part 8: Disposing of Waste from a Portable Camping Toilet

One of the most important considerations when using a portable camping toilet is the proper disposal of waste. This is essential for protecting the environment, following local regulations, and maintaining good hygiene. Here are some key tips for disposing of waste from your portable camping toilet:

  1. Use designated waste disposal areas: Many campgrounds and outdoor areas will have designated waste disposal areas for portable toilets. Always make sure to use these designated areas and follow any specific guidelines or regulations.
  2. Pack out waste if necessary: In some situations, such as when camping in remote or sensitive environments, you may need to pack out waste from your portable camping toilet. This could involve sealing waste in biodegradable bags and carrying it with you until you can properly dispose of it.
  3. Follow local regulations: Different areas will have different regulations and guidelines for waste disposal. Be sure to familiarize yourself with any local rules and regulations before heading out on your camping trip.

By following these tips and being mindful of the environment, you can ensure that you’re disposing of waste from your portable camping toilet in a responsible and sustainable way. This will help to minimize the impact on the environment and ensure that the outdoor spaces you enjoy remain clean and pristine for future generations.

Conclusion

A portable camping toilet is a practical and convenient addition to any outdoor adventure. By understanding the different types, benefits, and maintenance tips, you can choose a portable camping toilet that meets your specific needs and ensures a comfortable and hygienic experience while exploring the great outdoors. Whether you’re camping in a remote wilderness area or a crowded campground, a portable camping toilet provides peace of mind and convenience, allowing you to enjoy the beauty of nature without sacrificing basic comforts.

Motorcycle Camping: How to Hit the Road & Sleep Under the Stars

Introduction

Motorcycle camping is an exhilarating way to explore the great outdoors while enjoying the freedom of the open road. Whether you’re a seasoned rider or a newcomer to the world of motorcycle travel, hitting the open road with nothing but a tent and a sleeping bag can offer a sense of adventure and connection to nature that’s hard to beat. In this comprehensive guide, we’ll cover everything you need to know to plan and execute a successful, safe, and enjoyable motorcycle camping trip.

Part 1: Planning Your Route

Level 1: Choosing Your Destination
When it comes to motorcycle camping, the journey is just as important as the destination. Start by researching potential camping spots along your route, and take into consideration the type of terrain you’ll be riding through. Whether you prefer mountains, forests, deserts, or coastlines, there’s a perfect camping spot out there for you.

Level 2: Mapping Out Your Route
Once you’ve decided on a destination, it’s time to plan your route. Consider the distance you’ll be traveling each day, as well as the availability of gas stations, food, and accommodations along the way. Use a reliable map or GPS system to ensure you stay on track and have a backup plan in case of unexpected road closures or detours.

Part 2: Packing Essentials

Level 1: Gear and Equipment
When it comes to motorcycle camping, packing light is essential. Invest in compact, lightweight camping gear designed specifically for motorcycle travel, including a tent, sleeping bag, and cooking supplies. Additionally, make sure to pack essential motorcycle maintenance tools, a first-aid kit, and any necessary safety gear, such as a helmet and riding gloves.

Level 2: Clothing and Personal Items
Pack versatile, weather-appropriate clothing that can be layered for comfort and protection. Don’t forget essentials like sunscreen, bug spray, and toiletries. Consider the climate and terrain of your destination when choosing footwear and outerwear, and prioritize items that are quick-drying and moisture-wicking to stay comfortable on the road.

This Incredible Motorcycle Tent Lets You Camp Out Anywhere While Out On The Road

Part 3: On the Road

Level 1: Safe Riding Practices
Motorcycle camping presents its own set of challenges, especially when it comes to navigating unfamiliar roads and carrying additional gear. Brush up on safe riding practices before hitting the road, and remember to take frequent breaks to stretch and stay alert.

Level 2: Enjoying the Journey
While it’s important to focus on safety, don’t forget to take in the breathtaking scenery and unique experiences that only motorcycle travel can offer. Embrace the sense of freedom and adventure that comes with the open road, and be open to spontaneous detours and unexpected discoveries along the way.

Part 4: Setting Up Camp

Level 1: Choosing a Campsite
When it’s time to set up camp, seek out designated motorcycle-friendly campgrounds or secluded spots that offer a peaceful, natural setting. Look for a level, well-drained area to pitch your tent, and make sure to follow Leave No Trace principles to minimize your impact on the environment.

Level 2: Building a Comfortable Camp
After a long day of riding, take the time to create a comfortable campsite that feels like home. Set up your tent, organize your gear, and prepare a simple, satisfying meal to fuel up for the next day’s adventures. Embrace the tranquility of the great outdoors and take time to appreciate the beauty of the natural world around you.

Part 5: Embracing the Experience

Level 1: Connecting with Fellow Riders
Motorcycle camping offers a unique opportunity to connect with like-minded riders who share your passion for adventure and exploration. Take advantage of the camaraderie and community that comes with motorcycle travel, and don’t hesitate to strike up a conversation with fellow campers or fellow riders you meet along the way.

Level 2: Reflecting on the Journey
As your motorcycle camping trip comes to an end, take the time to reflect on the incredible experiences and memories you’ve made along the way. Whether you faced unexpected challenges or discovered hidden gems, embrace the sense of accomplishment and fulfillment that comes with embarking on a motorcycle camping adventure.

Top 20 Riding & Camping Gear Tips for ADV Motorcyclists

Part 6: Finding the Right Campsite for Motorcycle Camping

When it comes to motorcycle camping, finding the right campsite is crucial for a safe and enjoyable trip. For motorcyclists, it’s important to consider the accessibility of the campsite, as well as the availability of parking for motorcycles.

When looking for a campsite, consider the terrain and weather conditions. Look for a level and dry area to set up your tent, and make sure there are no hazards such as loose rocks or branches that could pose a danger to your motorcycle. If you’re planning to camp in a remote area, make sure you have a reliable map and GPS device to help you navigate to the campsite.

Additionally, consider the availability of amenities such as fire pits, picnic tables, and clean water sources. These can greatly enhance your camping experience and make your stay more comfortable. Keep in mind that some remote campsites may not have these amenities, so be prepared to bring your own supplies.

Lastly, consider the regulations and rules of the campsite. Some sites may have restrictions on the types of vehicles allowed, as well as rules regarding noise and open fires. Be sure to follow these regulations to ensure a positive camping experience for yourself and other campers.

By carefully considering these factors, you can find the perfect campsite for your motorcycle camping trip. Whether you prefer a developed campground or a remote wilderness site, the right campsite can make all the difference in your overall experience.

Part 7: Packing Essentials for Motorcycle Camping

When it comes to motorcycle camping, packing efficiently and effectively is essential for a successful trip. With limited space on a motorcycle, it’s important to pack only the essentials while still being prepared for various situations. Here are some essential items to consider when packing for motorcycle camping:

  1. Shelter: A lightweight and compact tent is essential for providing shelter and protection from the elements. Look for a tent that is easy to set up and tear down, and consider a waterproof and durable design.
  2. Sleeping Gear: A sleeping bag and sleeping pad are crucial for a good night’s rest. Look for a sleeping bag that is appropriate for the expected weather conditions, and consider a compact and lightweight sleeping pad for added comfort.
  3. Clothing: Pack versatile and weather-appropriate clothing that can be layered for warmth. Be sure to pack durable and moisture-wicking materials that can withstand outdoor activities.
  4. Cooking Gear: A compact stove, cookware, and utensils are essential for preparing meals while camping. Look for lightweight and portable cooking gear that can easily be packed on a motorcycle.
  5. Tools and Repair Kit: It’s important to be prepared for any mechanical issues that may arise with your motorcycle. Pack a basic tool kit, tire repair kit, and any necessary spare parts to address common mechanical problems.

By packing these essentials, you can be prepared for a successful motorcycle camping trip while still maintaining enough space on your motorcycle for safe and comfortable travel.

How to Properly Load Motorcycles When Camping: 6 Considerations

Part 8: Safety Tips for Motorcycle Camping

Motorcycle camping can be an exhilarating and unforgettable experience, but it’s important to prioritize safety while on the road and at the campsite. Here are some important safety tips to consider for a safe and enjoyable motorcycle camping trip:

  1. Plan Your Route: Before hitting the road, plan your route carefully and familiarize yourself with the area. Be aware of potential hazards such as rough terrain or heavy traffic, and consider alternative routes if necessary.
  2. Pack Light: With limited space on a motorcycle, it’s important to pack only the essentials. Avoid overloading your motorcycle with unnecessary gear, as this can affect handling and stability.
  3. Wear Protective Gear: Always wear proper protective gear, including a helmet, gloves, and sturdy footwear. Additionally, consider wearing durable and weather-appropriate clothing to protect yourself from the elements.
  4. Check Your Motorcycle: Before embarking on your trip, perform a thorough inspection of your motorcycle to ensure it is in good working condition. Check the tires, brakes, lights, and fluids to ensure everything is functioning properly.
  5. Campsite Safety: When setting up camp, be mindful of potential hazards such as uneven ground, sharp objects, and inclement weather. Choose a safe and level area for your tent, and be aware of the location of your motorcycle at all times.

By prioritizing safety on the road and at the campsite, you can ensure a safe and enjoyable motorcycle camping experience for yourself and your fellow travelers. With careful planning and preparation, you can make the most of your adventure while staying safe and secure.

Conclusion

Motorcycle camping offers a unique blend of freedom, exhilaration, and connection to nature that’s hard to find anywhere else. With the right planning, gear, and mindset, you can embark on an unforgettable journey that will leave you craving the open road and the peace of sleeping under the stars. So, pack your saddlebags, rev up your engine, and get ready to experience the thrill of motorcycle camping for yourself.

Inflatable Tents for Camping: Everything You Need to Know

Introduction

Camping has always been a popular outdoor activity for people of all ages. For many, the idea of spending a night under the stars, surrounded by nature, is a refreshing and exhilarating experience. However, the traditional process of setting up a tent can often be time-consuming and require a lot of effort. This is where inflatable tents come into play. These innovative and convenient structures are revolutionizing the camping experience by making setup and takedown a breeze. In this guide, we’ll explore the world of inflatable tents for camping, covering everything from their benefits and features to tips for choosing the right one for your next outdoor adventure.

Part 1: Benefits of Inflatable Tents

Level 1: Convenience
Inflatable tents are a game-changer when it comes to convenience. Unlike traditional tents, which require poles and stakes to set up, inflatable tents can be inflated and ready for use in just a few minutes. This makes them perfect for campers who want to spend less time on setup and more time enjoying the great outdoors. Additionally, inflatable tents are often lighter and more compact than traditional tents, making them easier to transport and store.

Level 2: Weather Resistance
Another major benefit of inflatable tents is their superior weather resistance. Thanks to their solid construction and sturdy materials, these tents are more capable of withstanding harsh weather conditions, such as high winds and heavy rain. This not only provides peace of mind for campers but also ensures a more comfortable and enjoyable camping experience.

Laaioo Glamping Inflatable Tent

Part 2: Types of Inflatable Tents

Level 1: Airbeam Tents
One of the most common types of inflatable tents is the airbeam tent. These tents feature inflatable beams that replace traditional poles, providing a more stable and durable structure. Airbeam tents are available in a variety of sizes and designs, making them suitable for solo campers, families, or large groups.

Level 2: Dome Tents
Dome inflatable tents are another popular choice for campers. These tents are characterized by their dome-shaped design, which offers increased headroom and stability. Dome tents are often lightweight and easy to set up, making them a great option for backpackers and hikers.

Part 3: Features to Consider

Level 1: Size and Capacity
When choosing an inflatable tent for camping, it’s important to consider the size and capacity that will best suit your needs. Whether you’re camping solo, with a partner, or with a group, there are inflatable tents available in various sizes to accommodate different camping scenarios.

Level 2: Ventilation and Airflow
Proper ventilation is essential for a comfortable camping experience, especially in warmer climates. Look for inflatable tents with multiple ventilation openings and mesh panels to promote airflow and prevent condensation buildup inside the tent.

Part 4: Tips for Choosing the Right Inflatable Tent

Level 1: Research and Compare
Before making a decision, take the time to research and compare different inflatable tents on the market. Consider factors such as size, weight, features, and pricing to find the best option for your specific camping needs.

Level 2: Read Reviews
Reading reviews from other campers can provide valuable insight into the quality and performance of inflatable tents. Look for feedback on durability, weather resistance, and ease of setup to ensure you’re making an informed decision.

Part 5: Care and Maintenance

Level 1: Proper Storage
To prolong the life of your inflatable tent, it’s important to store it properly when not in use. Ensure the tent is clean and dry before folding and storing it in a cool, dry place to prevent mold and mildew.

Level 2: Repair Kit
While inflatable tents are designed to be durable, accidents can happen. It’s a good idea to have a repair kit on hand to quickly fix any punctures or tears that may occur during your camping adventures.

Inflatable Tent for Camping, 2-4 Person Camping Tents

Part 6 – Easy Set-Up and Take-Down

Inflatable tents for camping are known for their quick and easy set-up and take-down process. With traditional tents, campers often struggle with assembling poles and stakes, which can be time-consuming and frustrating. Inflatable tents eliminate this hassle with their simple design. Most inflatable tents can be set up in a matter of minutes, simply by inflating the structure with a pump. This means campers can spend less time setting up their accommodation and more time enjoying the great outdoors.

The rapid set-up and take-down process also makes inflatable tents a popular choice for those who enjoy spontaneous camping trips. Whether you’re hiking through the wilderness and need a quick place to rest, or you decide to pitch up at a festival, inflatable tents provide a hassle-free solution. Additionally, taking down an inflatable tent is just as easy as setting it up. With a quick release valve, campers can deflate the tent and pack it away in no time, ready for their next adventure.

Overall, the easy set-up and take-down process of inflatable tents make them a convenient and practical choice for camping and outdoor activities.

Part 7 – Durability and Stability

Inflatable tents are often constructed using durable, high-quality materials that are built to withstand the elements. The inflatable beams or poles are designed to be strong and stable, ensuring that the tent remains secure in windy conditions. Many inflatable tents are also made with waterproof and UV-resistant fabrics, providing protection from the sun, rain, and other harsh weather conditions.

The stability of inflatable tents is further enhanced by their ability to flex and absorb impact, making them less likely to sustain damage from heavy winds or accidental knocks. This makes them a reliable option for camping in various environments, from sandy beaches to rocky mountainsides.

Inflatable tents are also known for their long-lasting performance, as the materials used are often more durable than those found in traditional tents. With proper care and maintenance, an inflatable tent can provide many years of reliable use, making it a worthwhile investment for avid campers and outdoor enthusiasts.

The A Shape High Profile Camping Tents

Part 8 – Versatility and Adaptability

One of the key advantages of inflatable tents for camping is their versatility and adaptability. Inflatable tents come in a variety of shapes and sizes, suitable for solo adventurers, families, or group camping trips. Some inflatable tents feature multiple rooms or separate compartments, providing privacy and flexibility for different camping needs.

Additionally, inflatable tents can be used for a wide range of outdoor activities beyond camping. They are popular for beach trips, music festivals, backyard sleepovers, and even as temporary shelter during natural disasters. Their portability and ease of set-up make them a practical solution for any situation that requires quick and reliable shelter.

Furthermore, inflatable tents can be easily customized with accessories such as awnings, ground sheets, and inner tents, allowing campers to tailor their setup to their specific needs. This adaptability makes inflatable tents a versatile and convenient option for a wide range of outdoor adventures. Whether you’re a seasoned camper or a casual outdoor enthusiast, an inflatable tent is a versatile and adaptable solution for all your shelter needs.

Conclusion

Inflatable tents are a fantastic option for campers who prioritize convenience, durability, and comfort. With their easy setup, weather resistance, and diverse range of options, these innovative structures are revolutionizing the camping experience. By understanding the benefits, types, features, and care considerations of inflatable tents, you can make an informed decision and enjoy a stress-free camping trip with your new inflatable tent.

The Ultimate Guide to Camping Tarp: Tips, Tricks, and Techniques

Introduction

Camping is a beloved outdoor activity that allows individuals to connect with nature and escape the hustle and bustle of daily life. While traditional tents are a popular choice for shelter while camping, many outdoor enthusiasts are turning to tarps as a lightweight, versatile, and cost-effective alternative. In this comprehensive guide, we will explore the benefits of camping with a tarp, as well as provide tips, tricks, and techniques for making the most of your tarp camping experience.

camping tarp

Part 1: The Benefits of Camping with a Tarp

Level 1: Durability and Versatility

One of the primary benefits of camping with a tarp is its durability and versatility. Unlike traditional tents, which are often made of delicate materials that can easily tear or puncture, tarps are typically constructed from heavy-duty fabrics that are designed to withstand the elements. Additionally, tarps can be pitched in a variety of configurations to provide protection from rain, wind, and sun, making them a versatile and adaptable shelter option for campers.

Level 2: Lightweight and Compact

In addition to their durability and versatility, tarps are also incredibly lightweight and compact, making them an ideal choice for backpackers and minimalist campers. When properly folded and stored, a tarp can occupy minimal space in a backpack, allowing for greater flexibility and freedom of movement while hiking or exploring the great outdoors.

Part 2: Choosing the Right Tarp for Camping

Level 1: Materials and Construction

When choosing a tarp for camping, it’s important to consider the materials and construction of the tarp. Most camping tarps are made from nylon, polyester, or polyethylene, each of which offers different benefits in terms of durability, water resistance, and weight. Additionally, tarps come in a variety of sizes and shapes, allowing campers to select the best option for their specific needs and preferences.

Level 2: Additional Features

In addition to considering the materials and construction of a tarp, campers should also take into account any additional features that may be beneficial for their camping experience. These features may include reinforced grommets for securing guy lines, reflective elements for increased visibility at night, and built-in storage pockets for keeping small items organized and easily accessible.

Part 3: Setting Up Your Tarp Shelter

Level 1: Basic Tarp Configurations

There are several basic tarp configurations that can be utilized to create a shelter while camping. These include the A-frame, the lean-to, the diamond, and the tarp tent. Each configuration offers different levels of protection and ventilation, allowing campers to customize their shelter to suit the specific conditions of their camping environment.

Level 2: Advanced Tarp Techniques

In addition to the basic tarp configurations, there are also several advanced tarp techniques that can be used to optimize the functionality and comfort of a tarp shelter. These techniques may include the use of additional guy lines for increased stability, the incorporation of natural features such as trees or boulders into the shelter design, and the use of adjustable poles to create a more spacious and open shelter.

Part 4: Tips for Camping Comfortably with a Tarp

Level 1: Insulation and Weatherproofing

Camping with a tarp requires careful consideration of insulation and weatherproofing to ensure a comfortable and enjoyable experience. This may include the use of a ground tarp or footprint to protect against moisture and cold, as well as the addition of a waterproof tarp liner or bivy sack to provide an extra layer of protection against rain and wind.

Level 2: Gear Organization and Storage

When camping with a tarp, it’s important to prioritize gear organization and storage to maximize the efficiency and functionality of your shelter. This may involve the use of hanging storage pockets, gear lofts, and equipment lines to keep essential items organized and easily accessible, as well as the strategic placement of gear and personal belongings within the shelter to optimize space and minimize clutter.

BULLBAT T/C Camping Tarp

Part 5: Tarp Camping Safety and Maintenance

Level 1: Safety Considerations

While camping with a tarp can be a rewarding and enjoyable experience, it’s important to prioritize safety and awareness to minimize the risk of accidents and injuries. This may involve selecting a suitable campsite with minimal hazards such as dead trees and loose rocks, as well as the use of proper knot-tying techniques and equipment to secure the tarp and prevent it from blowing away in high winds.

Level 2: Tarp Maintenance and Care

Proper maintenance and care of your camping tarp are essential for ensuring its longevity and functionality. This may include regular cleaning and drying of the tarp to prevent mold and mildew growth, as well as the prompt repair of any tears, punctures, or worn areas to prevent further damage and deterioration.

Part 6: How to Set Up a Camping Tarp

When setting up a camping tarp, there are a few tips to keep in mind to ensure a successful and comfortable shelter. First, it’s crucial to find a suitable location for your tarp. Look for a spot that is flat and free of any potential hazards such as falling branches or rocks. Once you have found the perfect spot, lay out your tarp and secure the corners using stakes or heavy objects like rocks.

Next, consider the weather conditions and the direction of the wind. If it’s windy, position the tarp so that the wind is hitting the shortest side. If rain is in the forecast, make sure to angle one side of the tarp slightly lower than the other to allow for water runoff.

To secure the tarp, use a combination of stakes, guylines, and tensioners to make sure it is taut and secure. Adjust the tension as needed to keep the tarp from sagging or flapping in the wind. Finally, inspect the tarp for any tears or damage, and make any necessary repairs before settling in for the night.

Part 7: How to Use a Camping Tarp for Shelter and Protection

A camping tarp is a versatile and essential piece of gear for outdoor enthusiasts. Not only does it provide shelter from the elements, but it also offers protection for your camping gear and a comfortable space for relaxation. Here are a few ways to use a camping tarp for shelter and protection:

  • Shelter: Set up the tarp as a makeshift tent by pitching it between trees or using trekking poles. This will provide you with a dry and comfortable space to sleep and relax during your camping trip.
  • Gear protection: Use the tarp to cover your gear, such as your backpack, cooking equipment, and firewood, to shield them from rain or snow. This will keep your gear dry and in good condition for the duration of your trip.
  • Sunshade: In hot and sunny weather, set up the tarp as a sunshade to provide a cool and shaded area for cooking, eating, or simply relaxing.
  • Windbreak: Position the tarp as a windbreak to block strong winds and create a more comfortable camping environment. This will also help maintain a steady flame for cooking or keep your campfire from getting out of control.

With these uses in mind, a camping tarp is an invaluable tool for any camping trip, providing shelter, protection, and comfort in a variety of outdoor settings.

camping tarp

Part 8: Choosing the Right Camping Tarp for Your Outdoor Adventure

When it comes to choosing a camping tarp for your outdoor adventure, there are a few factors to consider to ensure you select the right one for your needs. Here are some key considerations to keep in mind:

Size: The size of the tarp will depend on the number of people it needs to accommodate and the available space at your campsite. Look for a tarp that offers enough coverage to protect you and your gear from the elements without being too bulky or heavy to pack.

Material: Camping tarps are typically made from a variety of materials, including nylon, polyester, and silnylon. Consider the weather conditions you are likely to encounter and choose a tarp made from a durable, waterproof material that will provide adequate protection from rain, wind, and sun exposure.

Weight: If you plan on backpacking or hiking to your campsite, the weight of the tarp is a crucial factor to consider. Look for a lightweight tarp that can be easily packed and carried without adding too much extra weight.

Versatility: Some camping tarps come with additional features such as reinforced corners, attachment points, and built-in guylines, which can add to their versatility and ease of use in various camping scenarios. Consider the features that are important to you and choose a tarp that meets your specific needs.

By keeping these considerations in mind, you can select a camping tarp that will provide you with reliable shelter, protection, and comfort during your outdoor adventures.

Conclusion

Camping with a tarp offers a wealth of benefits for outdoor enthusiasts, including durability, versatility, and lightweight portability. By carefully considering the materials and construction of a tarp, learning how to set up and maintain a tarp shelter, and implementing tips and techniques for a comfortable and safe camping experience, campers can make the most of their tarp camping adventures. With the knowledge and skills provided in this guide, you’ll be well-equipped to enjoy the great outdoors with a tarp as your trusty shelter companion.

Navigating the Differences: Walking Stick or Cane?

Understanding Walking Sticks

Purpose and Usage of Walking Sticks

What is the difference between walking stick vs cane? Walking sticks serve as temporary support for balance and stability, mainly during outdoor activities. Unlike canes, they’re not designed for long-term use or to bear significant weight. Walking sticks can assist with maintaining footing on uneven terrain, making them ideal for hikes or nature walks.

Design and Features of Walking Sticks

Typically, walking sticks have a simple, straight design. They’re crafted from materials like wood or metal and may feature decorative elements. Many walking sticks are adjustable in height and some have foldable designs for easy transport. Their handles tend to be less ergonomic than canes, focusing more on aesthetics.

When to Choose a Walking Stick

Opt for a walking stick when engaging in temporary, outdoor activities that require additional stability. They’re suited for those who need a little extra support on rugged trails or for someone looking to enhance an outfit rather than provide substantial mobility assistance.

Adjustable Walking Cane With Rubber Tip

Exploring Walking Canes

Walking canes are vital for individuals needing consistent support. These devices focus on functionality and can bear weight over long periods, aiding those with chronic conditions.

The Role of Walking Canes in Mobility

Walking canes improve mobility for those with impairments. They ensure users have continuous support, reducing stress on joints and enhancing balance.

Types of Walking Canes and Their Handles

Various cane types cater to different needs. They range from basic single-point canes for minor support to quadripod canes for maximum stability. Handles are crafted for comfort, some boasting ergonomic designs for prolonged use.

Long-Term Benefits of Using Walking Canes

Regular cane use can relieve pain, increase independence, and prevent falls. Durable and designed for consistent use, they offer a reliable solution for long-term mobility challenges.

Key Differences Between Sticks and Canes

Walking sticks and canes are not the same. Although both aid in walking, they serve different purposes and suit various users.

Functionality and User Demographics

Walking sticks offer temporary support. They are ideal for hikers or those tackling uneven ground. Canes provide long-term aid for those with mobility issues.

Handle Variations and Ergonomics

Handles on walking sticks are less about comfort, more about style. They might look nice but are not made for frequent use. Canes have ergonomic handles. These handles are comfortable and safe, designed for regular, long-term use.

Support and Weight Capacity Considerations

Walking sticks cannot bear much weight. They are for light support and balance only. Canes can support more weight. They help the user take pressure off their joints. Heavier individuals should opt for a cane for better support and stability.

Walking Stick Cane Folding With Light LED Strap

Making the Right Choice

Choosing between a walking stick and a cane is important for your mobility and safety.

Assessing Your Mobility Needs

When choosing a mobility aid, think about your daily activities. Consider if you need help for a short hike or daily support for balance. For temporary support, a walking stick may be enough. For ongoing help with mobility, a walking cane is better.

Balancing Comfort and Style Preferences

Think about what matters more: comfort or style. Walking sticks often have unique designs, suitable for those valuing style. Canes focus more on comfort, with ergonomic handles that reduce pain during use. Choose a walking stick for style during short outings. Pick a cane for comfort if you use it often.

The Impact of Weight on Device Selection

Weight is a key factor when selecting a mobility aid. If you are heavier, a cane is designed to support more weight and provide stability. Walking sticks are for lighter support. Always check the weight capacity before buying a mobility aid for safety and effectiveness.

Correct Usage and Safety Tips

Proper usage of mobility aids is crucial for safety and effectiveness. Misusing a walking stick or cane can lead to accidents or injuries. Therefore, users should learn the right techniques.

How to Safely Use a Walking Stick

To ensure safety with a walking stick, follow these tips:

  • Step forward with the stick and weak leg at the same time.
  • Keep the stick close to your body to maintain balance.
  • Avoid placing it too far ahead or to the side.
  • Move slowly, especially when starting out or turning.
  • Use caution on uneven or slippery surfaces.
  • Always look ahead, not down, to see where you’re going.

If using a stick with multiple points, like three or four-point sticks, ensure the straight side faces your body to avoid tripping hazards.

Proper Techniques for Walking with a Cane

Walking with a cane requires different techniques for maximum support:

  • Grip the cane in the hand opposite the side that needs support.
  • Place the cane about two inches to the side and move with the affected leg.
  • Keep the cane steady while stepping forward with the strong leg.
  • If new to using a cane, practice with someone to help stabilize you.
  • Have a plan for assistance if you find yourself struggling while using your cane.

When using a cane on stairs or curbs, always take extra care. Hold onto railings whenever possible and step with the stronger leg first, followed by the affected leg and cane. These measures maintain balance and prevent falls.

Walking Stick, Adjustable Folding Walking Canes

Specialized Designs and Custom Options

For those with a keen eye for design and a love for the outdoors, specialized walking sticks cater to a variety of preferences. Custom options enhance functionality and style, affirming that mobility aids can also be a reflection of personality.

Unique Walking Stick Styles for Hikers and Adventurers

Walking sticks come in many shapes and designs, suited to the adventurous spirit. They can boast carved patterns, custom colors, or even be made from unique materials like bamboo or rare woods. For hikers, features such as built-in compasses or camera mounts make sticks more than just support tools—they become part of the adventure gear. Some sticks are even collapsible, making them perfect for travelers who want to pack light.

Lightweight but sturdy, these walking sticks offer the right balance for rough terrain. They can also serve as a protective measure against the wilds of nature. Whether for a casual walk through the woods or a challenging mountain trek, there’s a walking stick that blends both utility and aesthetics.

Customization and Personalization of Walking Canes

Turning to walking canes, personalization has taken center stage. Canes now come with options for adjustable heights and ergonomic grips tailored to the user’s hand size and shape. To add a personal touch, engraving services are available. One can inscribe their name, a special date, or even a meaningful quote. This custom option transforms a simple cane into a cherished keepsake.

The materials used in canes also offer variety. From traditional wooden canes that exude classic elegance to modern materials like carbon fiber for lightweight strength, there’s something for every preference. For those who prioritize appearance, canes with designer handles or patterned finishes allow expression of personal style while maintaining practicality.

Both walking sticks and canes have evolved to offer an array of options. It’s all about choosing a device that not only supports your mobility needs but also aligns with your lifestyle and personal taste. In summary, the main difference between a walking stick and a cane is their intended use and design. Walking sticks are designed for outdoor use on rough terrain, while canes are more commonly used for daily indoor or outdoor walking support.

Mastering Walking Stick Golf: Tips and Techniques

The Origin of Walking Stick Golf

Walking Stick Golf traces its roots back to ancient times. It began as a leisure activity for shepherds, who used their staffs to hit stones. This pastime evolved over the centuries, taking on various forms before becoming the game we know today. It gained popularity as a formal sport in the early 20th century. Early players fashioned their own sticks, often from hickory or ash wood.

The sport has a rich history, intertwined with the development of golf itself. Its name reflects the dual-purpose nature of the equipment – both as a walking aid and a golf club. Walking Stick Golf has always been about enjoying nature and engaging in a social, relaxed sporting activity.

Today, enthusiasts cherish the game for its tradition and unique style of play. Historic clubs and societies exist worldwide, celebrating the heritage and ongoing enjoyment of Walking Stick. Tournaments often include historic dress codes and rules, adding to the nostalgic experience.

Trusty Cane Safety Flashlight Walking Stick

Essential Equipment for Walking Stick Golfers

To play stick golf, you need the right gear. The most important piece is the walking stick, which serves both as a golf club and a walking aid. Choose a stick that feels comfortable in your hand and offers enough support for walking. The height and grip of the stick are crucial. Make sure it reaches your waistline for the most comfort and control.

Look for sticks made from sturdy woods like hickory or ash, as these materials can withstand the force of striking the ball. The base of the stick should have a tough, flat surface that serves as the club face. Some sticks also come with a metal base that helps with durability and precision shots.

You’ll also need golf balls designed for walking stick golf. These are often lighter and softer than traditional golf balls, reducing the risk of injury or damage. A small, compact bag can carry extra balls and personal items. Don’t forget comfortable clothing that won’t restrict your movements, along with sturdy shoes with good grip for varied terrain.

Finally, while not essential, consider a traditional cap or hat to add to the heritage feel of the game. It’s all about blending tradition with comfort on the course. With the right equipment, you’ll be ready to enjoy this charming and historic game to the fullest.

Mastering the Swing: Techniques for Walking Stick Golf

Mastering the swing is crucial in walking stick golf. Perfecting your technique can greatly enhance your enjoyment and performance. Here are some key pointers to help you improve your swing:

  • Stance and Posture: Start with a good stance. Keep your feet shoulder-width apart. Balance your weight on the balls of your feet. Stand straight but relaxed. This posture gives you a solid foundation.
  • Grip: Hold the walking stick firmly but not too tight. Your grip affects control and accuracy. Ensure your hands are comfortable and ready to swing.
  • Backswing: Raise the stick smoothly. Keep your eyes on the ball. Turning your shoulders, not just your arms, helps create a controlled backswing.
  • Downswing: Lead with your hips. Let your arms and the stick follow. This sequence generates power in the swing.
  • Impact: Strike the ball with confidence. Keep your head down and eyes focused on where the ball was. This helps with precision.
  • Follow Through: Complete your swing with a full follow-through. Your walking stick should end up over your shoulder. This ensures a smooth finish.

Remember, consistency is key in mastering your walking stick golf swing. Practice these techniques regularly. Soon, you’ll see improvement in your game. Enjoy the process and watch your skills grow.

Folding Walking Cane

Rules and Etiquette of Walking Stick Golf

Walking stick golf, like any sport, has its own rules and etiquette to ensure fair play and enjoyment for all players.

  • Respect for Tradition: Honor the history of walking stick golf. Players often wear traditional attire and follow historic codes.
  • Safety First: Always be aware of other golfers and spectators. Wait until the group ahead is out of range before swinging your stick.
  • Silence is Golden: Maintain quiet when players are taking their shots. This helps everyone focus and shows respect.
  • Pace of Play: Keep up with the group ahead. If you fall behind, allow faster groups to play through.
  • Care for the Course: Protect the course by not damaging the turf. Replace divots and smooth sand traps after playing.
  • Stick Handling: Only use your walking stick to hit the ball. Do not use it to lean on while others are taking their turns.
  • The 19th Hole: After the game, it’s customary to visit the clubhouse. Share tales and tips with fellow enthusiasts.
  • Rule Knowledge: Know the basic rules. Penalties apply for lost balls or hitting out of bounds.

By following these guidelines, you will uphold the spirit and enjoyment of walking stick golf. Remember to practice good sportsmanship, whether you win or lose.

Choosing the Right Walking Stick Golf Course

Choosing the ideal course is vital for enjoying walking stick golf. Consider these factors when selecting a course:

  • Location: Seek courses nearby. A close location means more playtime and less travel.
  • Course Layout: Look for varied terrain that challenges your game. Hills and flat areas test different skills.
  • Size and Length: Pick a course that matches your fitness level. Short courses suit beginners, while longer ones challenge experienced players.
  • Facilities: Ensure the course offers good facilities. Clubhouses and practice areas enhance the experience.
  • Course Maintenance: A well-kept course provides better play conditions. Check for well-maintained greens and fairways.
  • Fees and Membership: Consider cost and membership options. Find a balance that fits your budget and frequency of play.

Remember to review online ratings and feedback from other walking stick golf players. Personal recommendations can guide your choice. The right course improves your game and increases enjoyment.

Training Exercises for Improving Your Walking Stick Golf Game

Improving your walking stick golf game demands practice and focused training. Here are essential exercises to enhance your skills:

  • Strength Training: Build core and arm strength. Simple sit-ups, push-ups, and light dumbbell exercises work well.
  • Flexibility Drills: Increase flexibility with regular stretching. Focus on your back, shoulders, and arms. This promotes a fuller range of motion.
  • Wrist Exercises: Strengthen your wrists to improve grip. Wrist curls using light weights can be very effective.
  • Balance Work: Good balance is vital. Try standing on one leg or using a balance board. This will stabilize your stance during the swing.
  • Coordination Drills: Precision is key. Practice hitting targets at varying distances to fine-tune your eye-hand coordination.
  • Walking Exercises: Match the activity’s name; ensure your walking stamina is up to par. Brisk walking or hiking can be great training.
  • Mental Strategies: Visualize successful shots and rounds. Mental preparation can significantly improve your physical game.
  • Simulation Practice: If possible, use a golf simulator to practice swings and shots in different scenarios without leaving home.

Regular practice of these exercises will help you master walking stick golf techniques and enhance your game. Remember to integrate these training exercises gradually and consistently for the best results.

walking stick golf

Walking Stick Golf Competitions and Events

Walking stick golf offers exciting competitions for players of all levels. Tournaments celebrate the sport’s heritage and test your skills. Look for events at local and national levels. Community leagues often hold smaller contests. These are perfect for newcomers to the sport. Historic societies may host national competitions. They draw experienced players.

Joining walking stick golf events is a great way to meet fellow enthusiasts. It’s an opportunity to share strategies and stories. You’ll learn from others and improve your game. Remember to check event rules. Traditions play a big role in competitions. Dress codes and historic rules can apply.

Many events also offer workshops and clinics. These can help you refine your technique. Experts share tips on swing mechanics, equipment choice, and more. It’s a chance to immerse yourself in walking stick culture.

To stay informed, follow walking stick golf clubs and forums online. They announce upcoming events and registration details. Social media groups are also useful. They provide updates and connect you with the walking stick golf community.

Before entering a competition, practice is key. Use the skills and exercises mentioned earlier in this blog. They will prepare you for tournament play. Enjoy the camaraderie and challenge of stick golf. With each event, you’ll grow as a player and revel in the sport’s unique charm.

Integrating Technology: Apps and Tools for Walking Stick Golf Enthusiasts

Today’s technology can enhance your walking stick golf experience. Use apps and gadgets to improve your game. These tools offer helpful features for golfers. They track scores, measure distances, and provide playing tips. Here are ways technology can support your walking stick golf endeavors:

  • Golf GPS Apps: Download apps to your phone. They help navigate the course. Find out distances to holes and see layouts.
  • Swing Analyzers: Attach sensors to your walking stick. They analyze your swing and give feedback. This helps you adjust your technique.
  • Performance Tracking: Some tools track your shots and scores. They show your progress over time. Use this data to identify areas needing work.
  • Video Recording: Record your swing with your phone or a camera. Watch it to see what you do well and what to improve on.
  • Online Coaching: Find online courses or instructors. They offer advice on improving your walking stick golf game.
  • Community Forums: Join online forums with other enthusiasts. Share tips, ask questions, and get expert opinions.
  • Virtual Tournaments: Compete in online challenges or leagues. This offers practice and the fun of competition.

These digital aids bring a modern twist to the age-old game. With these tools, you can play smarter and get more from your walking stick golf play. Remember to use them to complement, not replace, practicing on the real green.

DIY Walking Stick: A Step-by-Step Guide

Introduction to DIY Walking Sticks

Creating your own walking stick can be rewarding. It’s more than just a tool for hiking. Making a DIY walking stick lets you express creativity and enjoy a unique, functional piece.

A walking stick aids with stability and support during hikes. It also serves as a helpful aid across various terrains. But the walking stick is not just practical. It reflects personal style and serves as a memento of outdoor adventures.

In this guide, we will cover everything to craft a personalized walking stick. We’ll discuss wood selection, necessary tools, and detailed crafting steps. From wood cutting to the final touches, we’ll ensure your DIY walking stick is both sturdy and stylish.

As we move forward, you will learn the value of a handmade stick. You’ll see it’s more than a hiking aid. It’s a companion on your journeys, a work of art, and a testament to your handiwork.

DIY Walking Stick

Choosing the Right Wood for Your Walking Stick

Selecting the ideal wood is the first critical step in creating a walking stick. Different woods offer varying levels of strength, flexibility, and workability. Here are some key considerations:

  • Hardwood vs. Softwood: Choose hardwood for its durability. Oak, maple, hickory, and ash are common choices. Softwoods like pine are less ideal due to their softness.
  • Grain Straightness: Look for wood with a straight grain. It ensures strength and minimizes warping or breaking.
  • Wood Density: Denser woods promote longevity but can be harder to carve. Find a balance between durability and workability.
  • Moisture Content: Dry wood reduces the risk of splitting and rotting. Woods that have naturally low moisture levels are preferable.
  • Aesthetics: Consider the appearance of the wood. Unique patterns and colors can add character to your walking stick.

Popular wood types like hickory and oak provide reliable strength, whereas willow and ash offer both strength and a lighter weight. If you want a ‘bark on’ finish, willow is a great choice. It has a rustic look and a smoother bark that is comfortable to hold.

Sugar maple, known for its straight growth and fine grain, is recommended for its beautiful color and pattern. Not only is it strong, but it’s also aesthetically pleasing once finished. Avoid woods that tend to crack or split easily, such as spruce and pine. Instead, opt for woods that are known for their resilience and long-lasting qualities. Remember to avoid any wood that still shows signs of life, like green wood, as it will contain too much moisture and may shrink or crack as it dries.

Before making your final decision, touch and feel different types of wood. This tactile approach will help you choose a piece that feels right in your hands and will be a joy to work with. With the right wood, your DIY walking stick will be a sturdy and stylish companion on your treks.

Tools and Materials Needed

To embark on creating your DIY walking stick, having the right tools and materials is essential. Gather these items before you start your project to ensure a smooth crafting process.

  • Saw: You’ll need a saw to cut your chosen wood to the appropriate length.
  • Knife or Carving Tools: For debarking and carving the wood.
  • Sandpaper: Various grits from coarse to fine are necessary to smooth the wood.
  • Sander: A hand sander or power sander can make the job faster and more uniform.
  • Drying Tubes or Racks: These are used to dry the wood evenly and prevent warping.
  • Varnish or Sealant: To protect the finished walking stick from the elements.
  • Decorative Items: Beads, feathers, paint, or whatever you choose to personalize your stick.
  • Safety Gear: Gloves and goggles for protection during the crafting process.

These are just the basics. Depending on the complexity of your design, you might also consider additional tools like a Dremel for more intricate work, a wood burner for personalization, or a rubber tip to add to the bottom of your finished stick. Remember that quality tools can make a significant difference in the ease of production and the quality of your final product. Be sure to have everything prepared so that once you start, you can enjoy the process of crafting your very own walking stick from start to finish.

Step-by-Step Process of Making Your Walking Stick

Crafting a DIY walking stick offers a sense of achievement and a personal touch to your hiking gear. Here’s how to make one from scratch.

Selecting and Cutting the Wood

First, pick a hardwood like maple or oak for durability. Look for a straight piece, roughly as tall as you or to your elbow, for a staff or stick. Cut it cleanly with a saw.

Debarking and Shaping the Stick

Use a knife or carving tool to carefully remove the bark. Shaping the wood allows creativity. Form a handle or smooth the edges for comfort.

Sanding and Smoothing

Smooth the stick using sandpaper from coarse (about 60 grit) to fine (up to 600 grit). A sander can speed up the process.

Drying Your Walking Stick

Let the stick dry to prevent rot. Keep it in a rack or tube for even drying. This can take several months.

Adding a Personal Touch and Finishing

After drying, personalize your stick with carvings or decorations. Seal it with varnish to protect from the elements. Attach a rubber tip on the end for added grip.

Walk Tall Walking Stick

Decorating Your Walking Stick

After the careful crafting, it’s time for the fun part: decorating your DIY walking stick. Personal touches make your stick a reflection of your personality and interests. It can be as simple or as ornate as you wish. Here are ideas to get started:

  • Carvings and Engravings: If you have a wood burner, you can add intricate details. Think of patterns, symbols, or text.
  • Paint: Use outdoor-friendly paints to add color or design. Let each layer dry before adding the next.
  • Decorative Tape: Durable, weather-resistant tape can create a grip or add flair.
  • Beads and Feathers: Drill a hole near the top to attach strings of beads or feathers.
  • Varnish: Once decorations are complete, coat with an outdoor varnish to protect your designs.

As you decorate, keep balance in mind. Try not to overload one side. Also, consider the environment. Use eco-friendly materials when you can. Your DIY walking stick can be as unique as the trails you explore with it.

Tips for Maintaining Your Walking Stick

After creating your DIY walking stick, proper maintenance is key to its longevity. Here are tips to keep your walking stick in top shape:

Handle with Care

Treat your walking stick with respect. Avoid throwing it or using it to move large obstacles. When not in use, store it in a safe place where it won’t fall or get damaged.

Regular Inspection

Check your walking stick regularly for any signs of wear or damage. Look for cracks, splits, or loose parts that may need attention.

Clean It Up

After hikes, wipe your walking stick with a damp cloth to remove dirt and debris. Dry it completely before storing to prevent moisture damage.

Reapply Protective Coatings

Over time, protective coatings like varnish or sealants may wear off. Reapply these coatings as needed, following the manufacturer’s instructions for best results.

Tighten Any Add-Ons

If your stick has add-ons like a rubber tip or decorative elements, make sure they’re secure. Tighten or replace them if they loosen over time.

By following these simple maintenance tips, you can ensure your DIY walking stick remains a reliable companion on your outdoor adventures.

DIY Walking Stick

Advantages of a Homemade Walking Stick

Creating a DIY walking stick presents several benefits. Let’s explore why crafting one can be more advantageous than buying a store-bought stick.

  • Personalization: Your walking stick will reflect your personal style and preferences. You choose the wood, design, decorations, and finish, making it truly one-of-a-kind.
  • Quality Control: You oversee the creation process from start to finish. This allows you to ensure the stick’s strength, durability, and finish are up to your standards.
  • Cost-Effective: Making your own stick can save you money compared to some of the expensive, commercially-made options.
  • Skill Building: Crafting a walking stick hones skills like carving, sanding, and woodworking. These skills may come in handy for other projects.
  • Sense of Accomplishment: Completing a walking stick from scratch provides a sense of pride. You made something functional and beautiful with your own hands.
  • Connection to Nature: Selecting your wood from nature creates a deeper connection to the outdoors. Your stick becomes a cherished companion on hikes.
  • Custom Features: Tailor your stick’s features to your needs. Add a specific grip, a wrist strap, or a special carving that holds personal significance.
  • Family Activity: This can be an engaging project for families to do together. It promotes creativity and teaches about nature and craftsmanship.

A DIY walking stick is not just a hiking aid; it’s a statement of creativity and self-reliance. With every step taken on the trails, you’ll appreciate the personal touch and effort you put into your walking companion.

Alleviate Hip Pain: Proper Use of Walking Sticks

Importance of Walking Aids for Hip Pain Relief

Walking aids are crucial for those struggling with hip pain. They provide needed support, easing discomfort and improving mobility. Painful hips can limit daily activities, making simple tasks demanding. A walking stick or cane takes on part of the body weight, reducing stress on the hip joint. This relief can lead to increased independence in daily life.

Using a walking aid, like a walking stick, can lessen hip pain substantially. When used properly, it serves as an extension of the body’s balance system. It helps maintain stability while distributing weight away from the painful hip. Not only does this improve comfort, it may also prevent further injury.

Patients with arthritis or those recovering from hip surgery, injury, or other hip-related conditions can benefit greatly. A walking stick complements other treatments and therapies for hip pain. It should be used in coordination with professional medical advice for best results.

In summary, a walking stick is more than just a tool. It’s a source of relief, safety, and greater mobility for individuals experiencing hip pain. Always remember to consult a healthcare professional for personalized advice on managing hip pain.

Find A walking stick with hand support For Your Hiking Trip

Selecting the Right Walking Stick

Selecting the right walking stick is a key step in managing hip pain effectively. The ideal walking stick should be comfortable, sturdy, and of the correct height. Here are several factors to consider when choosing a walking aid:

  • Height: The walking stick should reach the crease in your wrist when you stand upright, with your arms at your sides. This ensures that your elbow is slightly bent when you use it, promoting better posture and balance.
  • Handle: Opt for a handle that feels comfortable in your hand. Ergonomic handles can reduce stress on your joints and prevent fatigue during use.
  • Material: Walking sticks made of lightweight materials like aluminum are easier to carry and maneuver. However, wooden sticks can offer more aesthetic appeal and durability.
  • Tip: A rubber tip provides added traction and stability, particularly on slippery or uneven surfaces. It’s essential for safety, so always check it’s in good condition.
  • Adjustability: An adjustable walking stick allows you to modify its height. This is especially useful if you are recovering from an injury and your needs change over time.
  • Support: If you need additional support, consider a walking stick with a broader base or one with multiple tips, often referred to as quad canes.

In conclusion, take your time when selecting a walking stick. Trying several options and styles will help you find the one that best suits your needs and lifestyle. Remember, the right walking stick can make a big difference in your comfort and mobility levels.

Basic Walking Stick Usage for Hip Support

Using a walking stick for hip pain can be a game changer. Here’s how to do it right:

  1. Hold It Correctly: Keep the stick on your strong side, opposite the painful hip.
  2. Move In Sync: Step with your bad leg and the stick at the same time.
  3. Maintain Balance: Let the stick and your good leg share the weight equally.
  4. Keep It Close: Don’t extend the stick out too far; it should stay within easy reach.
  5. Adjust Height Properly: Your elbow should bend slightly when you hold the stick.
  6. Choose Right Handle: Ensure the grip is comfortable and doesn’t strain your hand.

Practice these techniques until they feel natural. With continued use, a walking stick can help alleviate hip pain and improve your quality of life.

Flexyfoot Premium Derby Handle Folding Walking Stick

Safety Tips for Walking with a Walking Stick

Walking safely with a walking stick is paramount. Below are essential guidelines to ensure your safety while using a walking stick for hip pain relief:

  1. Stay Alert: Keep your eyes forward to spot any obstacles in your path. It helps avoid trips and falls.
  2. Remove Hazards: Clear away loose rugs, cords, and clutter that can snag your walking stick.
  3. Proper Footwear: Wear shoes with non-slip soles to prevent slipping while walking.
  4. Dry and Clean Tips: Check that the rubber tip of your walking stick is dry and free from wear. Replace it when worn out.
  5. Steady Pace: Walk at a comfortable pace. Rushing can throw off your balance and strain your hip.
  6. Lean On Me: Use the walking stick to support your weight, not drag it. It should be an aid, not a hindrance.
  7. Mind the Pets: Be cautious around pets and kids to avoid unpredictable movements.
  8. Hand Position: Grip your walking stick firmly but comfortably to maintain control.
  9. Illumination Matters: Ensure good lighting in your home, especially at night, to see clearly.
  10. Handle Wet Surfaces: Take extreme care on wet or icy surfaces. If possible, avoid them altogether.

By adhering to these safety tips, you can improve your confidence and stability when using a walking stick for hip pain. Remember not to solely rely on the walking stick when rising from or sitting down in chairs; always use the chair arms to support your movements.

Walking Stick Techniques for Various Terrains

Navigating different terrains with a walking stick requires specialized techniques. Here’s what to consider on various grounds:

  • Solid Grounds: On stable surfaces like sidewalks or floors, use your stick for light support. Move it in sync with your opposite leg to maintain balance.
  • Uneven Terrains: When walking on rocky or irregular surfaces, plant your stick firmly. This helps to stabilize your body before taking each step with your painful hip.
  • Soft Surfaces: On soft grounds such as grass, place the stick slightly deeper into the surface. This prevents it from slipping and provides a secure anchor for each step.
  • Slopes: Ascending a slope, lean slightly forward, and use the stick to pull you up. Descending, place the stick ahead for stability and to control your descent pace.
  • Slippery Surfaces: On ice or wet ground, take short, cautious steps. Apply gentle pressure on the stick to test traction before committing your weight.
  • Transitions: Changing from one type of terrain to another, pause to adjust your grip and stick position. This ensures continuous support as the ground changes.

Each terrain presents unique challenges; mastering these techniques will provide confidence and safety. If you face a new and difficult terrain, practice with assistance first to ensure your technique is secure.

Advanced Walking Stick Techniques for Stairs and Curbs

Mastering stairs and curbs with a walking stick requires skill and practice. Apply these advanced techniques for safe and efficient navigation:

Navigating Stairs

When facing stairs, your walking stick becomes crucial for balance and support. Follow these steps:

  1. Using a Banister: If available, grasp the handrail with one hand and hold your walking stick in the other.
  2. Ascending Steps: Step up with your stronger leg first, followed by your weaker leg and walking stick together.
  3. Descending Steps: Lead with your walking stick and weaker leg when stepping down, then follow with your stronger leg.
  4. Even Pacing: Maintain a steady and slow pace to avoid missteps or losing balance.

Managing Curbs

Curbs can be tricky, but with practice, your walking stick can help you navigate them effortlessly:

  1. Approach Squarely: Face the curb directly and establish a firm footing before stepping.
  2. Up the Curb: Move the stronger leg up first, then the walking stick and weaker leg.
  3. Down the Curb: Place the walking stick on the lower level, step down with the weaker leg, then the stronger one.
  4. Pause for Balance: Always secure your balance before proceeding to walk.

Regularly applying these techniques will enhance mobility and confidence in using a walking stick over varied and challenging terrains.

Walking Stick for Hip Pain

Adjusting to Life with a Walking Stick for Hip Pain

Living with hip pain can alter your daily activities. Adapting to a walking stick may seem daunting at first, but with time, it can significantly ease your mobility challenges. Here are tips to help you adjust:

  1. Gradual Introduction: Start by using your walking stick around the home. Get comfortable moving through familiar spaces.
  2. Mind Your Posture: Always stand up straight. Keep the walking stick at the right height to prevent slouching.
  3. Build Confidence: Use your stick often. Over time, this builds trust in the support it provides and improves confidence.
  4. Stay Consistent: Carry your walking stick everywhere. Consistency will make it a seamless part of your movement.
  5. Join Support Groups: Meet others using walking aids. Sharing experiences can offer you practical tips and emotional support.
  6. Modify Your Home: Rearrange furniture to create clear paths. Ensure your home is walker-friendly to avoid trips and falls.
  7. Seek Training: A physiotherapist can teach you proper techniques. They tailor strategies to fit your lifestyle and physical condition.

With patience and practice, you can make the walking stick a beneficial part of managing your hip pain. It’s not a sign of weakness but a smart way to maintain your independence and activity levels. If you struggle to adapt or have concerns, consult a healthcare provider for further guidance.

When to Consult a Professional for Hip Pain and Walking Aid Use

While walking sticks can provide great support for hip pain, there are times when professional advice is essential. It is crucial to seek expert guidance in certain situations to ensure that the use of a walking aid is beneficial and not detrimental to your condition. Here is a rundown of scenarios when consulting a healthcare professional is advised:

  1. Initial Pain Assessment: If you’re experiencing hip pain for the first time, it’s important to get diagnosed by a doctor.
  2. After Injury: Post-injury, professional help can determine if a walking stick is right for you.
  3. Chronic Pain Changes: Any new or intensifying pain should be checked promptly.
  4. Walking Aid Adjustments: If your walking stick seems off balance or uncomfortable, ask for an expert’s help in adjusting it.
  5. Lack of Improvement: If there’s no relief after consistent walking stick use, a healthcare provider should reassess your situation.
  6. New Physical Challenges: When facing additional mobility issues, it’s best to get professional input.
  7. Post-Surgery: After hip surgery, consult with professionals on safe walking aid usage.
  8. Part of a Therapy Plan: Include walk aid queries in your regular check-ups with physiotherapists or occupational therapists.

Remember, a walking stick can aid hip pain but it’s not a cure-all. Regular consultations with healthcare professionals ensure that your walking stick use is effective and aligned with your overall treatment strategy. Stay vigilant about your health and don’t hesitate to ask for professional advice when needed.

Jeep Compass Lease Guide: Costs & Tips

Introduction to Jeep Compass Leasing

Leasing a Jeep Compass offers a smart way to drive a new SUV with less commitment compared to buying. A lease is a contract where you pay to use the vehicle for a specific time. You do not own the Jeep, but have the right to use it. Let’s break down what a Jeep Compass lease involves.

When you lease a Jeep Compass, you agree to keep it for a set period, usually two to three years. In return, you make monthly payments. These payments are often lower than loan payments for buying a car. At the end of the lease, you return the Jeep or choose to buy it.

A Jeep Compass lease can come with many benefits. You get to enjoy driving a new model every few years. You also avoid the long-term maintenance issues that can come with older cars. Plus, a lease often includes a warranty that covers most repairs.

By understanding the basics of a Jeep Compass lease, you can make an informed decision. In the following sections, we will discuss the benefits, costs, tips, and important considerations for leasing a Jeep Compass. Stay tuned to ensure you get the best deal on your next vehicle.

Jeep Compass Lease Guide

Benefits of Leasing a Jeep Compass

Leasing a Jeep Compass comes with several advantages. First, you enjoy lower monthly payments than buying outright. This makes it easier on your budget. You also get to drive a brand-new Jeep every few years. This means you always have the latest features and technology. Another benefit is avoiding the depreciation hit that comes with ownership. Cars lose value quickly, but with a lease, it’s not your concern.

Leasing can also mean fewer worries about repairs. Most leases include a warranty that covers major issues. You won’t face high costs for unexpected problems. Plus, for those who love feeling current and stylish, leasing ensures you’re never behind the wheel of an outdated model. Finally, leasing a Jeep Compass can be great for business use. It may offer tax advantages compared to buying a vehicle.

These benefits make a Jeep Compass lease an appealing option for many drivers. It’s worth considering if you prefer flexibility and less hassle over vehicle ownership. Remember to factor these advantages into your decision when exploring a Jeep Compass lease.

Costs Involved in Leasing a Jeep Compass

When considering a Jeep Compass lease, you need to understand the costs involved. These expenses can affect your budget and your decision. Here’s a breakdown of the typical costs associated with a Jeep Compass lease:

  • Monthly Payments: This is the amount you pay each month. It’s usually lower than loan payments for a car purchase.
  • Down Payment: Some leases require a down payment at the start. This upfront cost can vary widely.
  • Taxes and Fees: Expect to pay taxes on your lease. Fees might include registration, acquisition and documentation costs.
  • Insurance: You’ll need full coverage insurance for your leased Jeep Compass. Insurance costs can differ based on personal factors.
  • Mileage Limits: Leases have mileage caps. If you exceed the limit, you’ll owe money for extra miles.
  • Wear and Tear: Leasing companies charge for damage beyond normal wear and tear.
  • Disposition Fee: At the end of your lease, this fee covers vehicle inspection and resale preparations.

Don’t forget to include these costs in your budget when planning a Jeep Compass lease. By doing so, you’ll avoid surprises and be financially prepared for your leasing journey.

How to Find the Best Jeep Compass Lease Deals

Finding the best Jeep Compass lease deals involves research and timing. Start by looking at different dealerships. Compare their lease offers on Jeep Compass models. Pay attention to the lease terms, monthly payment amounts, down payment requirements, and any additional fees. Be on the lookout for special promotions. Dealers often have lease specials during holidays or at model year-end clearances.

Next, don’t be afraid to negotiate. Even lease deals can have some wiggle room. Talk about lowering the down payment or monthly payments. Ask about any hidden fees and make sure they are waived or reduced. It’s also a good idea to negotiate the mileage cap to fit your driving needs better.

Another tip is to check your credit score beforehand. A good credit score can secure lower interest rates, which translates to lower monthly payments. If your credit score is not great, take steps to improve it before you negotiate your lease.

Lastly, consider using lease comparison websites. These can quickly show you deals from various dealers and leasing companies. Remember to factor in the entire cost of the lease when comparing deals. Look at customer reviews to learn about others’ experiences with the dealership or leasing company.

By doing your homework and being prepared, you can find the best Jeep Compass lease deal for your situation. Keep these steps in mind as you start your search, and take control of your leasing process.

Jeep Compass SUV Near Boston

Key Considerations Before Signing a Jeep Compass Lease

Before you commit to a Jeep Compass lease, it is vital to weigh certain factors. Here are key considerations to help you decide if leasing is the best choice for you:

  • Budget: Assess if the monthly lease payments align with your budget. Consider the long-term affordability.
  • Driving Habits: Think about how much you drive. A lease has a mileage limit. If you exceed it, you pay more.
  • Future Changes: Will your need for a car change soon? A lease locks you in for a few years.
  • Vehicle Customizations: Leasing a Jeep Compass means little room for customization. You must return the car as leased.
  • Early Termination Costs: Exiting a lease early can be expensive. Understand the penalties involved.
  • Gap Insurance: This covers the difference if the Jeep is totaled. Check if it’s included or an extra cost.

Make sure you’re comfortable with every aspect of the lease agreement. A hasty decision can bring unwanted stress and costs. Take your time to think it over.

Tips for Negotiating Your Jeep Compass Lease

Negotiating a Jeep Compass lease can help you secure a better deal. Here are some effective tips:

  • Do Your Homework: Research the market. Know the average costs for a Jeep Compass lease. This knowledge is power during negotiations.
  • Be Clear About Your Needs: Before you talk to the dealer, decide on your needs. Include the model, features, and mileage you want. Stick to these to avoid overspending.
  • Compare Offers: Get lease quotes from different dealers. Use these as leverage to negotiate better terms.
  • Mind the Timing: Dealers may be more willing to negotiate at the end of the month or year. Their sales goals make them more flexible.
  • Talk Total Cost: Focus on the total lease cost, not just monthly payments. A low monthly payment may come with higher fees elsewhere.
  • Capitalize on Competition: Let the dealer know you’re considering multiple offers. They may offer better terms to secure your business.
  • Understand Your Credits: A good credit score means better leverage. Show your score to push for a better deal.
  • Negotiate End-of-Lease Charges: Discuss the disposition fee and wear and tear charges. Try to reduce them up front.
  • Ask for More Miles: If you drive a lot, negotiate a higher mileage limit. This may save you from overage fees later.

By using these tips, you can negotiate a Jeep Compass lease that fits your budget and needs. Remember, the goal is to walk away with a deal you feel good about.

Understanding Lease Terms and Conditions

When leasing a Jeep Compass, it’s crucial to grasp the lease terms and conditions. These can impact your lease experience. Here’s what to look out for:

  • Lease Duration: Know how long your lease will last. Most are 2 to 3 years.
  • Residual Value: This is the car’s value at lease end. It affects buyout options.
  • Monthly Lease Payment: Confirm the payment amount. Make sure it fits your budget.
  • Additional Fees: Be aware of fees for registration, documentation, and acquisition.
  • Mileage Limit: Check the annual mile cap. Consider if it matches your driving needs.
  • Excess Mileage Charge: Learn the cost per extra mile over the limit. It adds up.
  • Maintenance Responsibilities: Understand what maintenance you must cover.
  • Lease Termination Clause: Know the conditions and costs for ending the lease early.
  • End-of-Lease Charges: Expect charges for excess wear and tear or damages.

By understanding these terms, you can avoid future surprises. Make sure you ask questions if something is unclear. Read the lease agreement carefully before signing. This ensures you know exactly what you’re agreeing to with your Jeep Compass lease.

Jeep Compass Lease Guide

Ending Your Jeep Compass Lease: Options and Obligations

As your Jeep Compass lease comes to an end, you have several options and obligations to consider. Understanding these can help you make a smooth transition and avoid extra costs. Here’s what you need to know:

  • Return the Vehicle: Typically, you can return the Jeep to the dealership. They will check it for excess wear and use. Any damage beyond the normal, you may owe additional fees.
  • Lease Buyout: You might have the choice to buy the Jeep at a predetermined price. This amount is the residual value mentioned in your contract. If you love the car, this could be a good deal.
  • Lease Extension: Some dealers allow you to extend your lease. This can give you more time to decide or wait for a new model release.
  • Excess Mileage Fees: If you drove more than the agreed mileage, prepare to pay. The cost per extra mile is in your lease agreement.
  • Disposal Fee: Also known as a turn-in fee, expect to pay this when you return the Jeep. It covers the dealer’s cost to sell the car again.
  • End-of-Lease Inspection: Arrange this inspection ahead of time. Doing so helps you to know if there are any issues to address before return.
  • New Lease or Purchase: Consider if you will lease a new Jeep Compass or buy another vehicle. Starting early gives you more options.

Meet all terms of your lease to avoid penalties. Review your contract early to understand all your end-of-lease obligations. This way, when your Jeep Compass lease ends, you are ready to make the best choice.