Mastering the Camping Axe: A Guide for Outdoor Enthusiasts

Introduction

Camping is an exhilarating way to connect with nature, offering a break from the hustle and bustle of daily life. One essential tool that can significantly enhance your camping experience is the humble yet powerful camping axe. Whether you’re chopping wood for a campfire, clearing trails, or building shelters, a well-chosen and properly used camping axe can make all the difference. This comprehensive guide will delve into various aspects of camping axes, ensuring you are well-equipped to select, use, and maintain this indispensable tool.

In this article, we’ll explore the history and evolution of camping axes, provide tips on choosing the right one for your needs, discuss proper usage techniques, highlight maintenance and care practices, and address safety considerations. By the end, you’ll have a thorough understanding of how to integrate a camping axe into your outdoor adventures effectively and safely.

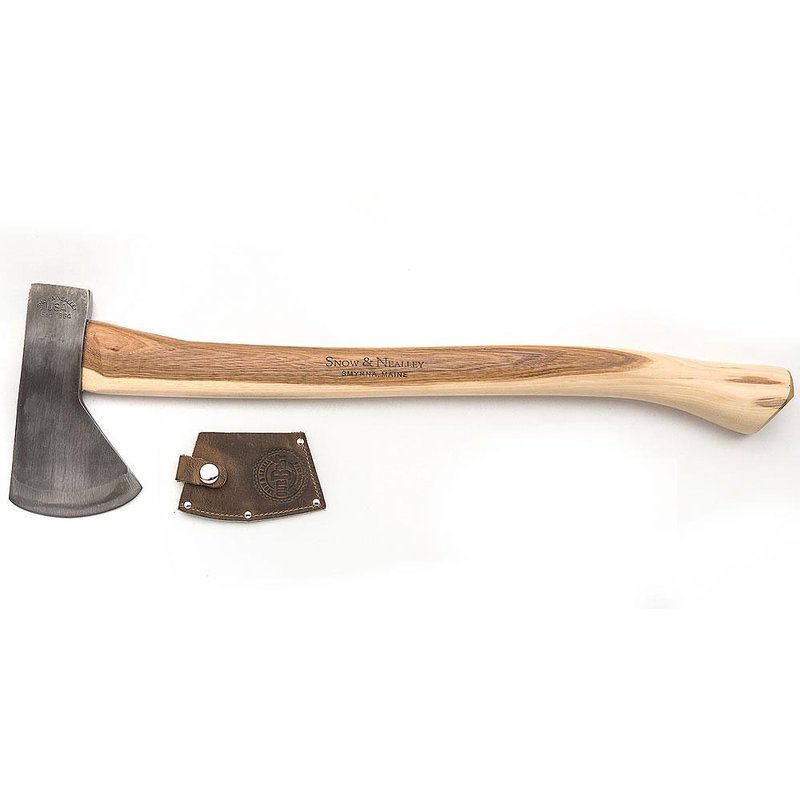
Snow & Nealley Hudson Bay Camping Axe, Wood Cutting and Hauling

Part 1: The History and Evolution of Camping Axes

Ancient Origins

Axes have been integral tools for humans since prehistoric times. Early humans crafted stone axes for hunting, construction, and defense. As civilizations advanced, so did the design and materials of axes. Metalworking techniques introduced bronze, iron, and eventually steel axes, which were far more durable and efficient.

Development Through Ages

The Middle Ages saw significant advancements in axe technology, particularly in Europe. Vikings, known for their seafaring prowess, relied heavily on axes for both practical and combat purposes. Their designs evolved to be lighter and more versatile, making them ideal for everyday tasks like felling trees and splitting wood. During this period, specialized types of axes emerged, each tailored to specific uses, such as the broadaxe for hewing logs or the hatchet for smaller jobs.

Modern Innovations

In the modern era, camping axes have undergone further refinement. Manufacturers now incorporate ergonomic designs, lightweight materials, and advanced manufacturing processes to produce axes that are both robust and user-friendly. Innovations like composite handles, non-slip grips, and precision-ground blades have made camping axes safer and more efficient than ever before. Additionally, multi-tool axes that combine features like a hammer, saw, or firestarter have gained popularity among campers seeking versatility.

Importance in Camping Culture

Camping axes have become iconic symbols of the great outdoors. They embody the spirit of self-reliance and adventure, allowing campers to engage directly with their environment. Beyond practicality, there’s a certain romance associated with wielding an axe—whether it’s chopping wood for a roaring campfire or crafting rustic furniture. For many, the camping axe represents a link to tradition and a simpler way of life, reminding us of our deep-rooted connection to nature.

Part 2: Choosing the Right Camping Axe

Types of Camping Axes

When selecting a camping axe, it’s crucial to understand the different types available, each suited for specific tasks:

  • Hatchet: Compact and lightweight, perfect for small-scale tasks like cutting kindling or driving tent stakes.
  • Camp Axe: Larger than a hatchet but still portable, ideal for splitting logs and general-purpose use.
  • Splitting Axe: Designed specifically for splitting large pieces of wood along the grain, featuring a heavy, wedge-shaped blade.
  • Multi-Tool Axe: Combines an axe head with additional features like a hammer, saw, or firestarter, offering maximum versatility.

Key Features to Consider

Choosing the right camping axe involves evaluating several key features:

  • Blade Material: High-quality steel is preferred for its durability and ability to hold a sharp edge. Stainless steel resists rust but may not be as hard as carbon steel.
  • Handle Material: Options include wood, plastic, and fiberglass. Wood offers a classic feel but requires maintenance; synthetic materials are more durable and weather-resistant.
  • Weight and Size: A heavier axe delivers more force but can be tiring to wield. Lightweight models are easier to carry but may lack power. Consider the balance between portability and effectiveness.
  • Ergonomics: Look for comfortable grips with textured surfaces to prevent slippage. Ergonomic designs reduce strain during prolonged use.
  • Sharpening Requirements: Some axes come pre-sharpened, while others require regular honing. Choose based on your willingness to maintain the blade.

Popular Brands and Models

Several reputable brands offer high-quality camping axes suitable for various needs:

  • Fiskars X7 Camp Axe: Known for its durable steel blade and ergonomic handle, this model excels at splitting wood and general camping tasks.
  • Gransfors Bruks Small Forest Axe: Hand-forged in Sweden, this premium axe boasts exceptional craftsmanship and performance, favored by serious outdoorsmen.
  • Estwing Camper’s Axe: Featuring a solid steel construction and rubber grip, this American-made axe provides excellent durability and comfort.
  • Gerber Bear Grylls Survival Hatchet: Combining a hatchet with a compass and fire starter, this multi-tool is perfect for survival situations and everyday camping.

Tailoring Your Choice

Ultimately, the best camping axe depends on your specific requirements and preferences. Consider factors like the type of camping you do (backpacking vs. car camping), the terrain you frequent, and the tasks you anticipate performing. Research thoroughly, read reviews, and consult experienced campers to find the axe that best fits your lifestyle.

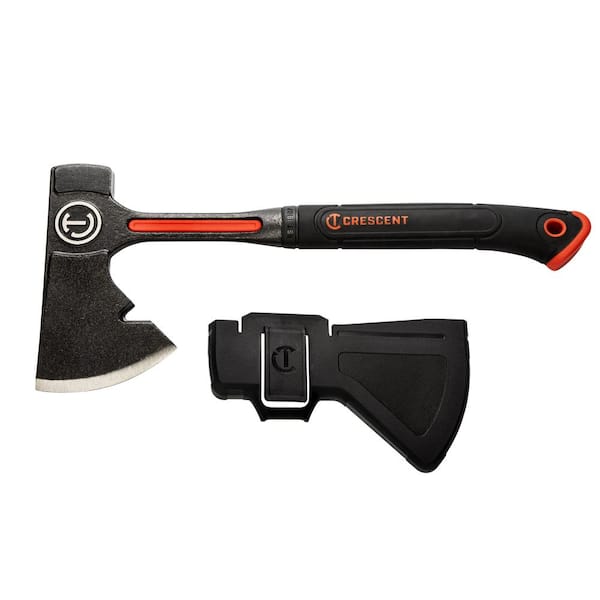
Crescent 16 in. Steel Camping Hatchet CSHATCH16

Part 3: Proper Usage Techniques

Safety First

Before diving into techniques, it’s imperative to prioritize safety. Always wear appropriate protective gear, including gloves and eye protection, when handling a camping axe. Ensure the area around you is clear of obstacles and bystanders. Familiarize yourself with local regulations regarding woodcutting and environmental conservation. Never use an axe in wet conditions, as moisture can cause slips and accidents.

Basic Chopping Methods

Mastering basic chopping techniques is essential for efficient wood processing:

  • Overhand Chop: Hold the axe with both hands near the base of the handle. Bring it down in a controlled arc, aiming for the center of the log. Follow through smoothly to ensure a clean cut.
  • Underhand Chop: Useful for low-hanging branches or awkward angles. Stand close to the target and swing the axe upward, keeping your wrists straight for better control.
  • Side Chop: Ideal for splitting larger logs. Position the log vertically on a stable surface and strike downward from the side, targeting the center line.

Splitting Wood Effectively

Splitting wood efficiently requires practice and technique:

  • Choose the Right Tool: Use a splitting axe or maul for large logs, as these tools are designed to deliver powerful blows without bouncing off.
  • Positioning: Place the log on a solid, level surface like a chopping block. Avoid working on uneven ground or unstable platforms.
  • Striking Technique: Aim for the center of the log and strike firmly but not forcefully. Let the weight of the axe do most of the work. If the log doesn’t split on the first try, adjust your aim slightly and repeat.
  • Safety Precautions: Keep your feet shoulder-width apart for stability. Step back after each strike to avoid accidentally hitting your legs. Never attempt to catch a falling axe mid-swing.

Advanced Techniques

For seasoned campers, advanced techniques can enhance productivity and safety:

  • Batoning: Insert the axe blade into the end of a log and use a sturdy stick to drive it deeper. This method works well for softer woods and smaller logs.
  • Limb Removal: When clearing trails or harvesting firewood, use the axe to remove branches from standing trees. Start from the bottom and work your way up, striking at a slight angle to sever limbs cleanly.
  • Craftsmanship: Skilled users can employ their camping axe for intricate tasks like carving utensils, constructing shelters, or shaping logs for furniture. Practice makes perfect, so start with simple projects and gradually challenge yourself.

Maintenance Tips

Proper maintenance ensures your camping axe remains in top condition:

  • Sharpening: Regularly hone the blade using a whetstone or file. Maintain a consistent angle and apply even pressure for optimal results.
  • Cleaning: After each use, wipe down the blade with a dry cloth to remove dirt and sap. Apply a light coat of oil to prevent rust.
  • Handle Care: Inspect the handle periodically for cracks or splinters. Sand down rough spots and apply linseed oil to preserve wood handles. Replace damaged handles immediately to avoid accidents.

By mastering these techniques, you’ll not only improve your efficiency but also minimize the risk of injury. Remember, practice and patience are key to becoming proficient with your camping axe.

Part 4: Maintenance and Care Practices

Cleaning and Storage

Proper cleaning and storage are critical for extending the lifespan of your camping axe. After each use, thoroughly clean the blade and handle to remove dirt, sap, and other residues. Use mild soap and water for the handle, ensuring it dries completely to prevent warping or cracking. For the blade, wipe it down with a dry cloth and apply a thin layer of lubricating oil to protect against rust. Store the axe in a cool, dry place, ideally in a sheath or cover to shield the blade from damage.

Sharpening and Honing

A sharp axe is a safe and effective tool. Regular sharpening keeps the blade in peak condition, enhancing its performance and reducing the effort required for tasks. There are several methods to sharpen your axe:

  • Whetstone: This traditional method involves rubbing the blade against a whetstone at a consistent angle. Start with a coarse grit to remove nicks and dullness, then progress to finer grits for a razor-sharp edge.
  • File: A mill bastard file is an excellent choice for quick touch-ups. Hold the file at a 25-30 degree angle and stroke away from the edge, maintaining even pressure.
  • Electric Sharpener: For those who prefer convenience, electric sharpeners can save time and effort. However, they may remove more metal than necessary, potentially shortening the life of the blade.

Regardless of the method, always test the edge frequently to avoid over-sharpening. A properly sharpened axe should easily slice through paper or shave hair.

Handle Maintenance

The handle is another vital component that requires attention. Wooden handles need periodic treatment to prevent drying and cracking. Apply boiled linseed oil every few months, especially if the handle feels dry or looks dull. Soak a rag with the oil and rub it into the wood, allowing it to absorb fully. Wipe off any excess and let it dry overnight. For synthetic handles, inspect for signs of wear and tear. Replace cracked or damaged handles promptly to avoid accidents.

Seasonal Checks

Perform seasonal checks to ensure your camping axe is ready for action. Before heading out on a trip, give your axe a thorough inspection:

  • Inspect the Blade: Look for chips, nicks, or rust spots. Address any issues with sharpening or rust removal.
  • Check the Wedge: If your axe has a wooden handle, verify that the wedge holding the head in place is secure. Tighten or replace as needed.
  • Test the Fit: Ensure the handle feels comfortable and secure in your hand. Adjust or modify as necessary to maintain optimal ergonomics.

By adhering to these maintenance practices, you’ll ensure your camping axe remains reliable and functional for years to come.

Hand Forged Carbon Steel Textured Finish Outdoor Camping Axe, Survival Axe

Part 5: Safety Considerations

Handling and Transport

Safety begins with proper handling and transport. Always keep the axe sheathed when not in use to protect both the blade and others. When transporting, secure the axe in a dedicated compartment or bag to prevent accidental exposure. Never leave the axe unattended where children or pets can access it. When carrying the axe, hold it securely by the handle with the blade facing backward, away from your body.

Setting Up Safe Workspaces

Creating a safe workspace is paramount when using a camping axe. Choose a flat, stable area free from tripping hazards. Ensure adequate clearance around you—approximately six feet in all directions—to prevent accidental strikes. Use a chopping block or similar platform to elevate logs, reducing strain on your back and minimizing the risk of injury. Avoid working in windy or rainy conditions, as slippery surfaces and poor visibility increase the likelihood of accidents.

Personal Protective Equipment (PPE)

Wearing appropriate PPE is non-negotiable. Essential items include:

  • Gloves: Protect your hands from blisters, cuts, and splinters. Opt for thick, durable gloves designed for gripping tools.
  • Eye Protection: Safety glasses or goggles safeguard your eyes from flying debris and sparks.
  • Footwear: Sturdy boots with ankle support and slip-resistant soles provide stability and protection.
  • Clothing: Wear long sleeves and pants to shield your skin from potential injuries. Avoid loose clothing that could get caught in the axe.

Emergency Preparedness

Be prepared for emergencies by carrying a first aid kit and knowing basic first aid procedures. Include items like bandages, antiseptic wipes, and adhesive tape. Familiarize yourself with CPR and wound management techniques. Inform someone about your camping plans and expected return date, so help can be summoned if needed.

Supervision and Training

If you’re new to using a camping axe, seek training from experienced users or take a course to learn proper techniques. Children should never handle axes unsupervised. Teach them about the dangers and emphasize the importance of safety protocols. Encourage responsible behavior and set clear boundaries to prevent accidents.

By prioritizing safety at every step, you can enjoy the benefits of a camping axe while minimizing risks. Remember, a little caution goes a long way in ensuring a successful and enjoyable outdoor experience.

Conclusion

In conclusion, the camping axe is more than just a tool—it’s a companion that enhances your outdoor adventures. From its ancient origins to modern innovations, the camping axe has evolved to meet the diverse needs of campers today. By choosing the right axe, mastering proper usage techniques, maintaining it diligently, and prioritizing safety, you can unlock its full potential and make the most of your time in nature.

This comprehensive guide aims to equip you with the knowledge and skills necessary to integrate a camping axe into your outdoor routine effectively and safely. Whether you’re a seasoned camper or a newcomer, embracing the art of using a camping axe can enrich your experiences and foster a deeper connection with the natural world. Happy camping!

Mastering Outdoor Cooking with the Coleman Camping Grill

Introduction

Camping is an exhilarating way to reconnect with nature, unwind from the stresses of daily life, and create lasting memories. One essential element that can elevate your camping experience is having a reliable and efficient cooking appliance. Enter the Coleman Camping Grill—a versatile and durable tool designed to bring culinary delights right into the heart of the great outdoors. Whether you’re a seasoned camper or a novice adventurer, understanding how to choose, use, and maintain a Coleman grill can significantly enhance your outdoor cooking adventures.

This article aims to provide a comprehensive guide on Coleman camping grills. We will delve into the various types available, explore their features and benefits, offer tips for selecting the perfect model, discuss proper usage and maintenance, and share some delicious recipes to try out on your new grill. By the end of this piece, you’ll be well-equipped to make informed decisions and enjoy countless meals cooked under the open sky.

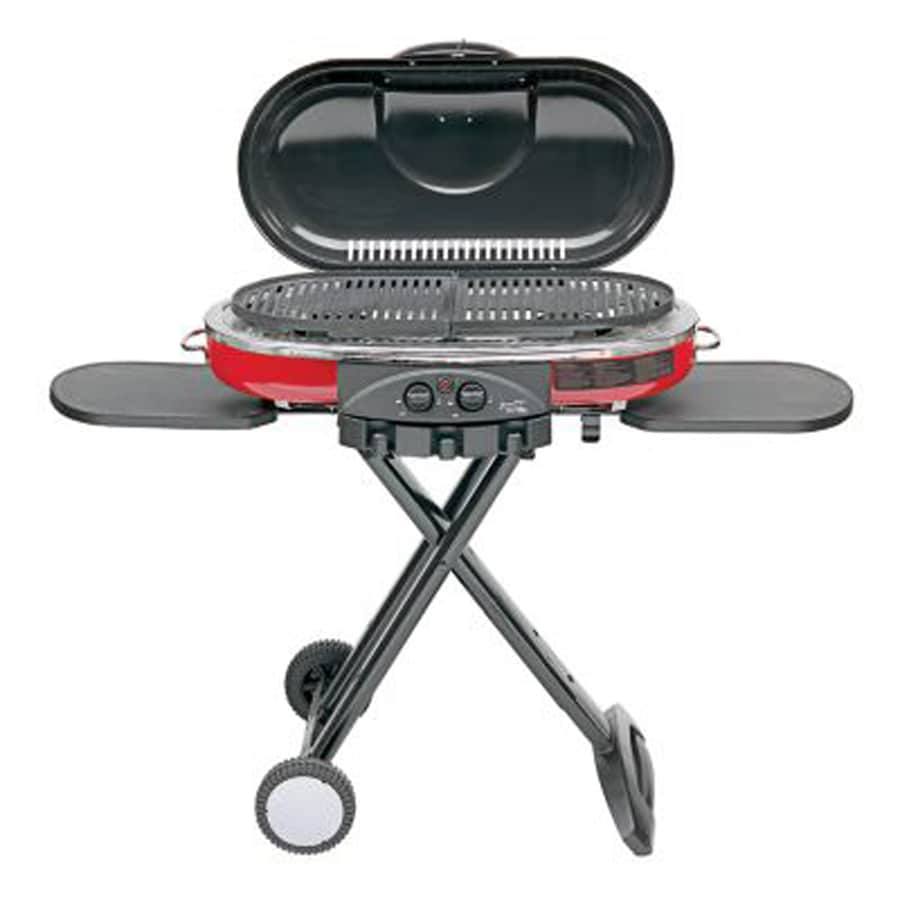
Coleman Portable Sportster 1-Burner Propane Grill

Part 1: Understanding Coleman Camping Grills

Types of Coleman Camping Grills

Coleman offers a wide range of camping grills tailored to different needs and preferences. Here are the primary types:

  1. Propane Grills: These grills use propane gas as fuel and are known for their quick ignition and even heat distribution. They are ideal for those who prefer convenience and consistent performance.
  2. Charcoal Grills: Charcoal grills provide a traditional smoky flavor to your food. They require more setup time but offer a unique cooking experience that many enthusiasts cherish.
  3. Dual Fuel Grills: Combining the best of both worlds, dual fuel grills allow you to switch between propane and charcoal, giving you flexibility based on availability and preference.
  4. Portable Grills: Designed for easy transport, these compact grills are perfect for backpackers and car campers alike. They often come with foldable legs and handles for convenient carrying.
  5. Tabletop Grills: Ideal for smaller groups or family picnics, tabletop grills fit easily on picnic tables and can cook enough food for several people without taking up too much space.

Key Features and Benefits

Each type of Coleman camping grill comes equipped with features that cater to specific camping scenarios. Some common benefits include:

  • Durability: Made from high-quality materials, Coleman grills are built to withstand harsh outdoor conditions.
  • Portability: Many models feature lightweight designs and folding mechanisms, making them easy to carry and store.
  • Fuel Efficiency: Propane grills, in particular, are designed to maximize fuel efficiency, ensuring longer cooking times on fewer refills.
  • Safety Features: Built-in safety mechanisms like flame-out protection and adjustable heat settings help prevent accidents and ensure a smooth cooking process.
  • Versatility: From searing steaks to roasting vegetables, Coleman grills offer a wide range of cooking options to satisfy diverse palates.

Understanding the types and features of Coleman camping grills will help you select the one that best fits your needs and enhances your outdoor cooking experience.

Part 2: Choosing the Right Coleman Camping Grill

Factors to Consider

Selecting the right Coleman camping grill involves considering several factors to ensure it meets your specific requirements. Here are some key considerations:

  1. Size and Capacity: Determine the number of people you typically cook for. Larger families or groups may need a bigger grill with more cooking surface area, while solo campers or couples might opt for a compact model.
  2. Fuel Type: Decide whether you prefer the convenience of propane, the traditional taste of charcoal, or the flexibility of a dual-fuel grill. Each has its own advantages and drawbacks, so choose based on your cooking style and fuel availability.
  3. Portability: If you plan to hike or travel light, prioritize portability. Look for lightweight, foldable grills that come with carrying cases or backpack attachments.
  4. Ease of Setup and Cleanup: Consider how much time and effort you want to spend setting up and cleaning your grill. Some models have self-cleaning burners or removable grease trays that simplify the process.
  5. Budget: Set a budget that aligns with your financial constraints. While premium models offer advanced features, there are also affordable options that provide excellent performance.

Popular Models

To give you a better idea, here are some popular Coleman camping grill models across different categories:

  • Propane Grills:
    • Coleman RoadTrip LXX Portable Gas Grill: Known for its robust construction and large cooking surface, this grill is perfect for family outings.
    • Coleman Classic Portable Propane Grill: A compact and budget-friendly option suitable for small gatherings.
  • Charcoal Grills:
    • Coleman Campfire Charcoal Grill: Offers a classic charcoal cooking experience with a sturdy design and ample cooking space.
    • Coleman Compact Charcoal Grill: Ideal for solo campers or minimalists, this grill packs a punch despite its small size.
  • Dual Fuel Grills:
    • Coleman Dual Fuel Portable Camping Grill: Provides the versatility of switching between propane and charcoal, catering to varying fuel availability.
  • Portable Grills:
    • Coleman MiniMate Portable Propane Grill: Extremely portable and easy to set up, making it a favorite among backpackers.
    • Coleman Fyrestorm Portable Tabletop Grill: A lightweight, foldable option that’s perfect for picnics and short trips.

By carefully evaluating these factors and exploring popular models, you can find a Coleman camping grill that perfectly suits your camping lifestyle.

Part 3: Setting Up and Using Your Coleman Camping Grill

Preparing for Use

Before firing up your Coleman camping grill, it’s crucial to prepare properly to ensure a safe and enjoyable cooking experience. Follow these steps:

  1. Choose a Safe Location: Select a flat, stable surface away from flammable materials such as tents, trees, and dry grass. Ensure the grill is placed on a non-flammable surface like concrete or bare ground.
  2. Check Fuel Levels: Verify that you have enough propane or charcoal for your planned meal. For propane grills, check the tank gauge, and for charcoal grills, ensure you have sufficient coals and lighter fluid if needed.
  3. Inspect the Grill: Examine the grill for any damage or wear, especially the burners, hoses, and connectors. Clean the grates and remove any debris to prevent flare-ups.
  4. Assemble the Grill: If your grill requires assembly, follow the manufacturer’s instructions carefully. Ensure all parts are securely attached and functioning correctly.

Operating Instructions

Once everything is set up, it’s time to start cooking. Here’s how to operate your Coleman camping grill:

  1. Igniting the Grill:
    • Propane Grills: Turn the propane tank valve to the “On” position. Open the burner control knob and press the igniter button. If the grill doesn’t ignite immediately, wait a few seconds before trying again.
    • Charcoal Grills: Arrange the charcoal in a pyramid shape at the bottom of the grill. Pour lighter fluid over the coals and let it soak in for about 5 minutes. Light the coals using matches or a long-neck lighter. Allow the coals to ash over before cooking.
  2. Adjusting Heat Settings:
    • Propane Grills: Use the burner control knobs to adjust the heat intensity. Most Coleman grills have multiple burners, allowing you to create hot and cool zones for versatile cooking.
    • Charcoal Grills: Control heat by adjusting the air vents. Opening the vents increases airflow and heat, while closing them reduces both.
  3. Cooking Tips:
    • Preheat the grill for about 10-15 minutes to ensure even heat distribution.
    • Use a grill thermometer to monitor temperature accurately.
    • Avoid overcrowding the grill to allow for proper heat circulation and even cooking.
  4. Shutting Down:
    • Propane Grills: Turn off the burner control knobs first, then close the propane tank valve. Allow the grill to cool down completely before storing.
    • Charcoal Grills: Close the air vents to extinguish the coals gradually. Once cooled, dispose of the ashes safely in a metal container.

By following these preparation and operating instructions, you can enjoy safe and efficient outdoor cooking with your Coleman camping grill.

Coleman grill deals

Part 4: Maintaining Your Coleman Camping Grill

Cleaning and Storage

Proper maintenance is essential to extend the lifespan of your Coleman camping grill and ensure optimal performance. Here’s how to clean and store your grill effectively:

  1. Cleaning After Use:
    • Cool Down: Allow the grill to cool completely after each use. This prevents burns and makes cleaning easier.
    • Remove Ashes and Debris: For charcoal grills, empty the ash catcher and wipe down the interior. For propane grills, scrape off any food particles from the grates.
    • Wash the Grates: Use a wire brush or grill scraper to remove stubborn residues. Rinse the grates with water and dry thoroughly to prevent rust.
    • Clean Exterior: Wipe down the exterior surfaces with a damp cloth and mild detergent. Dry the grill to avoid water spots and corrosion.
  2. Seasoning the Grates:
    • Apply a thin layer of cooking oil to the grates after cleaning. This helps prevent rust and creates a non-stick surface for future cooking sessions.
  3. Storing the Grill:
    • Disassemble (if applicable): Fold or disassemble the grill according to the manufacturer’s instructions for compact storage.
    • Cover or Bag: Protect the grill from dust and moisture by covering it with a grill cover or placing it in a storage bag.
    • Store in a Dry Place: Keep the grill in a dry, sheltered area such as a garage or shed to prevent rust and damage.

Troubleshooting Common Issues

Even with regular maintenance, issues can arise. Here’s how to troubleshoot some common problems:

  1. Flare-Ups:
    • Cause: Grease buildup or excessive fat dripping onto the flames.
    • Solution: Clean the grates regularly and trim excess fat from meats. Keep a spray bottle of water nearby to douse small flare-ups.
  2. Uneven Heating:
    • Cause: Blocked burners or improperly arranged charcoal.
    • Solution: Check and clean the burners. For charcoal grills, distribute the coals evenly or create a two-zone fire for better control.
  3. Weak Flame:
    • Cause: Low propane supply or clogged burner ports.
    • Solution: Replace the propane tank if necessary. Clean the burner ports with a needle or wire brush.
  4. Difficulty Igniting:
    • Cause: Faulty igniter or insufficient gas flow.
    • Solution: Test the igniter with a manual lighter. Check the propane connections and ensure the tank valve is fully open.

By maintaining your Coleman camping grill and addressing common issues promptly, you can enjoy years of reliable outdoor cooking.

Part 5: Delicious Recipes for Your Coleman Camping Grill

Steak and Vegetable Skewers

Ingredients:

  • 1 lb steak strips
  • 1 bell pepper, sliced
  • 1 red onion, sliced
  • 8 oz mushrooms, halved
  • 2 tbsp olive oil
  • 2 tbsp soy sauce
  • 1 tbsp honey
  • 1 tsp garlic powder
  • Salt and pepper to taste

Instructions:

  1. Thread the steak strips and vegetables alternately onto skewers.
  2. In a bowl, mix olive oil, soy sauce, honey, garlic powder, salt, and pepper.
  3. Brush the marinade over the skewers and let them sit for 15 minutes.
  4. Grill the skewers over medium-high heat for 8-10 minutes, turning occasionally until the steak is cooked through and the vegetables are tender.

Grilled Chicken Quesadillas

Ingredients:

  • 4 large flour tortillas
  • 2 cups shredded chicken
  • 1 cup shredded cheese
  • 1/2 cup salsa
  • 1/4 cup chopped cilantro
  • 1 lime, cut into wedges

Instructions:

  1. Spread shredded chicken and cheese over half of each tortilla.
  2. Fold the tortillas in half and lightly brush the outsides with oil.
  3. Grill the quesadillas over medium heat for 3-4 minutes per side until golden brown and crispy.
  4. Slice into wedges and serve with salsa, cilantro, and lime wedges.

Campfire Corn on the Cob

Ingredients:

  • 6 ears of corn, husks removed
  • 4 tbsp butter, melted
  • 1 tsp chili powder
  • 1 tsp garlic powder
  • Salt and pepper to taste

Instructions:

  1. Preheat the grill to medium heat.
  2. Brush the corn with melted butter and sprinkle with chili powder, garlic powder, salt, and pepper.
  3. Grill the corn for 10-12 minutes, turning occasionally until kernels are slightly charred and tender.

Foil Packet Baked Potatoes

Ingredients:

  • 4 large potatoes, scrubbed and pierced with a fork
  • 4 tbsp butter
  • 1/4 cup sour cream
  • 1/4 cup shredded cheese
  • 1/4 cup chopped chives
  • Salt and pepper to taste

Instructions:

  1. Wrap each potato in aluminum foil.
  2. Grill the potatoes for 45-60 minutes until they are soft when squeezed.
  3. Cut a slit in the top of each potato and add butter, sour cream, cheese, chives, salt, and pepper.

Grilled Banana Boats

Ingredients:

  • 4 bananas, peeled and split lengthwise but still connected at the base
  • 1/4 cup chocolate chips
  • 1/4 cup mini marshmallows
  • 1/4 cup crushed nuts

Instructions:

  1. Stuff the banana halves with chocolate chips, marshmallows, and crushed nuts.
  2. Wrap each stuffed banana in aluminum foil.
  3. Grill for 10-15 minutes until the bananas are heated through and the toppings are melted.

These recipes showcase the versatility of your Coleman camping grill and provide delicious meals to savor during your outdoor adventures.

Camping shop grill coleman

Conclusion

Camping with a Coleman camping grill opens up a world of culinary possibilities, allowing you to enjoy gourmet meals right in the heart of nature. From understanding the different types of grills to choosing the right model, setting up and using your grill safely, maintaining it for longevity, and experimenting with delicious recipes, this guide has covered all aspects to ensure you have a memorable and enjoyable outdoor cooking experience.

Whether you’re gathering around the campfire with friends and family or enjoying a peaceful solo trip, a Coleman camping grill is a valuable companion that enhances your connection with nature. Embrace the joy of outdoor cooking and create unforgettable moments with every meal prepared on your Coleman grill. Happy camping and bon appétit!

The Guide to Camping Oven: Everything You Need to Know

Introduction

Camping is one of the most enjoyable experiences of life, and having good food to eat while you’re out in the wild can make the experience even better. While camping stoves are a popular choice for cooking while camping, many people are now turning to camping ovens as a way to bake and cook more diverse meals in the great outdoors. In this guide, we will take an in-depth look at the camping oven and how they can enhance your camping experience.

Portable Camping Oven & Stove

Part 1: What is a Camping Oven?

Level 1: Understanding the Basics of Camping Ovens
Camping ovens are portable and versatile cooking appliances designed for outdoor use. They typically run on propane or butane and are similar in design to the ovens found in a standard kitchen. These ovens come in various sizes, from compact backpacking models to larger, more robust options for campers who prefer to travel with more equipment.

Level 2: The Benefits of Using a Camping Oven
One of the main benefits of using camping ovens is the ability to bake and cook a wider variety of meals while camping. Unlike traditional camping stoves, camping ovens allow you to bake bread, cook pizzas, roast meats, and make delicious desserts. This versatility can make the camping experience more enjoyable and allows for more creativity in meal planning.

Part 2: Types of Camping Ovens

Level 1: Different Types of Camping Ovens
There are several types of camping ovens available, each with its own unique features and benefits. Some ovens are compact and lightweight, designed for backpacking and minimalist camping, while others are larger and more sophisticated, ideal for car camping and RV trips.

Level 2: Choosing the Right Camping Oven for Your Needs
When selecting a camping oven, it is important to consider factors such as size, weight, fuel type, and cooking capacity. For backpackers and hikers, a compact and lightweight oven may be the best option, while those with larger camping setups may prefer a more robust model with additional features.

Part 3: Tips for Using a Camping Oven

Level 1: Setting Up and Operating Your Camping Oven
Before using your camping oven, it is important to carefully read the manufacturer’s instructions and familiarize yourself with the setup and operation of the appliance. Take the time to practice using the oven at home before your camping trip so that you are comfortable with its features and functions.

Level 2: Cooking Techniques and Recipes for Camping Ovens
When using camping ovens, it’s essential to adjust your cooking techniques to suit the outdoor environment. This may involve using different cooking temperatures, preheating the oven for longer, and rotating dishes for even cooking. There are also many camping oven’s recipes available online, from simple bread and pizza recipes to more elaborate dishes.

Part 4: Maintenance and Care of Camping Ovens

Level 1: Cleaning and Storage of Camping Ovens
Proper maintenance of your camping ovens is essential for ensuring its longevity and reliable performance. After each use, clean the oven thoroughly, removing any food residue and grease buildup. Proper storage is also important to protect the oven from damage and deterioration.

Level 2: Troubleshooting Common Issues with Camping Ovens
Like any appliance, camping ovens may experience issues from time to time. Learning how to troubleshoot common problems such as uneven heating, burner malfunction, or ignition issues can help you resolve these issues quickly and get back to enjoying your outdoor cooking experience.

Part 5: Safety Considerations When Using Camping Ovens

Level 1: Understanding the Risks Associated with Camping Ovens
While camping ovens are designed for outdoor use, it’s important to be aware of the potential risks and hazards associated with their use. These may include fire hazards, burns, and carbon monoxide poisoning if the oven is not operated correctly.

Level 2: Safety Precautions for Using Camping Ovens
To ensure safe operation of your camping oven, follow the manufacturer’s safety guidelines and never leave the oven unattended while in use. Always set up the oven on a stable and level surface, away from flammable materials, and ensure proper ventilation to prevent the buildup of harmful gases.

Coleman Camp Oven

Part 6: Safety Tips for Using a Camping Oven

When using a camping oven, safety should always be the top priority. Here are some important safety tips to keep in mind while using a camping oven:

  1. Always read and follow the manufacturer’s instructions for camping ovens. This will ensure that you are using the oven safely and in accordance with the manufacturer’s guidelines.
  2. Use the camping oven in a well-ventilated area to prevent the build-up of carbon monoxide. Never use a camping oven inside a tent or a closed space.
  3. Keep flammable materials away from the camping oven. This includes things like paper, cloth, and other combustible materials that could catch fire if they come into contact with the oven.
  4. Make sure the camping oven is placed on a stable and level surface to prevent it from tipping over while in use.
  5. Always supervise the camping oven while it is in use, especially if there are children or pets around. Accidents can happen quickly, so it’s important to keep a close eye on the oven at all times.

By following these safety tips, you can ensure that you are using your camping oven in a safe and responsible manner, allowing you to enjoy delicious meals while enjoying the great outdoors.

Part 7: Cleaning and Maintenance of a Camping Oven

Proper cleaning and maintenance of your camping ovens are important to ensure its longevity and optimal performance. Here are some tips for cleaning and maintaining your camping ovens:

  1. After each use, allow the camping oven to cool down completely before cleaning. Use a mild detergent and water to clean the interior and exterior of the oven, and avoid using abrasive cleaners that could damage the finish.
  2. Regularly inspect the camping oven for any signs of wear and tear, such as rust or corrosion. If you notice any damage, have it repaired by a professional before using the oven again.
  3. Check the fuel connections and hoses for any leaks or damage. Replace any worn or damaged parts to prevent potential safety hazards.
  4. Store camping ovens in a dry and well-ventilated area to prevent rust and corrosion. Cover the oven when not in use to protect it from the elements.

By following these cleaning and maintenance tips, you can ensure that your camping ovens remain in good working condition for many outdoor adventures to come.

Part 8: Cooking Tips and Recipes for a Camping Oven

When it comes to cooking with a camping oven, there are a variety of delicious dishes that you can prepare. Here are some cooking tips and recipes for making the most of your camping ovens:

  1. One-pot meals: A camping oven is perfect for making hearty one-pot meals such as stews, casseroles, and soups. Simply add your ingredients to the oven, set the temperature, and let it cook while you enjoy the great outdoors.
  2. Baking: You can also use your camping ovens to bake delicious treats such as bread, cookies, and even pizzas. Just make sure to preheat the oven and monitor the cooking time to achieve the perfect bake.
  3. Grilling: Many camping ovens come with a grill attachment, allowing you to grill up your favorite meats and vegetables while camping. Take advantage of this feature to add some smoky flavor to your meals.
  4. Dutch oven recipes: Dutch ovens are a popular choice for camping cooking, and there are countless recipes available for making everything from breakfast dishes to desserts in a Dutch oven. Try your hand at cooking a classic Dutch oven recipe for a memorable camping meal.

By exploring these cooking tips and recipes, you can elevate your camping experience with delicious and satisfying meals prepared with your camping ovens.

Deluxe Outdoor Camping Oven

Conclusion

Investing in camping ovens can significantly expand your cooking capabilities while camping, allowing you to enjoy delicious meals that go beyond traditional camping fare. By understanding the different types of camping ovens, learning how to use and maintain them properly, and following safety precautions, you can make the most of your outdoor cooking experience and create memorable camping meals for yourself and your fellow campers.

Camping Clothes: What to Pack for Your Outdoor Adventure

Introduction

Camping is one of the best ways to enjoy the great outdoors and escape the hustle and bustle of everyday life. Whether you’re going on a weekend backpacking trip or a week-long camping excursion, having the right clothes can make your outdoor adventure more comfortable and enjoyable. In this guide, we’ll explore the essential clothing items you should pack for your next camping trip.

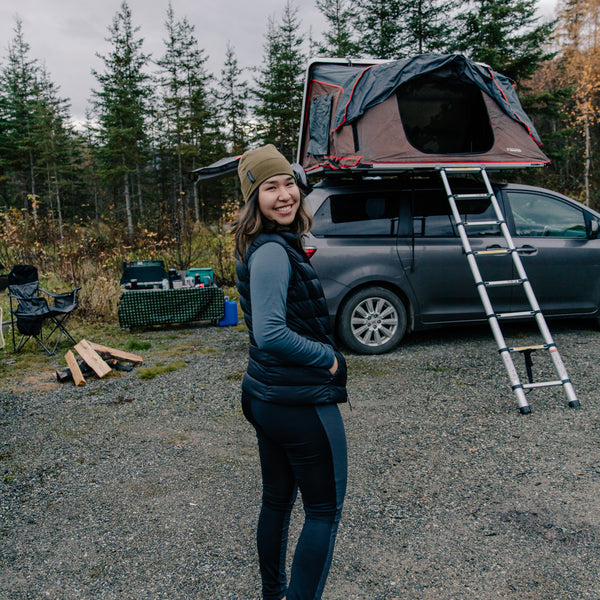
The Best Women's Camping Clothes for Comfort Outdoors

Part 1: Base layer clothing

Level 1: Importance of base layer clothing
Before you start packing for your camping trip, it’s essential to understand the importance of base layer clothing. The base layer is the first layer of clothing that comes into contact with your skin, and its primary function is to manage moisture and regulate body temperature. Without the right base layer clothing, you may find yourself cold and uncomfortable, regardless of the weather.

Level 2: Recommended base layer clothing
When it comes to choosing the right base layer clothing for camping, opt for moisture-wicking and quick-drying materials such as merino wool or synthetic fabrics. These materials are designed to draw moisture away from the skin, keeping you dry and warm. Additionally, consider packing both lightweight and mid-weight base layers to accommodate changing weather conditions.

Part 2: Insulating layers

Level 1: Purpose of insulating layers
Insulating layers are designed to provide warmth and insulation in cold weather conditions. These layers are essential for staying comfortable during chilly nights and early mornings at the campsite. While you may not need them during the day, insulating layers are crucial for retaining body heat when temperatures drop.

Level 2: Recommended insulating layers
When it comes to insulating layers, pack a combination of fleece jackets, down or synthetic insulated jackets, and thermal leggings or pants. These items can be easily layered over your base layer clothing to provide additional warmth when needed. Look for lightweight, compressible, and packable options to save space in your backpack.

Part 3: Outerwear

Level 1: Importance of outerwear
Outerwear is essential for protecting yourself from the elements while camping. Whether it’s rain, wind, or sun, having the right outerwear can make a significant difference in your comfort and overall camping experience. In addition to providing protection, outerwear also serves as a barrier against moisture and helps regulate body temperature.

Level 2: Recommended outerwear
When packing for your camping trip, be sure to include a waterproof and windproof jacket, a durable pair of hiking pants or shorts, and a wide-brimmed hat for sun protection. Consider the climate and terrain of your camping destination to determine the specific type of outerwear you will need.

Part 4: Footwear

Level 1: Importance of proper footwear
Proper footwear is crucial for a successful camping trip, as it provides comfort, support, and protection for your feet throughout your outdoor adventures. Ill-fitting or unsuitable footwear can lead to blisters, discomfort, and even injuries, so it’s essential to invest in quality hiking boots or shoes.

Level 2: Recommended footwear
When it comes to choosing the right footwear for camping, opt for waterproof and breathable hiking boots with good ankle support. Additionally, pack a pair of comfortable camp shoes, such as sandals or lightweight sneakers, for relaxing around the campsite or for short walks in the evenings.

Part 5: Accessories

Level 1: Essentials accessories for camping
In addition to clothing, accessories play a vital role in keeping you comfortable and prepared during your camping trip. From headwear to gloves, having the right accessories can enhance your outdoor experience and provide additional protection against the elements.

Level 2: Recommended accessories
Consider packing a wide range of accessories, including a brimmed hat for sun protection, a beanie or balaclava for warmth, lightweight gloves, sunglasses with UV protection, and a neck gaiter or scarf for added warmth and protection. Additionally, don’t forget to bring moisture-wicking socks, a versatile buff, and a lightweight backpack for day hikes.

Super Simple Guide for What to Wear Camping

Part 6: Essential Camping Footwear

When it comes to camping, the right footwear can make all the difference in your outdoor adventures. Whether you’re hiking through rugged terrain, wading through streams, or simply strolling around the campsite, having the right shoes can keep you comfortable and protected. Here are some essential footwear options for camping:

  1. Hiking Boots: Durable, supportive hiking boots are a must-have for any camping trip. Look for waterproof and breathable options with sturdy outsoles and ankle support for added stability on uneven terrain.
  2. Water Shoes: If your camping trip involves water activities such as swimming, kayaking, or fishing, a pair of water shoes can be a game-changer. These quick-drying, lightweight shoes provide protection and traction on wet surfaces.
  3. Sandals: A pair of comfortable, durable sandals can be a great choice for casual campsite wear and shorter hikes. Look for styles with adjustable straps and sturdy soles for maximum comfort and support.
  4. Camp Shoes: Many campers like to bring a pair of lightweight, slip-on shoes to wear around the campsite. These can be an easy way to give your feet a break from your hiking boots while still offering some protection and support.
  5. Socks: Don’t forget about the importance of good quality socks. Look for moisture-wicking, cushioned socks that provide comfort and prevent blisters.

Choosing the right footwear for your camping trip can help keep your feet happy and comfortable, allowing you to fully enjoy the great outdoors.

Part 7: Layering for Changeable Weather

When it comes to camping, preparing for changeable weather is crucial. The key to staying comfortable in varying temperatures and conditions is layering. By layering your clothing, you can easily adjust to changing weather, stay warm, and maintain your comfort level. Here are some layering tips for camping:

Base Layer: The base layer is the first layer of clothing you put on. Look for moisture-wicking, quick-drying materials like merino wool or synthetic fabrics. These materials will help keep you dry and comfortable, even if you start to sweat.

Mid Layer: The mid layer provides insulation and warmth. Fleece jackets, down vests, and softshell jackets are popular choices for camping. Make sure the mid layer is easy to pack and carry.

Outer Layer: The outer layer, like a waterproof jacket or windbreaker, protects you from the elements. Look for a breathable, waterproof, and lightweight option that can be easily packed and pulled out if the weather turns.

Accessories: Don’t forget to layer your accessories as well. A warm hat, gloves, and a scarf can make a big difference in maintaining your comfort level in cold weather.

Camping Gear & Accessories | Backpacks, Storage, More

Part 8: Choosing the Right Camping Hats

When it comes to camping, protecting yourself from the sun, rain, and other elements is crucial. One essential piece of gear to achieve this is a good camping hat. With the right hat, you can stay cool, avoid sunburn, and even protect yourself from biting insects. Here are some popular types of camping hats to consider:

Wide-Brimmed Hat: Wide-brimmed hats provide excellent sun protection for your face, neck, and ears. Look for hats with an adjustable chin strap to keep it secure in windy conditions.

Baseball Cap: A classic baseball cap can provide some sun protection and keep sweat out of your eyes. Look for a cap with a dark underbrim to reduce glare and improve visibility.

Bucket Hat: Bucket hats are a trendy and functional option for camping. They provide all-around sun protection and are typically made from lightweight, breathable materials.

Boonie Hat: Boonie hats are similar to wide-brimmed hats but offer added versatility with adjustable brims. Many boonie hats also feature a bug net to keep insects at bay.

Beanie: In cooler weather, a comfortable, warm beanie can keep your head and ears cozy during chilly evenings at the campsite.

When choosing a camping hat, consider factors such as sun protection, breathability, packability, and comfort. The right hat can make a big difference in your overall camping experience.

Conclusion

Packing the right clothing for your camping trip is essential for staying comfortable and safe in the great outdoors. By considering the different layers, outerwear, footwear, and accessories needed for a camping adventure, you can ensure that you are well-prepared for whatever Mother Nature throws your way. With the right clothing and gear, you can fully immerse yourself in the beauty of the outdoors and make lasting memories on your camping trip.

Unleashing the Wild: A Camping Trip to Remember

Introduction

Camping is a recreational outdoor activity that involves staying overnight in a tent, camper, or other temporary shelter. It often involves activities such as hiking, fishing, swimming, and cooking over an open fire. Camping can take place in various settings such as national parks, campgrounds, and wilderness areas, and it provides an opportunity to connect with nature and enjoy the great outdoors.

Camping trips are a fantastic way to get in touch with nature, relax, and have an adventure. Whether you are a seasoned camper or a newbie, there is always something exhilarating about escaping the hustle and bustle of everyday life to spend a few days in the great outdoors. From setting up camp to exploring the wilderness, a camping trip can be a truly transformative experience.

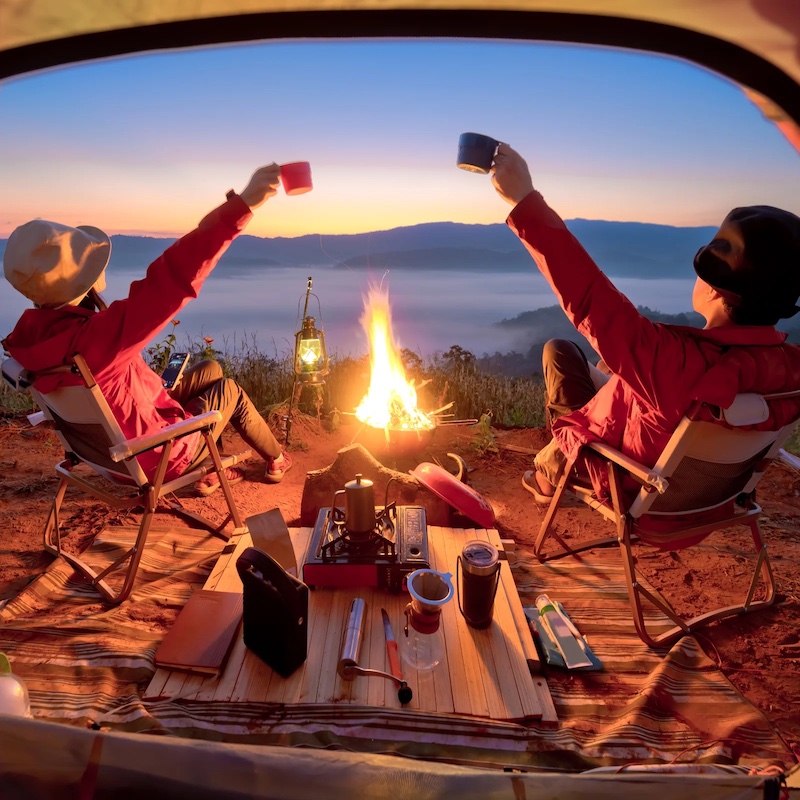
camping adventure

Part 1: Planning and Preparation

Level 1: The Essentials
Before embarking on a camping trip, it’s crucial to have the right gear and supplies. A sturdy tent, sleeping bags, cooking equipment, and suitable clothing are just a few of the essential items to pack. Additionally, food, water, and first aid supplies should be on your checklist to ensure a safe and enjoyable trip.

Level 2: Research and Destination
Choosing the perfect camping destination is an important part of the planning process. Researching potential locations, considering the weather, and understanding the rules and regulations of the area are essential. Whether it’s a national park, a secluded forest, or a coastal campsite, each location offers a unique camping experience.

Part 2: Setting Up Camp

Level 1: Pitching the Tent
Setting up your home away from home can be an adventure in itself. It’s important to find a level and sheltered spot, and follow the instructions for your particular tent carefully. Once the tent is set up, arranging the sleeping area and ensuring adequate protection from the elements is essential for a comfortable stay.

Level 2: Creating a Campsite
In addition to the tent, creating a designated campsite area with a fire pit, seating, and space for cooking is necessary. Organizing kitchen supplies and setting up a camping stove or barbeque can make meal preparation an enjoyable part of the experience. Consideration for the surroundings and leaving no trace is essential when setting up a campsite.

Part 3: Exploring the Wilderness

Level 1: Hiking and Nature Walks
Exploring the surrounding wilderness is one of the most rewarding aspects of a camping trip. Whether it’s a leisurely nature walk or a more challenging hike, there are endless opportunities to experience the natural beauty and wildlife. It’s important to be prepared with appropriate footwear, water, and a map of the area.

Level 2: Wildlife Observation and Photography
Observing and capturing the local flora and fauna can be a memorable part of any camping trip. From spotting birds and insects to observing larger animals such as deer or elk, it’s essential to maintain a safe distance, respect the wildlife, and capture the experience through photography or sketching.

Part 4: Campfire Stories and Relaxation

Level 1: Gathering around the Campfire
One of the most cherished camping traditions is the campfire. Gathering around the crackling flames, sharing stories, and cooking delicious campfire meals can create lasting memories. Whether it’s roasting marshmallows or simply enjoying the warmth, the campfire is a central part of the camping experience.

Level 2: Stargazing and Relaxation
Once the sun sets, stargazing and relaxation become natural activities. Away from the city lights, the clear night sky offers a breathtaking view of the stars and constellations. Finding a comfortable spot to lay back, unwind, and soak in the tranquil atmosphere completes the camping experience.

The Essential Shopping List for Solo Camping

Part 5: Packing Up and Reflection

Level 1: Leaving No Trace
When it’s time to pack up and leave the campsite, it’s essential to ensure that no trace of your presence remains. Gathering all rubbish and waste, extinguishing the campfire, and leaving the area as you found it preserves the natural environment for future campers to enjoy.

Level 2: Reflecting on the Experience
As the camping trip comes to an end, taking a moment to reflect on the experience, cherish the memories, and plan for future adventures can be a rewarding way to close the chapter. Whether it’s journaling, sharing stories with fellow campers, or simply taking in the final moments in the wilderness, reflecting on the trip can be a transformative experience.

Part 6: The Unexpected Storm

As the group settled into their camping site, they noticed the clouds building up in the sky. The weather had been perfect all day, so they weren’t too concerned. However, as they finished cooking dinner, the first drops of rain began to fall. Within minutes, a full-blown storm had descended upon them.

The wind howled through the trees, and the rain came down in sheets. The group quickly scrambled to secure their belongings and huddle together under a tarp for shelter. Despite the chaos of the storm, they found themselves laughing and bonding over their shared experience. As the storm raged on, they realized that this unexpected turn of events had brought them even closer together.

Part 7: A Night of Bonding

The storm finally passed, leaving behind a cool, crisp night. With the sky now clear and full of stars, the group decided to start a campfire. They sat around the crackling flames, sharing stories and roasting marshmallows. The warmth of the fire and the quiet of the night created a comfortable atmosphere, and the group found themselves opening up to one another in a way that hadn’t happened before.

They talked about their fears, their dreams, and their favorite memories. Some shared personal struggles they were facing, and others offered words of support and encouragement. As the night drew on, they all felt a deep sense of connection and understanding, knowing that they had each other’s backs no matter what.

Part 8: The Morning Farewell

As the sun began to rise over the horizon, the group knew their camping trip was coming to an end. They packed up their belongings and shared one last breakfast together, savoring the final moments of their adventure. They exchanged phone numbers and promised to stay in touch, knowing that the memories they had made would bond them forever.

As they parted ways, each member of the group felt a sense of gratitude for the experience they had shared. They had faced challenges, embraced nature, and formed friendships that would last a lifetime. As they drove away from the campsite, they looked forward to the next adventure that awaited them, knowing that they were forever changed by their camping trip.

camping trip

Conclusion

Camping is an outdoor recreational activity where individuals or groups set up temporary shelters, such as tents or RVs, and spend time outdoors in natural settings. This can include activities such as hiking, fishing, cooking over a campfire, and enjoying the beauty of the natural environment. Camping can be done in designated campgrounds, national parks, or other public lands, as well as in more remote or rugged locations for a more adventurous experience. It is a popular way to disconnect from the hustle and bustle of daily life and connect with nature.

A camping trip offers a myriad of experiences and presents an opportunity to connect with nature, relax, and create lasting memories. From planning and setting up camp to exploring the wilderness and reflecting on the experience, each aspect of the trip contributes to a fulfilling and unforgettable adventure. Whether it’s finding solace in nature, overcoming challenges, or simply enjoying the outdoors, a camping trip is an experience that can leave a lasting impact.

The Ultimate Guide to Portable Showers for Camping

Introduction

Camping is a great way to escape the hustle and bustle of everyday life and connect with nature. However, one of the downsides of camping is the lack of amenities, including a proper shower. Thankfully, portable showers have become increasingly popular among outdoor enthusiasts, providing a convenient and efficient way to stay clean while exploring the great outdoors. In this comprehensive guide, we will explore the different types of portable showers available, their features, benefits. And how to choose the best one for your camping needs.

Part 1: Types of Portable Showers

  1. Inflatable Showers
    • Inflatable showers are a popular option for campers due to their lightweight and compact design. These showers typically feature a built-in pump that allows you to inflate the shower bag with air, creating a pressurized water flow for easy rinsing.
    • Some inflatable showers also come with a solar panel for heating water, making them a great eco-friendly option for camping.
  2. Propane-Powered Showers
    • Propane-powered showers are an excellent choice for campers who require a steady supply of hot water. These showers are equipped with a propane burner that heats the water as it passes through the showerhead, providing a warm and comfortable bathing experience.
    • While propane-powered showers are bulkier and heavier than other options, they are ideal for extended camping trips where access to hot water is essential.

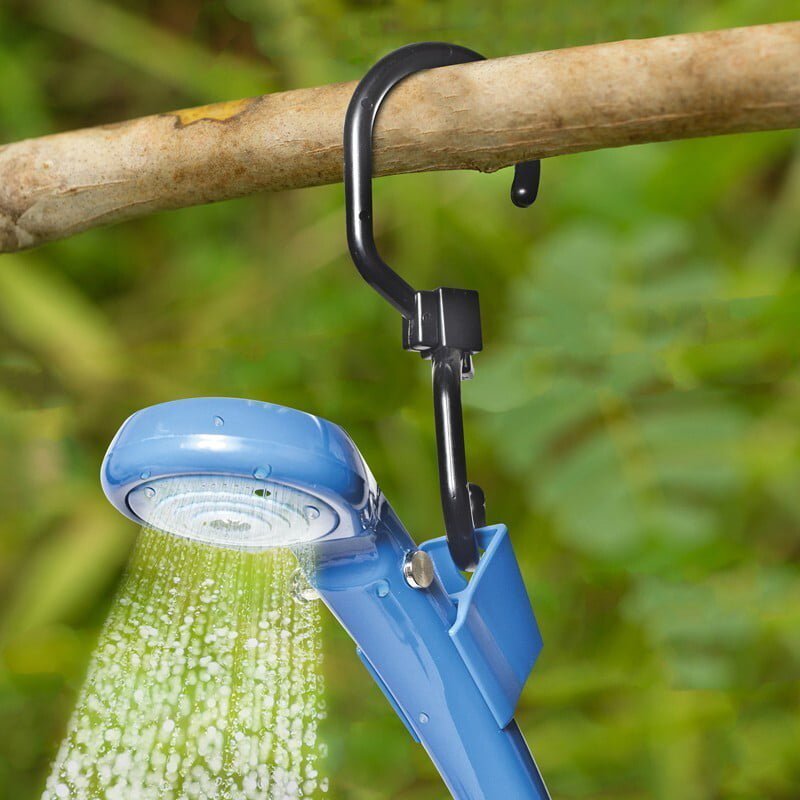
Outdoor Electric Shower Rechargeable  Pump with Intelligent Digital Display

Part 2: Features to Consider

  1. Water Capacity
    • When choosing a portable shower for camping, consider the water capacity of the shower bag or tank. A larger water capacity is ideal for group camping trips or extended stays in remote locations where access to water may be limited.
  2. Heating Method
    • The heating method of a portable shower plays a significant role in determining its functionality. While some showers rely on solar panels to heat water, others use propane or electricity. Consider your camping environment and the availability of resources when selecting the heating method for your portable shower.

Part 3: Benefits of Portable Showers

  1. Convenience
    • Portable showers offer the convenience of staying clean and refreshed while camping, without the need to rely on public facilities or natural water sources. This is especially beneficial for hygiene and comfort during multi-day outdoor activities.
  2. Hygiene
    • Maintaining good hygiene is crucial when spending time in the great outdoors. Portable showers allow campers to wash away dirt, sweat, and other impurities, reducing the risk of skin irritation and infections.

Part 4: How to Choose the Best Portable Shower

  1. Durability
    • When choosing a portable shower for camping, look for durable materials that can withstand outdoor conditions. Consider factors such as weather-resistance, tear resistance. And overall build quality to ensure the shower can withstand the rigors of camping.
  2. Portability
    • The portability of a portable shower is essential when considering how to transport and store it during camping trips. Look for showers that are lightweight, compact, and easy to pack, ensuring they won’t take up too much space in your camping gear.

Part 5: Tips for Using a Portable Shower

  1. Set up in a Sheltered Area
    • When using a portable shower while camping, set it up in a sheltered area to provide privacy and protection from the elements. Utilize pop-up privacy tents or natural barriers such as trees and rocks to create a secluded bathing space.
  2. Conservation of Water
    • To make the most of your portable shower while camping, practice water conservation techniques such as turning off the shower while soaping up, using water-saving showerheads, and capturing used water for other purposes such as washing dishes or watering plants.

5 Gallon Portable Shower Outdoor Camping Hiking Solar Energy Heated Pipe Bag New

Importance of a Portable Shower in Camping

A portable shower is an essential piece of equipment for camping, as it allows campers to maintain proper hygiene even when they are away from traditional bathroom facilities. The ability to take a shower while camping can greatly improve the overall experience, making it more enjoyable and comfortable. It also allows campers to stay clean and fresh, which is especially important for those who are spending several days or weeks in the great outdoors.

In addition to the basic need for cleanliness, a portable shower can also provide a sense of comfort and relaxation. After a long day of hiking, swimming, or other outdoor activities. Being able to take a warm shower can be incredibly soothing and rejuvenating. It can also help to alleviate sore muscles and reduce stress, making the camping experience more enjoyable overall.

Choosing the Right Portable Shower for Camping

When it comes to choosing a portable shower for camping, there are several factors to consider. First and foremost, campers should consider the size and weight of the shower, as well as how easy it is to set up and use. A compact, lightweight shower that is simple to assemble and operate is ideal for camping trips, as it will not take up too much space or be a hassle to transport.

Campers should also consider the water capacity and flow rate of the portable shower, as well as the heating mechanism. A shower with a large water capacity and a high flow rate will provide a more satisfying shower experience, while a reliable heating mechanism will ensure that the water is at a comfortable temperature. Some portable showers are solar-powered, while others require a propane tank or other fuel source, so campers should choose the option that best suits their needs.

Tips for Using a Portable Shower while Camping

Using a portable shower while camping requires some preparation and know-how to ensure a satisfying experience. Campers should always test out their portable shower before heading out on a trip, to ensure that it is functioning properly and that they understand how to operate it. They should also consider using a privacy tent or shower enclosure to maintain modesty and keep their surroundings clean.

When using a portable shower, campers should be mindful of their water usage, especially if they are in a remote area with limited water sources. They should aim to conserve water as much as possible by turning off the shower when they are not actively using it and using quick, efficient techniques for washing and rinsing. It is also important to dispose of soapy water in a manner that is environmentally friendly and respectful of the natural surroundings. Lastly, campers should be sure to dry off completely to avoid getting chilled in cooler outdoor temperatures.

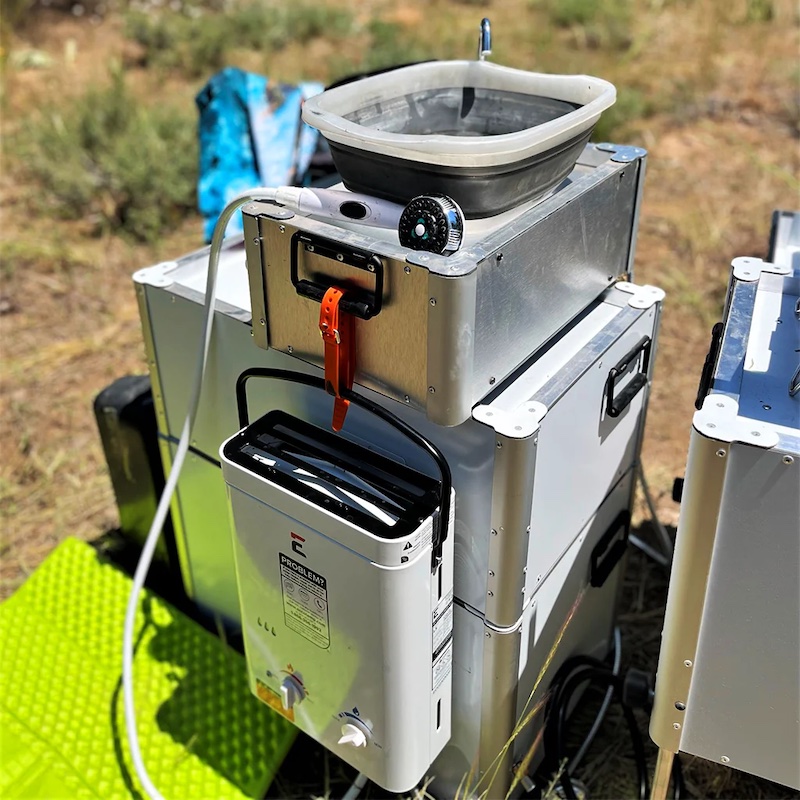
Companion 12V Portable Camp Shower

Tips for Choosing the Right Portable Shower for Camping

When it comes to choosing the right portable shower for camping, there are a few key factors to consider. Here are some tips to help you find the perfect option for your outdoor adventures:

  1. Size and Portability: Consider the size and weight of the portable shower. You’ll want something that is easy to transport and set up at your campsite. Look for compact and lightweight options that won’t take up too much space in your camping gear.
  2. Water Capacity: Think about how much water you’ll need for your camping trips. Some portable showers have larger water reservoirs, while others are more compact. Consider how many people will be using the shower and how often you’ll need to refill the water.
  3. Heating Method: Portable showers can be heated in a few different ways, including solar power, propane, or electricity. Consider which heating method will be most convenient for your camping needs. For example, if you’ll be camping in sunny locations, a solar-powered shower may be a great option. If you prefer a quick and reliable heating source, a propane-powered shower might be the best choice.
  4. Durability: Look for a portable shower that is built to withstand the demands of outdoor use. High-quality materials and construction will ensure that your shower can handle rugged camping conditions and last for many trips to come.
  5. Additional Features: Some portable showers come with extra features, such as adjustable water pressure, built-in water filtration, or a detachable shower head. Consider which features are important to you and will enhance your camping experience.

By considering these factors, you can find the perfect portable shower for your camping adventures. There are plenty of choices available to suit your needs.

Conclusion

Portable showers have revolutionized the camping experience, allowing outdoor enthusiasts to stay clean and refreshed even in remote locations. With various types and features to consider, choosing the right portable shower for camping requires careful consideration of your specific needs and preferences. By understanding the benefits, features, and tips for using a portable shower. You can make the most of your camping adventures while maintaining hygiene and comfort in the great outdoors.

Inflatable Tents for Camping: Everything You Need to Know

Introduction

Camping has always been a popular outdoor activity for people of all ages. For many, the idea of spending a night under the stars, surrounded by nature, is a refreshing and exhilarating experience. However, the traditional process of setting up a tent can often be time-consuming and require a lot of effort. This is where inflatable tents come into play. These innovative and convenient structures are revolutionizing the camping experience by making setup and takedown a breeze. In this guide, we’ll explore the world of inflatable tents for camping, covering everything from their benefits and features to tips for choosing the right one for your next outdoor adventure.

Part 1: Benefits of Inflatable Tents

Level 1: Convenience
Inflatable tents are a game-changer when it comes to convenience. Unlike traditional tents, which require poles and stakes to set up, inflatable tents can be inflated and ready for use in just a few minutes. This makes them perfect for campers who want to spend less time on setup and more time enjoying the great outdoors. Additionally, inflatable tents are often lighter and more compact than traditional tents, making them easier to transport and store.

Level 2: Weather Resistance
Another major benefit of inflatable tents is their superior weather resistance. Thanks to their solid construction and sturdy materials, these tents are more capable of withstanding harsh weather conditions, such as high winds and heavy rain. This not only provides peace of mind for campers but also ensures a more comfortable and enjoyable camping experience.

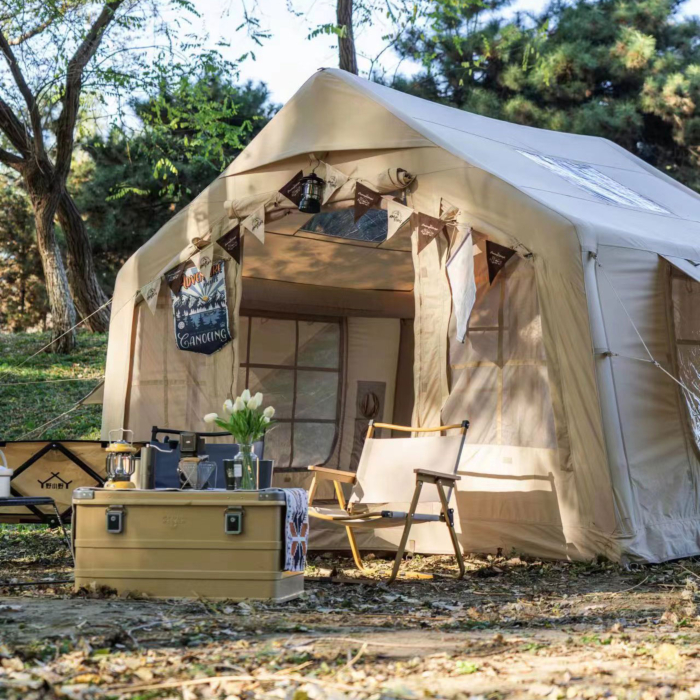
Laaioo Glamping Inflatable Tent

Part 2: Types of Inflatable Tents

Level 1: Airbeam Tents
One of the most common types of inflatable tents is the airbeam tent. These tents feature inflatable beams that replace traditional poles, providing a more stable and durable structure. Airbeam tents are available in a variety of sizes and designs, making them suitable for solo campers, families, or large groups.

Level 2: Dome Tents
Dome inflatable tents are another popular choice for campers. These tents are characterized by their dome-shaped design, which offers increased headroom and stability. Dome tents are often lightweight and easy to set up, making them a great option for backpackers and hikers.

Part 3: Features to Consider

Level 1: Size and Capacity
When choosing an inflatable tent for camping, it’s important to consider the size and capacity that will best suit your needs. Whether you’re camping solo, with a partner, or with a group, there are inflatable tents available in various sizes to accommodate different camping scenarios.

Level 2: Ventilation and Airflow
Proper ventilation is essential for a comfortable camping experience, especially in warmer climates. Look for inflatable tents with multiple ventilation openings and mesh panels to promote airflow and prevent condensation buildup inside the tent.

Part 4: Tips for Choosing the Right Inflatable Tent

Level 1: Research and Compare
Before making a decision, take the time to research and compare different inflatable tents on the market. Consider factors such as size, weight, features, and pricing to find the best option for your specific camping needs.

Level 2: Read Reviews
Reading reviews from other campers can provide valuable insight into the quality and performance of inflatable tents. Look for feedback on durability, weather resistance, and ease of setup to ensure you’re making an informed decision.

Part 5: Care and Maintenance

Level 1: Proper Storage
To prolong the life of your inflatable tent, it’s important to store it properly when not in use. Ensure the tent is clean and dry before folding and storing it in a cool, dry place to prevent mold and mildew.

Level 2: Repair Kit
While inflatable tents are designed to be durable, accidents can happen. It’s a good idea to have a repair kit on hand to quickly fix any punctures or tears that may occur during your camping adventures.

Inflatable Tent for Camping, 2-4 Person Camping Tents

Part 6 – Easy Set-Up and Take-Down

Inflatable tents for camping are known for their quick and easy set-up and take-down process. With traditional tents, campers often struggle with assembling poles and stakes, which can be time-consuming and frustrating. Inflatable tents eliminate this hassle with their simple design. Most inflatable tents can be set up in a matter of minutes, simply by inflating the structure with a pump. This means campers can spend less time setting up their accommodation and more time enjoying the great outdoors.

The rapid set-up and take-down process also makes inflatable tents a popular choice for those who enjoy spontaneous camping trips. Whether you’re hiking through the wilderness and need a quick place to rest, or you decide to pitch up at a festival, inflatable tents provide a hassle-free solution. Additionally, taking down an inflatable tent is just as easy as setting it up. With a quick release valve, campers can deflate the tent and pack it away in no time, ready for their next adventure.

Overall, the easy set-up and take-down process of inflatable tents make them a convenient and practical choice for camping and outdoor activities.

Part 7 – Durability and Stability

Inflatable tents are often constructed using durable, high-quality materials that are built to withstand the elements. The inflatable beams or poles are designed to be strong and stable, ensuring that the tent remains secure in windy conditions. Many inflatable tents are also made with waterproof and UV-resistant fabrics, providing protection from the sun, rain, and other harsh weather conditions.

The stability of inflatable tents is further enhanced by their ability to flex and absorb impact, making them less likely to sustain damage from heavy winds or accidental knocks. This makes them a reliable option for camping in various environments, from sandy beaches to rocky mountainsides.

Inflatable tents are also known for their long-lasting performance, as the materials used are often more durable than those found in traditional tents. With proper care and maintenance, an inflatable tent can provide many years of reliable use, making it a worthwhile investment for avid campers and outdoor enthusiasts.

The A Shape High Profile Camping Tents

Part 8 – Versatility and Adaptability

One of the key advantages of inflatable tents for camping is their versatility and adaptability. Inflatable tents come in a variety of shapes and sizes, suitable for solo adventurers, families, or group camping trips. Some inflatable tents feature multiple rooms or separate compartments, providing privacy and flexibility for different camping needs.

Additionally, inflatable tents can be used for a wide range of outdoor activities beyond camping. They are popular for beach trips, music festivals, backyard sleepovers, and even as temporary shelter during natural disasters. Their portability and ease of set-up make them a practical solution for any situation that requires quick and reliable shelter.

Furthermore, inflatable tents can be easily customized with accessories such as awnings, ground sheets, and inner tents, allowing campers to tailor their setup to their specific needs. This adaptability makes inflatable tents a versatile and convenient option for a wide range of outdoor adventures. Whether you’re a seasoned camper or a casual outdoor enthusiast, an inflatable tent is a versatile and adaptable solution for all your shelter needs.

Conclusion

Inflatable tents are a fantastic option for campers who prioritize convenience, durability, and comfort. With their easy setup, weather resistance, and diverse range of options, these innovative structures are revolutionizing the camping experience. By understanding the benefits, types, features, and care considerations of inflatable tents, you can make an informed decision and enjoy a stress-free camping trip with your new inflatable tent.

The Camping Necessities: A Successful Outdoor Adventure

Introduction

Camping is a beloved activity for many people. It offers a chance to escape the hustle and bustle of everyday life and immerse oneself in nature. However, in order to have a successful and enjoyable camping trip, it’s important to be well-prepared. This article will discuss the essential camping necessities that every camper should have, from shelter and sleeping gear to cooking equipment and safety supplies.

Part 1: Shelter

Level 1: Tents
When it comes to camping, having a reliable and durable tent is crucial. Look for a tent that is appropriate for the number of people who will be using it and the climate you’ll be camping in. Make sure it’s easy to set up and has good ventilation to prevent condensation.

Level 2: Tent Accessories
In addition to the tent itself, there are several accessories that can enhance your camping experience. This includes a ground tarp to protect the bottom of your tent, a footprint to provide an extra layer of protection from moisture, and a mallet for driving tent stakes into the ground.

Part 2: Sleeping Gear

Level 1: Sleeping Bags
A good quality sleeping bag is essential for a comfortable night’s sleep while camping. Look for a bag that is suitable for the temperature range you’ll be camping in and consider the size and shape that best fits your needs.

Level 2: Sleeping Pads
Sleeping pads provide cushioning and insulation from the ground, helping to keep you warm and comfortable while sleeping. There are various types of sleeping pads, including self-inflating, air, and foam pads, so choose the one that best suits your needs and preferences.

Emergency Camping-Essentials / Survival-Kits Tools

Part 3: Cooking Equipment

Level 1: Camp Stove
A reliable camp stove is essential for cooking meals while camping. There are various options available, including propane, butane, and multi-fuel stoves. Consider the size, weight, and fuel type that will work best for your camping needs.

Level 2: Cookware
Having the right cookware is important for preparing meals while camping. Look for lightweight, durable pots and pans that are suitable for outdoor cooking and easy to clean. Also, consider other essentials like a cutting board, knife, and utensils.

Part 4: Safety Supplies

Level 1: First Aid Kit
A first aid kit is a must-have for any camping trip. It should include items like bandages, antiseptic wipes, pain relievers, and any necessary prescription medications. You can also consider adding items such as tweezers, scissors, and a CPR mask.

Level 2: Navigation Tools
When venturing into the great outdoors, it’s important to have the means to navigate your surroundings. This can include a map, compass, or GPS device to help you find your way on the trails and back to your campsite.

Part 5: Miscellaneous Essentials

Level 1: Lighting
Having adequate lighting is important for safety and convenience while camping. Consider bringing a headlamp, flashlight, and lantern to illuminate your campsite and trails after dark.

Level 2: Hydration Supplies
Staying hydrated is essential while camping, especially if you’re engaging in physical activities such as hiking. Make sure to bring plenty of water and consider bringing a water filtration system or purification tablets for refilling water bottles from natural sources.

Camping Essentials

Part 6: Essential Cooking Gear for Camping

One of the most exciting parts of camping is cooking and enjoying meals in the great outdoors. To make sure you have everything you need for a successful camping trip, it’s important to pack the right cooking gear. A portable camping stove is a must-have, as it will allow you to easily cook meals and boil water for hot drinks. Look for a lightweight and compact stove that is easy to transport and set up. In addition to a stove, you’ll also need a set of cookware, including pots, pans, and utensils. Opt for non-stick and durable cookware that is designed for outdoor use. Don’t forget to pack a reliable lighter or matches to start your stove and a portable cooler or food storage containers to keep your perishable items fresh. With the right cooking gear, you’ll be able to enjoy delicious meals during your camping trip.

Part 7: Safety Essentials for Camping

When heading out for a camping trip, it’s essential to prioritize safety and be prepared for unexpected situations. First aid kits are a must-have item when camping as they can help with any minor injuries or accidents that may occur. Be sure to include items such as bandages, antiseptic wipes, pain relievers, and insect repellent. It’s also important to pack emergency supplies such as a flashlight, extra batteries, a multi-tool, and a whistle. These items can come in handy in case of emergencies. Additionally, consider bringing a map and compass or GPS device to help navigate the wilderness and stay on course. Lastly, always be prepared for the weather by bringing waterproof gear, extra layers of clothing, and a reliable shelter.

Part 8: Entertainment and Comfort for Camping

While camping is a chance to disconnect from everyday life, bringing along some entertainment and comfort items can enhance the experience. Consider bringing portable chairs or a hammock to relax and enjoy the scenery. A portable speaker can provide some background music, while a deck of cards or board games can offer some entertainment during downtime. Don’t forget to bring comfortable and weather-appropriate clothing, as well as a sleeping pad or air mattress for a restful night’s sleep. Finally, consider bringing some simple comforts from home such as a favorite book or a hot beverage to enjoy around the campfire. These small touches can make your camping trip even more enjoyable.

First Aid Kit Bag for Car Emergency Supplies Mini Compact Bag for Backpack - Camping Essentials Survival Kit

Some Additional Camping Necessities

When it comes to camping, having the right equipment and supplies is essential. Here are some additional camping necessities that can make your outdoor adventure more enjoyable:

  1. Shelter: A good quality tent is a must-have for camping. It provides protection from the elements and gives you a comfortable place to rest and sleep. Look for a tent that is easy to set up and provides enough space for your group.
  2. Sleeping bag: Invest in a high-quality sleeping bag that is suitable for the climate you will be camping in. Look for a bag that offers good insulation and is comfortable to sleep in.
  3. Sleeping pad: A sleeping pad can make a huge difference in the quality of your sleep when camping. It provides cushioning and insulation from the cold ground, making for a more comfortable sleeping experience.
  4. Camp stove: Cooking over an open fire can be fun, but having a camp stove allows you to cook meals more easily and efficiently. Look for a lightweight, portable stove that is easy to use and has good fuel efficiency.
  5. Cooking equipment: In addition to a camp stove, make sure you have the necessary cooking equipment such as pots, pans, utensils, and plates. If you plan to cook over an open fire, consider bringing a grill or grate to place over the flames.
  6. Lighting: Having adequate lighting is important for staying safe and being able to see at night. Pack a headlamp or flashlight, as well as extra batteries or a portable charger.
  7. First aid kit: Accidents can happen while camping, so it’s important to be prepared with a well-stocked first aid kit. Make sure it includes items such as bandages, antiseptic wipes, pain relievers, and any necessary prescription medications.
  8. Navigation tools: Depending on where you are camping, you may need navigation tools such as a map, compass, or GPS device. Knowing how to use these tools can help you find your way around and stay safe in the wilderness.

By being prepared with these camping necessities, you can ensure a more enjoyable and comfortable outdoor experience.

Conclusion

Being well-prepared with the right camping necessities is essential for a successful and enjoyable outdoor adventure. From shelter and sleeping gear to cooking equipment and safety supplies, each item plays a vital role in ensuring a comfortable and memorable camping experience. By carefully considering these essentials and preparing accordingly, you can be well-equipped for your next camping trip and have peace of mind while immersing yourself in the great outdoors.

Finding the Perfect Camping Sink for Your Outdoor Adventure

Introduction

Camping is an amazing way to reconnect with nature and escape the hustle and bustle of everyday life. However, one challenge that many campers face is finding a convenient and hygienic way to wash dishes, clean up after meals, and maintain personal hygiene. This is where camping sinks come in. In this comprehensive guide, we will explore everything you need to know about camping sink, from the different types available to tips on how to choose the best one for your next outdoor adventure.

Part 1: The Importance of a Camping Sink

Level 1: Hygiene and convenience
Camping sinks are essential for maintaining cleanliness and hygiene while in the great outdoors. Whether you’re camping in a designated campground or venturing into the backcountry, having a dedicated space for washing dishes and personal hygiene can make all the difference in your camping experience.

Level 2: Environmental impact
By using a camping sink, you can minimize the impact on the environment by properly disposing of soapy water and preventing food scraps from contaminating natural water sources. This helps to preserve the beauty of the outdoors for future generations to enjoy.

Part 2: Types of Camping Sinks

Level 1: Portable sinks
Portable camping sinks are lightweight and compact, making them perfect for car camping, RV trips, or other outdoor activities where space is limited. They often come with a built-in water reservoir and drainage system, making them a convenient option for campers on the go.

Level 2: DIY sinks
For the more adventurous campers, DIY camping sinks are a budget-friendly and customizable option. These can be made from a variety of materials such as collapsible buckets, plastic tubs, or even repurposed kitchen items. This option allows you to create a camping sink that suits your specific needs and preferences.

Portable Sink - Convenient Camping Sink Solution!

Part 3: Features to Consider When Choosing a Camping Sink

Level 1: Size and capacity
When selecting a camping sink, consider the number of people in your camping party and the amount of dishes and personal items that will need to be washed. A larger capacity sink may be necessary for larger groups, while solo campers may opt for a more compact option.

Level 2: Durability and portability
Look for a camping sink that is made from durable, lightweight materials that can withstand the rigors of outdoor use. Additionally, consider how easily the sink can be transported and set up at your campsite, as convenience and ease of use are key factors to consider.

Part 4: Tips for Setting Up and Maintaining a Camping Sink

Level 1: Proper location
When setting up your camping sink, choose a location that is level and stable. Avoid setting up the sink near natural water sources to prevent contamination and adhere to Leave No Trace principles.

Level 2: Cleaning and maintenance
Regularly clean and sanitize your camping sink to prevent the buildup of bacteria and odors. Additionally, be mindful of local regulations regarding the disposal of gray water to ensure that you are following proper waste management practices.

Part 5: Alternatives to Traditional Camping Sinks

Level 1: Biodegradable soap and waste disposal
For minimalist campers or those seeking a more eco-friendly approach, using biodegradable soap and disposing of waste water in a responsible manner can be an effective alternative to a traditional camping sink.

Level 2: Waterless hygiene products
In situations where water may be limited or unavailable, waterless hygiene products such as hand sanitizers, biodegradable wipes, and dry shampoo can help maintain personal hygiene without the need for a dedicated camping sink.

Choosing the Right Camping Sink for Your Needs!

Part 6: Choosing the Right Camping Sink for Your Needs

When it comes to choosing a camping sink, it’s essential to consider your specific needs and preferences. There are various options available, from collapsible sinks to portable handwashing stations. Consider the size of your camping group, the duration of your trip, and the facilities available at your campsite.

If you’re camping with a large group, a portable handwashing station with multiple faucets may be the best option to accommodate everyone’s needs. On the other hand, if you’re solo camping or with a small group, a compact collapsible sink may be more than sufficient. Additionally, consider the storage and transportation of the camping sink. Collapsible sinks are great for saving space, while portable handwashing stations may require a bit more room in your vehicle.

Another important factor to consider is the type of activities you’ll be engaging in during your camping trip. If you’ll be doing a lot of cooking and meal prep, a camping sink with a larger basin and additional features such as a drying rack may be beneficial. Conversely, if you’ll primarily be using the sink for handwashing or quick clean-ups, a simpler and more compact option could suffice.

Ultimately, the right camping sink for you will depend on your specific needs, the size of your group, the activities you’ll be engaging in, and your transportation and storage capabilities. Take the time to research and compare different options to ensure you choose the best camping sink for a comfortable and convenient outdoor experience.

Part 7: Tips for Setting Up Your Camping Sink

Setting up a camping sink can make your outdoor experience more comfortable and convenient. Whether you’re using a portable handwashing station or a collapsible sink, proper setup is essential for functionality and efficiency.

Start by choosing the ideal location for your camping sink. Look for a flat and stable surface near your campsite, preferably close to your cooking and food prep area. Ensure the area is easily accessible and has adequate drainage if using a plumbing-based sink.

If you’re using a portable handwashing station, follow the manufacturer’s instructions for assembly and connection to water sources. Many portable sinks come with built-in water tanks, while some may require connection to a separate water source. Ensure the sink is secure and stable, especially if it will be used by children or pets. For collapsible sinks, unfold and assemble the sink according to the manufacturer’s instructions. Some collapsible sinks may require additional support, such as hooks or stakes, to keep them stable during use.

Use biodegradable soap and environmentally friendly cleaning products to minimize the impact on the surrounding environment. Encourage proper handwashing and dishwashing practices to maintain cleanliness and hygiene at your campsite. By taking the time to set up your camping sink properly and promoting good hygiene practices, you can enjoy a more comfortable and convenient outdoor experience.Camping sink!

Conclusion

Camping sinks are a valuable addition to any outdoor adventure, providing a convenient and hygienic solution for washing dishes and personal items. By considering the type of camping sink that best suits your needs, as well as following proper setup and maintenance tips, you can elevate your camping experience and minimize your impact on the environment. So, before embarking on your next camping trip, be sure to equip yourself with the knowledge and tools needed to make the most of your time in the great outdoors.

A camping sink is an essential piece of equipment for any outdoor adventure. Whether you are camping in a remote wilderness area or at a designated campground, having right camping sinks can make a big difference in your camping experience. By understanding the different types of camping sinks, evaluating the factors to consider when choosing one, and knowing how to set up and maintain it properly, you can find the perfect camping sink for your next outdoor excursion. With the right camping sink, you can enjoy the convenience and comfort of a clean and functional water source while immersing yourself in the beauty of the great outdoors.

The Guide to Small Camping Trailers: Everything You Need

Introduction

Small camping trailers are a popular choice for outdoor enthusiasts who want the freedom and flexibility to travel and explore without the confines of a larger RV. These compact trailers are designed to provide a comfortable and convenient camping experience while still being easy to tow and maneuver.

When it comes to camping, having the right gear can make all the difference in ensuring a comfortable and enjoyable experience. Small camping trailers have become increasingly popular among outdoor enthusiasts due to their convenience, versatility, and affordability. In this comprehensive guide, we will explore everything you need to know about small camping trailers, from their benefits and features to the best options on the market.

Part 1: Benefits of Small Camping Trailers

Level 1: Convenience and Mobility
Small camping trailers offer the perfect balance of convenience and mobility. Unlike larger RVs, they can be easily towed by a variety of vehicles, including sedans and SUVs. This means you can explore off-the-beaten-path campsites without worrying about navigating through narrow roads or tight spaces.

Level 2: Cost-Effective
In comparison to traditional RVs, small camping trailers are much more affordable. They require less fuel to tow, and their compact size means you can often camp for free in remote locations that larger rigs can’t access. Additionally, the maintenance and insurance costs for small camping trailers are significantly lower, making them a more budget-friendly option for outdoor enthusiasts.

Part 2: Features to Look for in Small Camping Trailers

Level 1: Size and Weight
When choosing a small camping trailer, it’s important to consider its size and weight. Look for a model that is lightweight and compact, yet still provides enough living and storage space for your needs. Additionally, consider the trailer’s length and width to ensure it will be compatible with your towing vehicle and can navigate the terrain you plan to explore.

Level 2: Amenities and Comfort
While small camping trailers may be compact, many models are equipped with a range of amenities to enhance your camping experience. Look for features such as a kitchenette, sleeping quarters, storage cabinets, and a bathroom. Some trailers even include air conditioning, heating, and entertainment systems to provide added comfort during your outdoor adventures.

hybrid camping off-road campers / small rv caravan mobile travel trailer

Part 3: Best Small Camping Trailers on the Market

Level 1: Airstream Basecamp
The Airstream Basecamp is a top choice for outdoor enthusiasts looking for a small camping trailer that doesn’t compromise on style or functionality. This lightweight trailer features a sleek, aerodynamic design and comes equipped with a kitchen, bathroom, sleeping quarters, and ample storage space.

Level 2: Scamp Trailers
Scamp Trailers are known for their durable construction, lightweight design, and customizable options. These fiberglass trailers come in a range of sizes and floor plans, making them a versatile choice for campers of all types. Whether you’re a solo adventurer or traveling with a small family, there’s a Scamp Trailer model to suit your needs.

Part 4: Tips for Towing and Setting Up Small Camping Trailers

Level 1: Proper Towing Techniques
Towing a small camping trailer requires a different set of skills and techniques than driving a car alone. It’s important to familiarize yourself with proper towing procedures, including how to safely hitch and unhitch the trailer, as well as how to maneuver and back up with a trailer attached. Additionally, be mindful of the trailer’s weight distribution to ensure a smooth and stable towing experience.

Level 2: Setting Up Camp
Once you’ve arrived at your campsite, setting up your small camping trailer is a relatively simple process. Take the time to level the trailer, extend stabilizing jacks, and hook up water, electricity, and gas if available. Familiarize yourself with the trailer’s amenities and systems to ensure everything is in working order before you settle in for the night.

Part 5: Maintenance and Storage for Small Camping Trailers

Level 1: Routine Maintenance
Keeping your small camping trailer in top condition requires regular maintenance. This includes inspecting and lubricating the trailer’s tires, wheels, and bearings, as well as checking and cleaning the exterior and interior surfaces. Additionally, be sure to maintain the trailer’s appliances, plumbing, and electrical systems to prevent issues during your camping excursions.

Level 2: Storage Options
When your small camping trailer is not in use, it’s important to store it properly to protect it from the elements and prolong its lifespan. Consider options such as covered storage facilities, outdoor storage covers, or storing the trailer in a garage or dedicated parking space. Proper storage will help preserve the trailer’s value and ensure it’s ready for your next adventure.

The Best Small Camping Trailers

Part 6: Benefits of Small Camping Trailers

Level 1: Convenience
Small camping trailers offer a level of convenience that is hard to beat. With their compact size, they are easy to tow and maneuver, making them perfect for both short and long road trips. Additionally, many small camping trailers come equipped with basic amenities such as a small kitchenette and sleeping quarters, providing all the comforts of home while on the road.

Level 2: Affordability
Compared to larger RVs and motorhomes, small camping trailers are often much more affordable. They are a great option for budget-conscious travelers who want to enjoy the benefits of camping without breaking the bank. Additionally, their smaller size means they are often more fuel-efficient, saving money on gas during travel.

Part 7: Popular Small Camping Trailer Brands

Level 1: Airstream
Airstream is a well-known and respected brand in the world of small camping trailers. Their iconic silver bullet design is instantly recognizable, and their trailers are known for their durability and quality craftsmanship. Airstream offers a range of small camping trailers to suit different needs and budgets.

Level 2: Scamp
Scamp is another popular brand that specializes in small camping trailers. Their lightweight fiberglass trailers are easy to tow and come in a variety of floor plans to accommodate different camping preferences. Scamp trailers are known for their compact size and clever use of space, making them a favorite among outdoor enthusiasts.

Part 8: Key Features to Consider When Choosing a Small Camping Trailer

Level 1: Size and Weight
When choosing a small camping trailer, it’s important to consider the size and weight of the trailer in relation to your towing vehicle. Opt for a trailer that is within the towing capacity of your vehicle and fits comfortably within standard towing regulations. Additionally, consider the size of the trailer’s interior to ensure it will comfortably accommodate your camping needs.

Level 2: Amenities
Consider the amenities and features that are important to you when choosing a small camping trailer. Some trailers come equipped with basic kitchenettes, bathrooms, and sleeping quarters, while others offer more luxurious options such as air conditioning and entertainment systems. Think about your camping style and what amenities will make your trips more enjoyable.

Happier Camper | Fiberglass Travel Trailers

Conclusion

These trailers are available in a variety of designs and styles to suit different camping preferences. Some are more minimalist and lightweight, while others offer more amenities and luxury features. There are also options for off-road camping, with rugged models equipped with high ground clearance and off-road tires for more adventurous journeys.

Small camping trailers offer a convenient and affordable way to enjoy the great outdoors without sacrificing comfort and convenience. With the right features, proper towing and setup techniques, and routine maintenance, a small camping trailer can provide years of memorable adventures for outdoor enthusiasts of all types. Whether you’re a solo traveler, a couple, or a small family, there’s a small camping trailer that’s perfect for your camping needs. So, get ready to hit the road and start making memories in your home away from home!