Introduction to DIY Walking Sticks
Creating your own walking stick can be rewarding. It’s more than just a tool for hiking. Making a DIY walking stick lets you express creativity and enjoy a unique, functional piece.
A walking stick aids with stability and support during hikes. It also serves as a helpful aid across various terrains. But the walking stick is not just practical. It reflects personal style and serves as a memento of outdoor adventures.
In this guide, we will cover everything to craft a personalized walking stick. We’ll discuss wood selection, necessary tools, and detailed crafting steps. From wood cutting to the final touches, we’ll ensure your DIY walking stick is both sturdy and stylish.
As we move forward, you will learn the value of a handmade stick. You’ll see it’s more than a hiking aid. It’s a companion on your journeys, a work of art, and a testament to your handiwork.
Choosing the Right Wood for Your Walking Stick
Selecting the ideal wood is the first critical step in creating a walking stick. Different woods offer varying levels of strength, flexibility, and workability. Here are some key considerations:
- Hardwood vs. Softwood: Choose hardwood for its durability. Oak, maple, hickory, and ash are common choices. Softwoods like pine are less ideal due to their softness.
- Grain Straightness: Look for wood with a straight grain. It ensures strength and minimizes warping or breaking.
- Wood Density: Denser woods promote longevity but can be harder to carve. Find a balance between durability and workability.
- Moisture Content: Dry wood reduces the risk of splitting and rotting. Woods that have naturally low moisture levels are preferable.
- Aesthetics: Consider the appearance of the wood. Unique patterns and colors can add character to your walking stick.
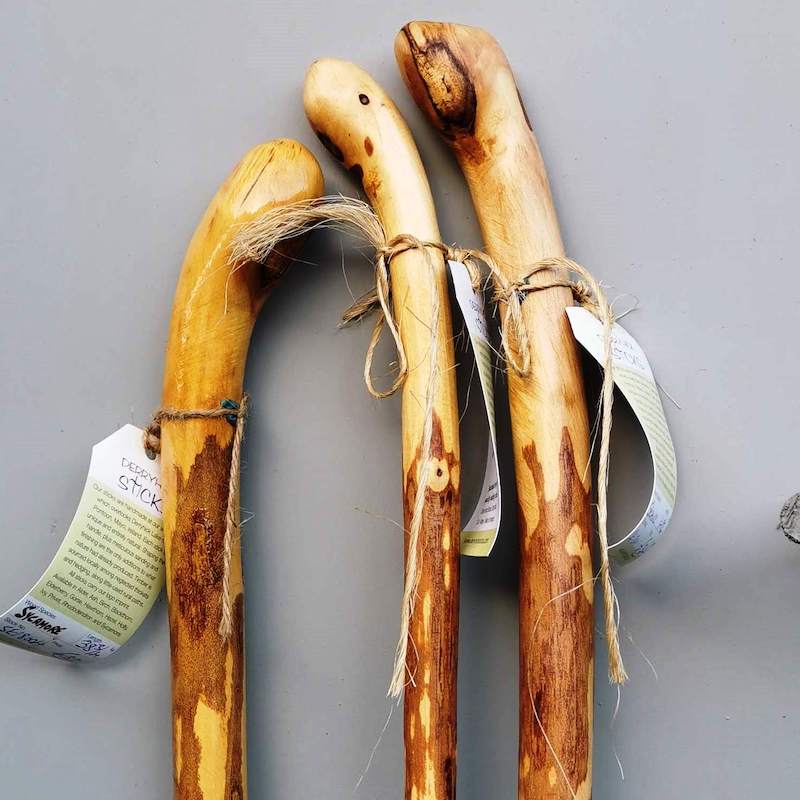
Popular wood types like hickory and oak provide reliable strength, whereas willow and ash offer both strength and a lighter weight. If you want a ‘bark on’ finish, willow is a great choice. It has a rustic look and a smoother bark that is comfortable to hold.
Sugar maple, known for its straight growth and fine grain, is recommended for its beautiful color and pattern. Not only is it strong, but it’s also aesthetically pleasing once finished. Avoid woods that tend to crack or split easily, such as spruce and pine. Instead, opt for woods that are known for their resilience and long-lasting qualities. Remember to avoid any wood that still shows signs of life, like green wood, as it will contain too much moisture and may shrink or crack as it dries.
Before making your final decision, touch and feel different types of wood. This tactile approach will help you choose a piece that feels right in your hands and will be a joy to work with. With the right wood, your DIY walking stick will be a sturdy and stylish companion on your treks.
Tools and Materials Needed
To embark on creating your DIY walking stick, having the right tools and materials is essential. Gather these items before you start your project to ensure a smooth crafting process.
- Saw: You’ll need a saw to cut your chosen wood to the appropriate length.
- Knife or Carving Tools: For debarking and carving the wood.
- Sandpaper: Various grits from coarse to fine are necessary to smooth the wood.
- Sander: A hand sander or power sander can make the job faster and more uniform.
- Drying Tubes or Racks: These are used to dry the wood evenly and prevent warping.
- Varnish or Sealant: To protect the finished walking stick from the elements.
- Decorative Items: Beads, feathers, paint, or whatever you choose to personalize your stick.
- Safety Gear: Gloves and goggles for protection during the crafting process.
These are just the basics. Depending on the complexity of your design, you might also consider additional tools like a Dremel for more intricate work, a wood burner for personalization, or a rubber tip to add to the bottom of your finished stick. Remember that quality tools can make a significant difference in the ease of production and the quality of your final product. Be sure to have everything prepared so that once you start, you can enjoy the process of crafting your very own walking stick from start to finish.
Step-by-Step Process of Making Your Walking Stick
Crafting a DIY walking stick offers a sense of achievement and a personal touch to your hiking gear. Here’s how to make one from scratch.
Selecting and Cutting the Wood
First, pick a hardwood like maple or oak for durability. Look for a straight piece, roughly as tall as you or to your elbow, for a staff or stick. Cut it cleanly with a saw.
Debarking and Shaping the Stick
Use a knife or carving tool to carefully remove the bark. Shaping the wood allows creativity. Form a handle or smooth the edges for comfort.
Sanding and Smoothing
Smooth the stick using sandpaper from coarse (about 60 grit) to fine (up to 600 grit). A sander can speed up the process.
Drying Your Walking Stick
Let the stick dry to prevent rot. Keep it in a rack or tube for even drying. This can take several months.
Adding a Personal Touch and Finishing
After drying, personalize your stick with carvings or decorations. Seal it with varnish to protect from the elements. Attach a rubber tip on the end for added grip.

Decorating Your Walking Stick
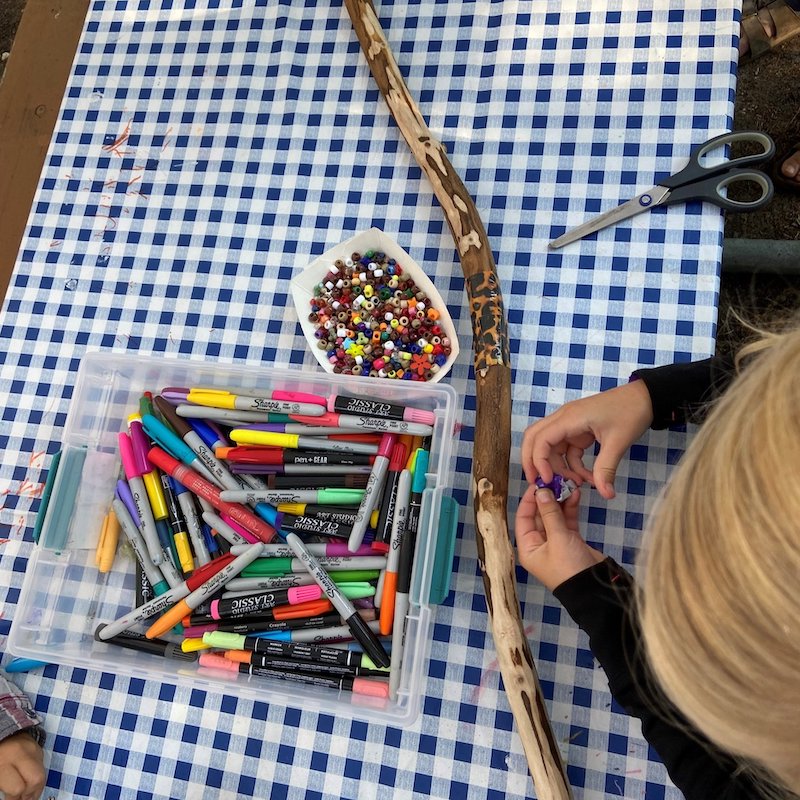
After the careful crafting, it’s time for the fun part: decorating your DIY walking stick. Personal touches make your stick a reflection of your personality and interests. It can be as simple or as ornate as you wish. Here are ideas to get started:
- Carvings and Engravings: If you have a wood burner, you can add intricate details. Think of patterns, symbols, or text.
- Paint: Use outdoor-friendly paints to add color or design. Let each layer dry before adding the next.
- Decorative Tape: Durable, weather-resistant tape can create a grip or add flair.
- Beads and Feathers: Drill a hole near the top to attach strings of beads or feathers.
- Varnish: Once decorations are complete, coat with an outdoor varnish to protect your designs.
As you decorate, keep balance in mind. Try not to overload one side. Also, consider the environment. Use eco-friendly materials when you can. Your DIY walking stick can be as unique as the trails you explore with it.
Tips for Maintaining Your Walking Stick
After creating your DIY walking stick, proper maintenance is key to its longevity. Here are tips to keep your walking stick in top shape:
Handle with Care
Treat your walking stick with respect. Avoid throwing it or using it to move large obstacles. When not in use, store it in a safe place where it won’t fall or get damaged.
Regular Inspection
Check your walking stick regularly for any signs of wear or damage. Look for cracks, splits, or loose parts that may need attention.
Clean It Up
After hikes, wipe your walking stick with a damp cloth to remove dirt and debris. Dry it completely before storing to prevent moisture damage.
Reapply Protective Coatings
Over time, protective coatings like varnish or sealants may wear off. Reapply these coatings as needed, following the manufacturer’s instructions for best results.
Tighten Any Add-Ons
If your stick has add-ons like a rubber tip or decorative elements, make sure they’re secure. Tighten or replace them if they loosen over time.
By following these simple maintenance tips, you can ensure your DIY walking stick remains a reliable companion on your outdoor adventures.
Advantages of a Homemade Walking Stick
Creating a DIY walking stick presents several benefits. Let’s explore why crafting one can be more advantageous than buying a store-bought stick.
- Personalization: Your walking stick will reflect your personal style and preferences. You choose the wood, design, decorations, and finish, making it truly one-of-a-kind.
- Quality Control: You oversee the creation process from start to finish. This allows you to ensure the stick’s strength, durability, and finish are up to your standards.
- Cost-Effective: Making your own stick can save you money compared to some of the expensive, commercially-made options.
- Skill Building: Crafting a walking stick hones skills like carving, sanding, and woodworking. These skills may come in handy for other projects.
- Sense of Accomplishment: Completing a walking stick from scratch provides a sense of pride. You made something functional and beautiful with your own hands.
- Connection to Nature: Selecting your wood from nature creates a deeper connection to the outdoors. Your stick becomes a cherished companion on hikes.
- Custom Features: Tailor your stick’s features to your needs. Add a specific grip, a wrist strap, or a special carving that holds personal significance.
- Family Activity: This can be an engaging project for families to do together. It promotes creativity and teaches about nature and craftsmanship.
A DIY walking stick is not just a hiking aid; it’s a statement of creativity and self-reliance. With every step taken on the trails, you’ll appreciate the personal touch and effort you put into your walking companion.